122
Tutorial 6-2: Photo Stitch 1
Tutorial 6-2: Photo Stitch 1
By using the Photo Stitch 1, embroidery patterns can be created from photos.
Step 1 Importing photo data into
Layout & Editing
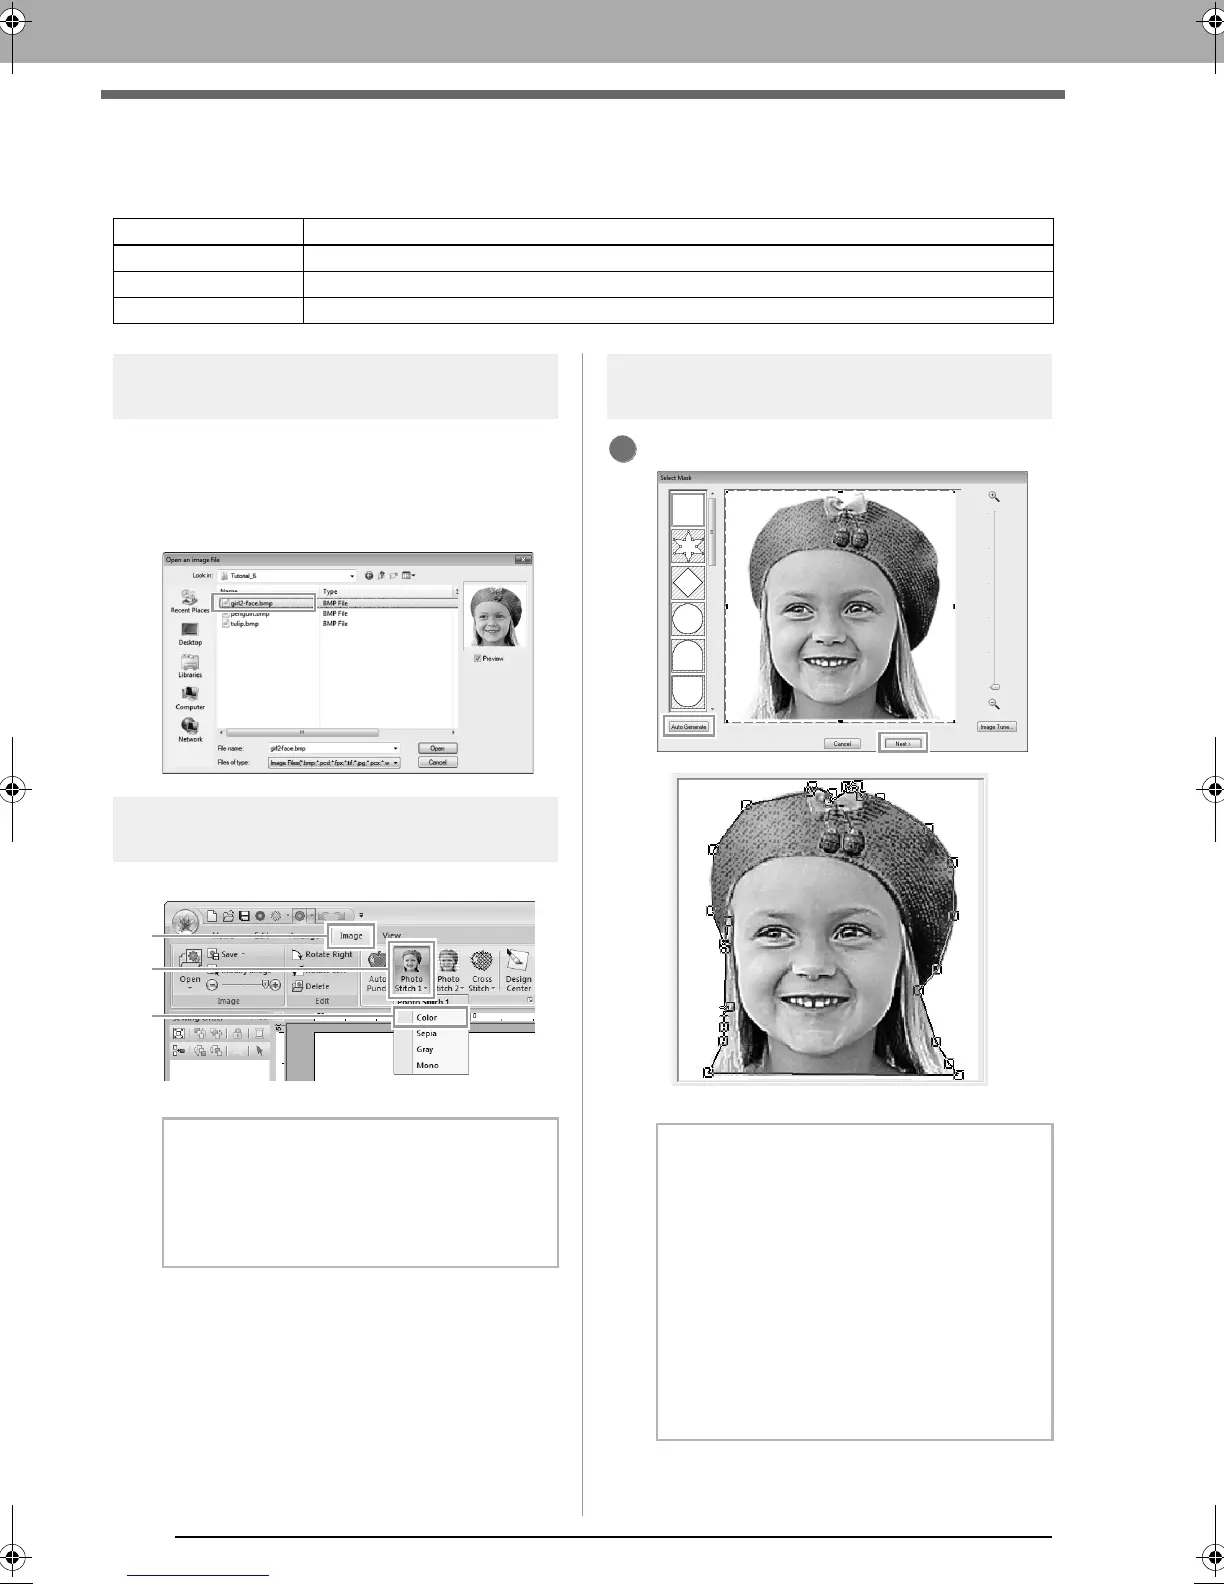
Select the Tutorial_6 folder, and then select
girl2-face.bmp as the image.
c
“Importing image data into Layout &
Editing” on page 119
Step 2
Starting the Photo Stitch 1
wizard
Click 1, then 2, then 3.
Step 3 Masking by removing the
background
Click Auto Generate, then Next.
Step 1 Importing photo data into Layout & Editing
Step 2 Starting the Photo Stitch 1 wizard
Step 3 Masking by removing the background
Step 4 Automatically correcting the image and creating an embroidery pattern
b Memo:
With Photo Stitch 1, an embroidery pattern
can be created in color (
Color
), sepia (
Sepia
),
grayscale (
Gray
) or one color (
Mono
). For this
example, select
Color
.
b Memo:
• The
Auto Generate
button is available only
with images that have a light-colored
background, like in this photo.
• The shape of the mask line can be edited by
moving, adding or deleting the point of the
mask line.
• It is also possible to select the mask shape
from various template shapes already
available.
c
“Select Mask dialog box” on
page 134
XE8656-001.book Page 122 Monday, May 24, 2010 5:44 PM
 Loading...


