45
Drawing Shapes
Basic Layout & Editing Operations
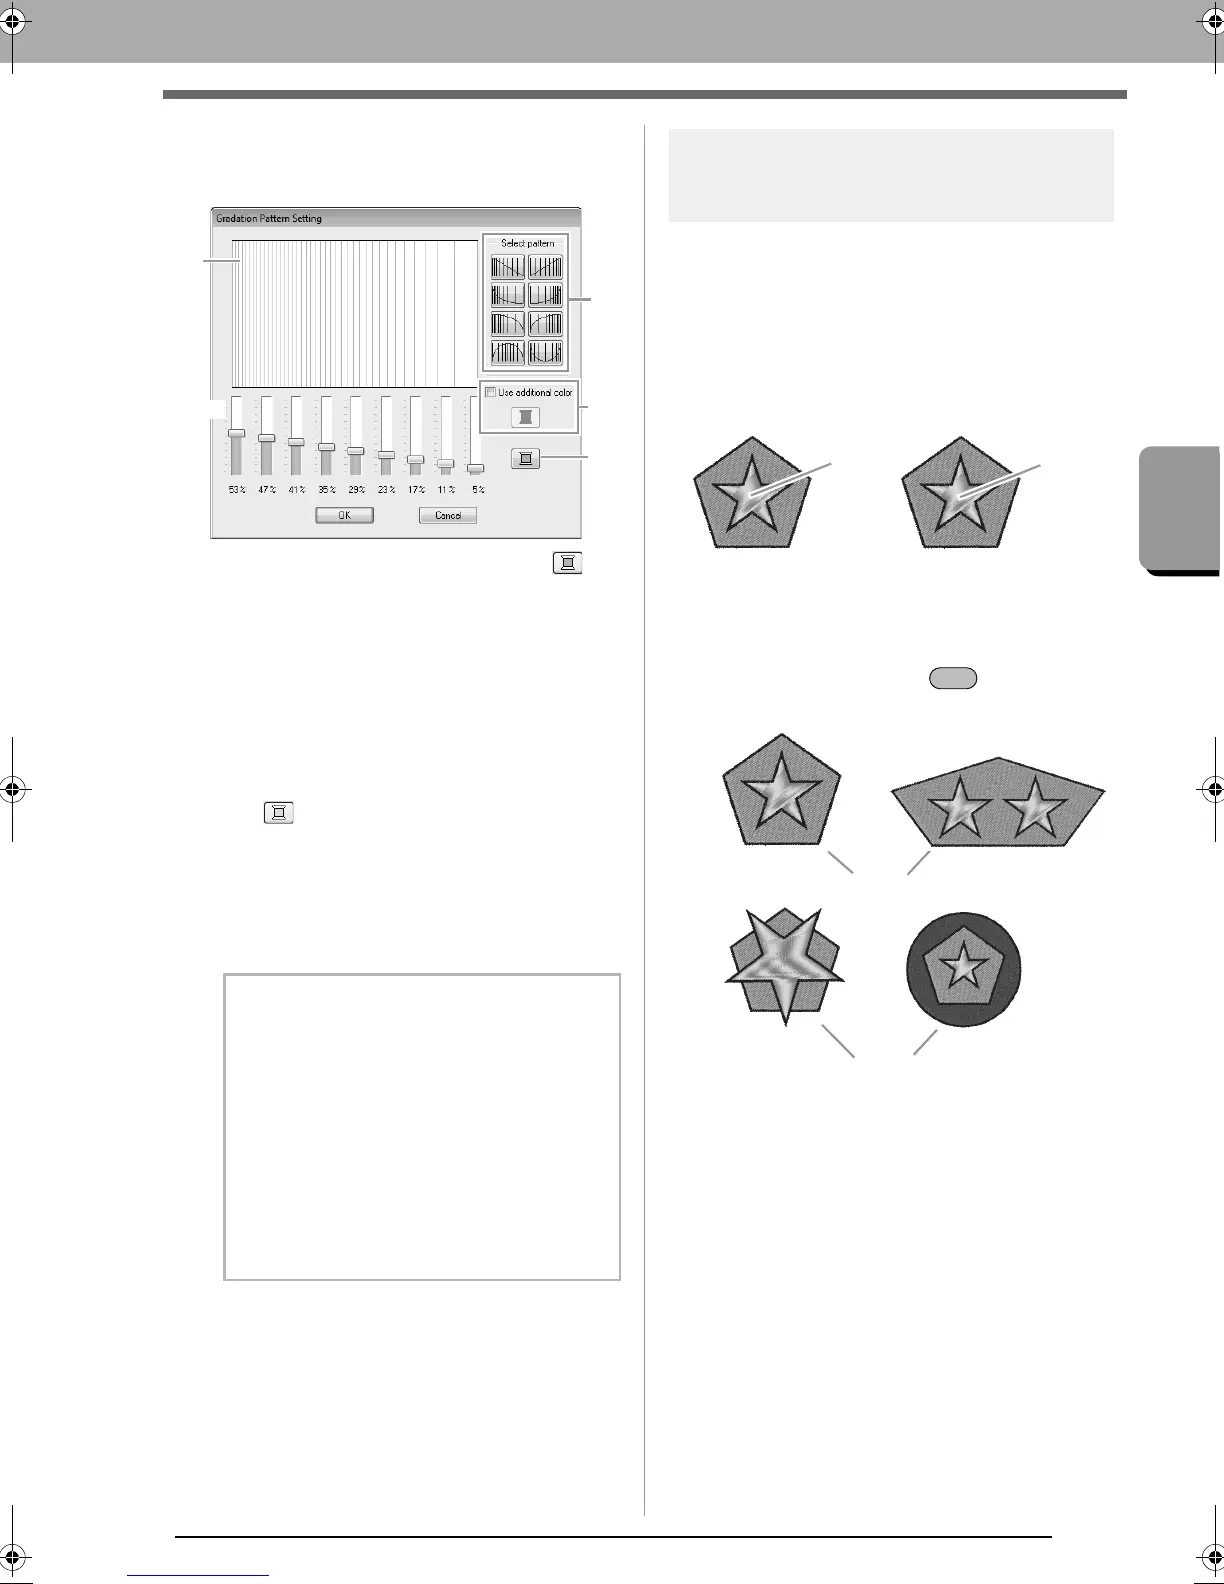
4. Specify the desired settings in the Gradation
Pattern Setting dialog box, and then click
OK.
(1) To change the thread color, click .
Select a color in the Thread Color dialog
box that appeared, and then click OK.
(2) To select a preset gradation pattern, click
the desired pattern under Select pattern.
(3) Move the sliders to adjust the density of
the gradation pattern.
(4) To blend two colors, select the Use
additional color check box, then click
. Select a color in the Thread Color
dialog box that appeared, and then click
OK.
c
“Blending” on page 6
(5) The preview area shows the setting
changes that you make.
Hole sewing
By specifying hole sewing, the stitching in
overlapping regions will not be sewn twice. Hole
sewing can be set only when one region completely
encloses another.
Embroidery patterns created with the Rectangle,
Circle or Arc tools, Shapes tools or Line/Region
tools can be selected to set hole sewing.
1. Select a pair of patterns, for example, a star
included in a pentagon.
While holding down the key, click the
star, then the pentagon.
b Memo:
• Gradation/blending can be specified if satin
stitches, fill stitches or programmable fill
stitches have been selected for the region
sewing and
Constant
has been selected as
the sewing direction.
• If the
Use additional color
check box is
cleared, the gradation settings are applied to
the remaining color.
• The first and second colors of the gradation
can also be changed by selecting
Region1
or
Region2
in the
Thread Color
tab.
Sewn twice Sewn once
Hole sewing not set Hole sewing set
XE8656-001.book Page 45 Monday, May 24, 2010 5:44 PM
 Loading...


