246
Basic Font Creator Operations
Basic Font Creator Operations
With Font Creator, custom font characters that can be used in Layout & Editing can be created and edited.
Using these custom characters, original embroidery patterns can be created.
Step 1 Opening a background
image
Click (Start), then select All Programs,
then PE-DESIGN NEXT, then Tools, then
Font Creator.
Click 1, then 2, then 3.
Import the Capital_T.bmp.
The image file can be found at the following
location.
Documents (My documents)\PE-DESIGN
NEXT\Sample\Font Creator\Font Template
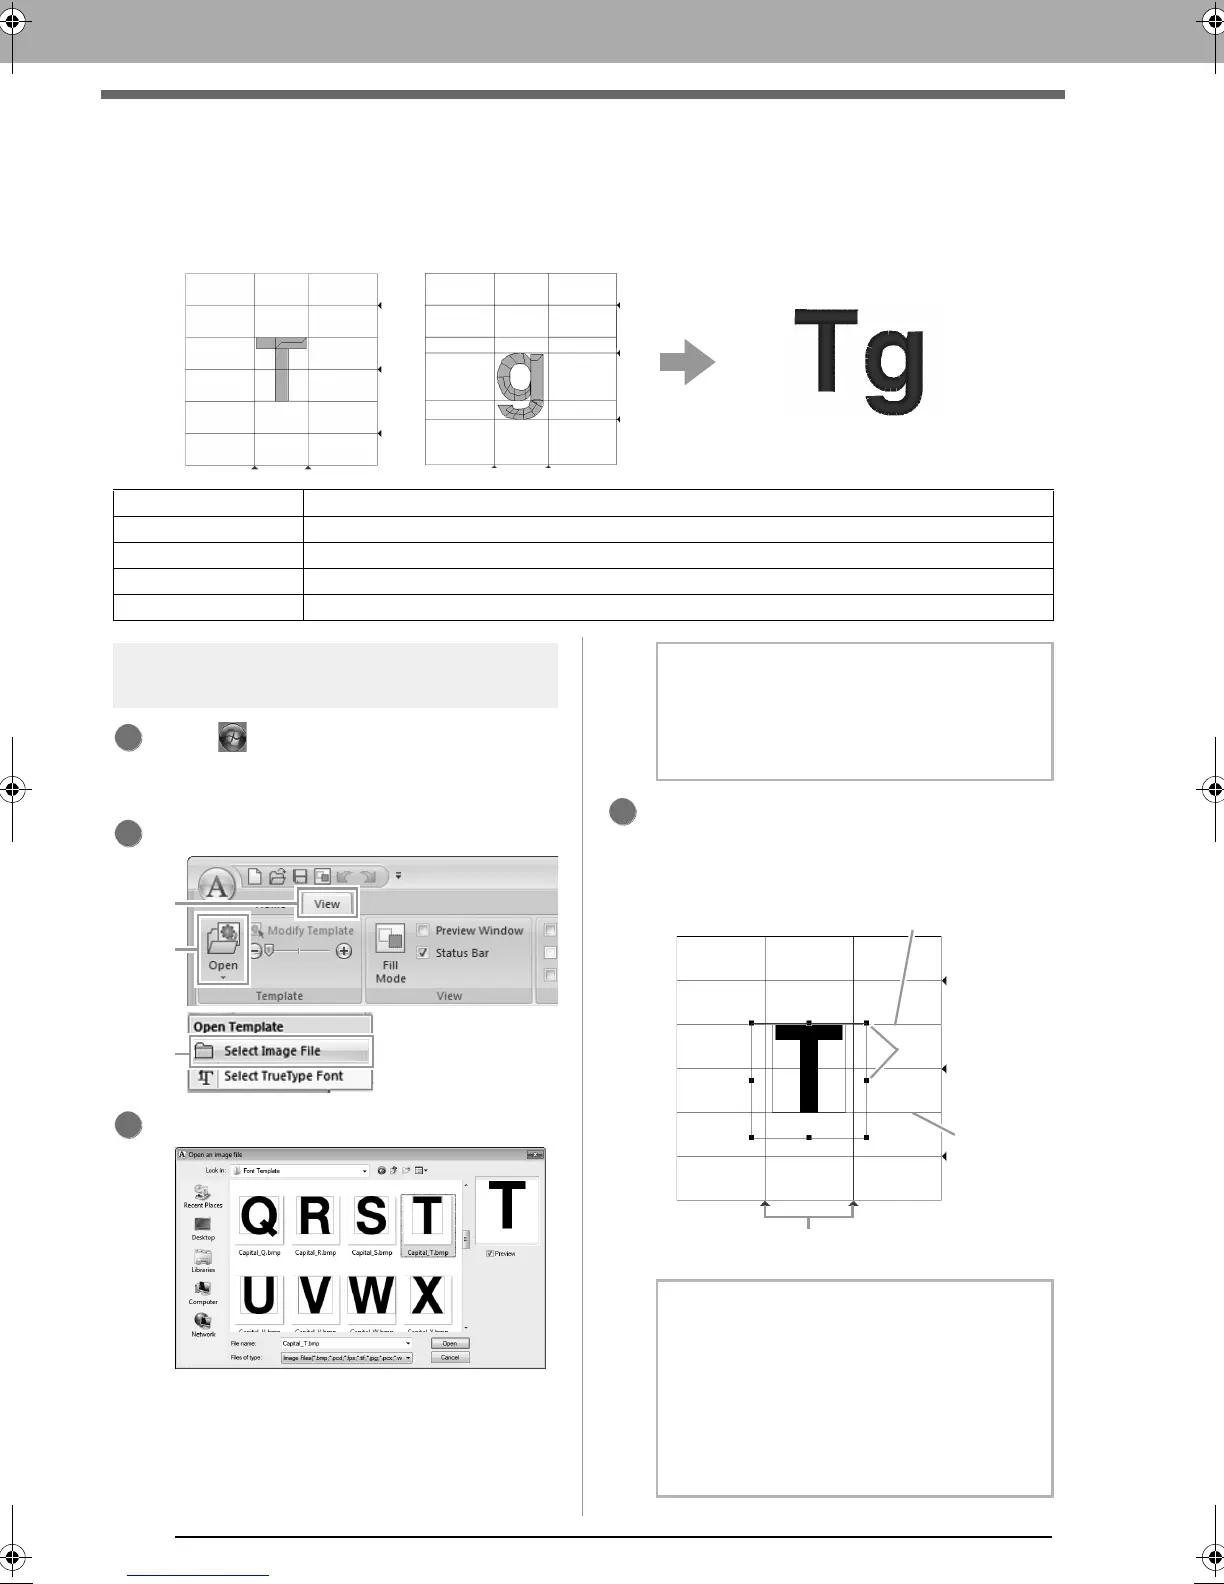
Move the character so that the top aligns with
the Capital Line. To adjust the height of the
character, drag a handle to adjust the height
between the Capital Line and the Base Line.
Step 1 Opening a background image
Step 2 Creating a font character pattern
Step 3 Creating other font character patterns
Step 4 Save the font character pattern
Step 5 Creating an embroidery pattern using the created font characters
b Memo:
There are many different types of files that can
be opened.
c
“Image file formats” on page 137
b Memo:
• Red lines are added above, below and to
the left and right of the sample image. Use
these lines as guides for adjusting the
Base
Line
,
Capital Line
and
Set Lines
.
• If the handles have disappeared, right-click
the image, and then click
Modify Template
in the menu that appeared.
4
Capital Line
Handles
Base Line
Set Line
XE8656-001.book Page 246 Monday, May 24, 2010 5:44 PM
 Loading...


