119
Creating Embroidery Patterns Using Images
Tutorial 6-1: Auto Punch
Tutorial 6-1: Auto Punch
In this section, we are going to use the Auto Punch function to automatically create an embroidery pattern from
an image.
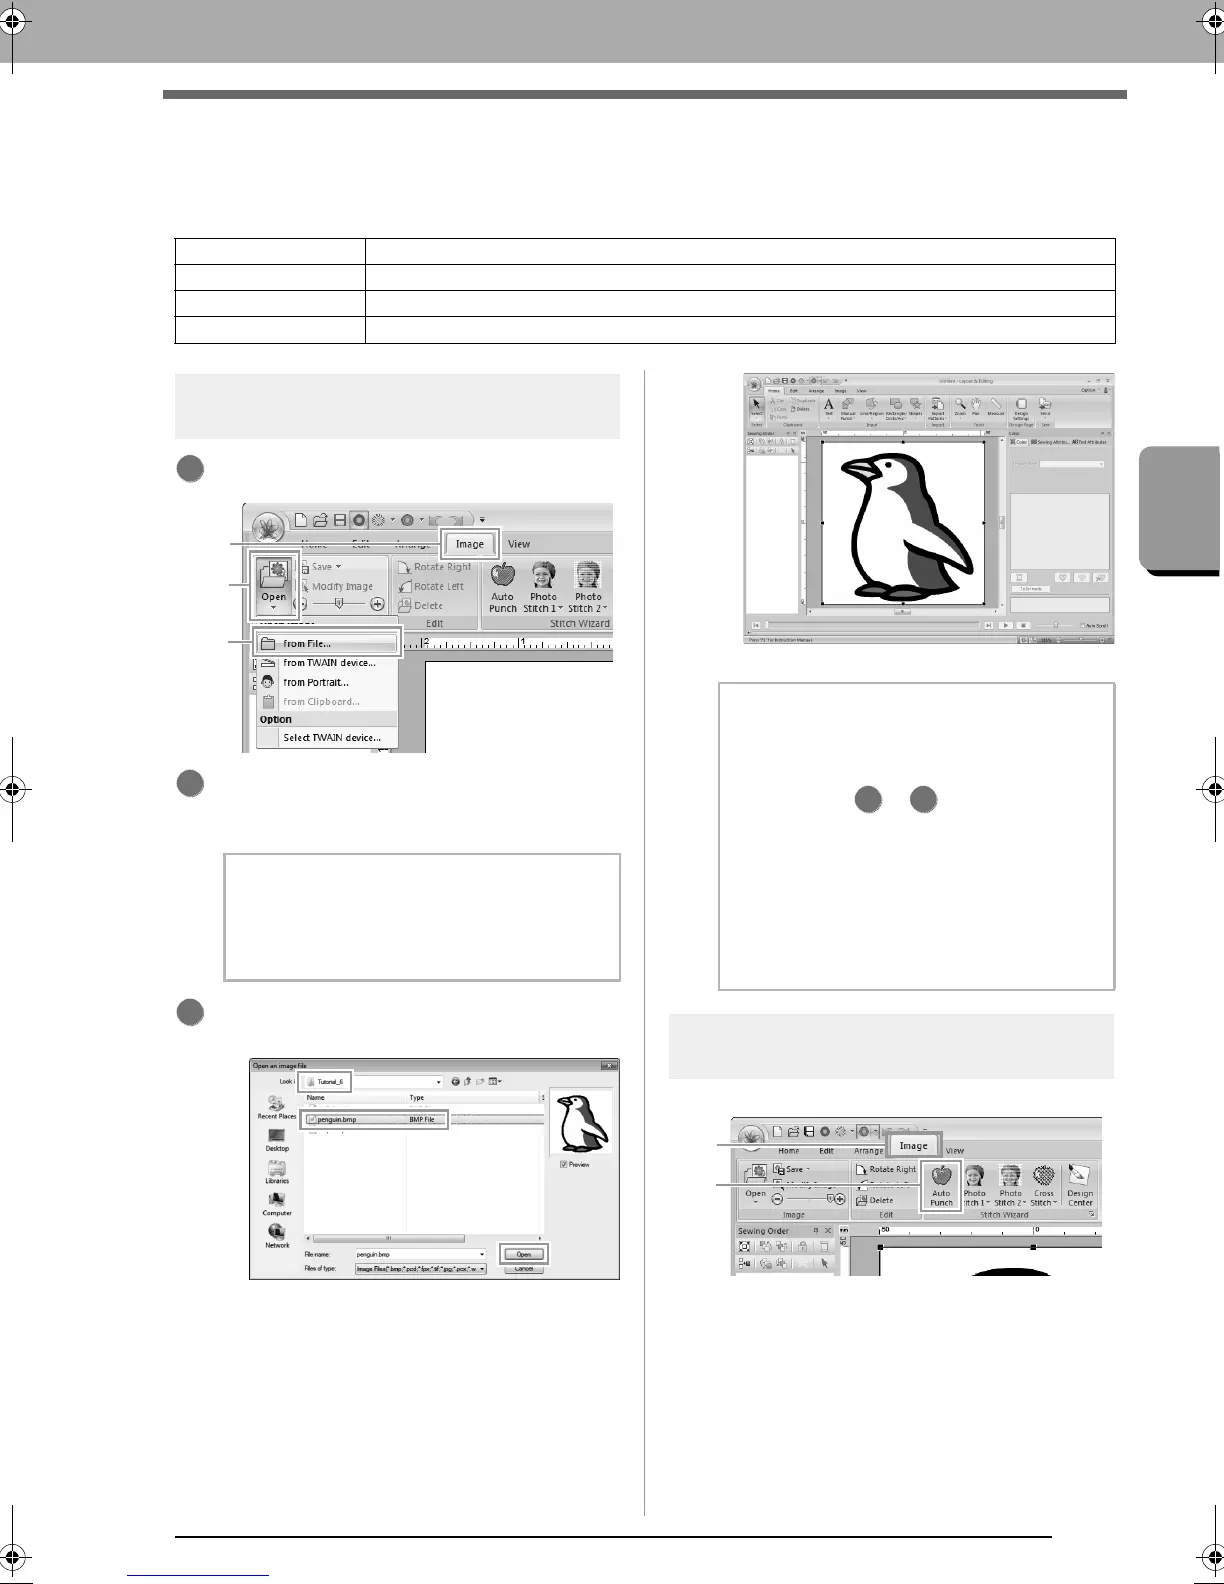
Step 1 Importing image data into
Layout & Editing
Click 1, then 2, then 3.
Double-click the
Documents
(
My Documents
)\
PE-DESIGN NEXT\Tutorial\Tutorial_6 folder
to open it.
Select the file penguin.bmp, and then click
Open, or double-click the file's icon.
The image appears in the work area.
Step 2
Starting the Auto Punch wizard
Click 1, then 2.
Step 1 Importing image data into Layout & Editing
Step 2 Starting the Auto Punch wizard
Step 3 Applying an image mask and adjusting its size and position
Step 4 Creating a border from the mask outline and converting to an embroidery pattern
b Memo:
When this application is installed, the
PE-DESIGN NEXT
folder is installed in the
Documents (My Documents)
folder.
3
b Memo:
• Images with few and distinct colors work
best with Auto Punch.
• Repeat steps to to choose another
picture image.
• You can import picture images from a
scanner, or clipboard, or even create
images with the portrait function and import
that image.
c
“Importing Image Data” on
page 137
1 3
XE8656-001.book Page 119 Monday, May 24, 2010 5:44 PM
 Loading...


