166
Tutorial 10-3: Embroidering With the Jumbo Frame
Tutorial 10-3: Embroidering With the
Jumbo Frame
This section describes the procedures for creating embroidery data and for embroidering using the jumbo
frame (frame size: 360 × 360 mm; with mounts on both sides of the embroidery frame).
Sample data that can be used in this example is provided in the following folder.
Documents (My Documents)\PE-DESIGN NEXT\Tutorial\Tutorial_10
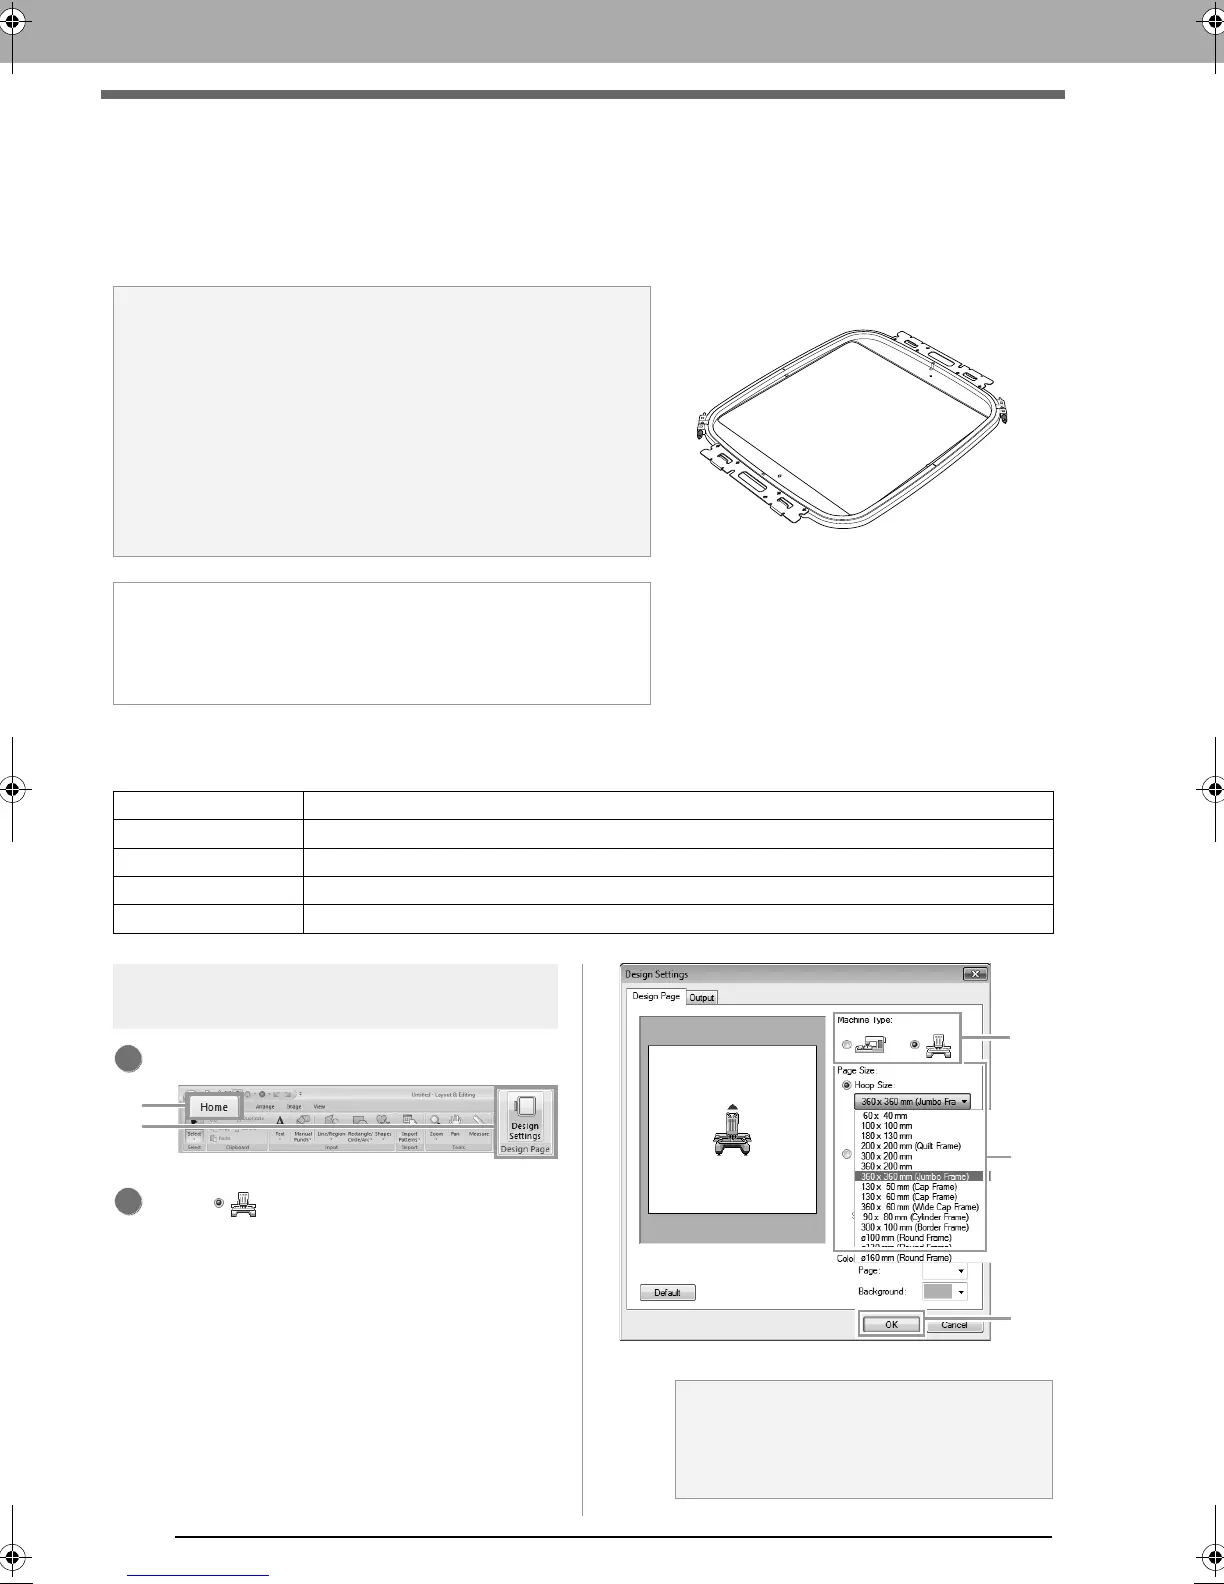
Step 1 Selecting the Design Page
size
Click 1, then 2.
Click under Machine Type (3), select
360 × 360 mm (Jumbo Frame) from the
Hoop Size selector under Page Size (4), and
then click OK (5).
a Note:
• If the jumbo frame was selected, the size of the Design Page
becomes 350 × 350 mm in order to create margins that allow
automatic positioning using the built-in camera.
• The jumbo frame described here was designed specifically for
our multi-needle embroidery machines equipped with a built-
in camera. It cannot be used with any other machine, such as
single-needle embroidery machines. Check the Operation
Manual provided with your multi-needle embroidery machine
to determine if it is compatible with the jumbo frame.
Jumbo frame: 360 × 360 mm embroidery frame
b Memo:
For details on embroidering using the camera and on affixing
the embroidery positioning stickers, refer to the Operation
Manual provided with the embroidery machine.
Step 1 Selecting the Design Page size
Step 2 Creating the embroidery design
Step 3 Checking a divided pattern
Step 4 Attaching stabilizer to the fabric
Step 5 Embroidering
a Note:
Check the size of embroidery frames that
can be used with your machine before
changing the setting.
XE8656-001.book Page 166 Monday, May 24, 2010 5:44 PM
 Loading...


