51
Editing Embroidery Designs
Basic Layout & Editing Operations
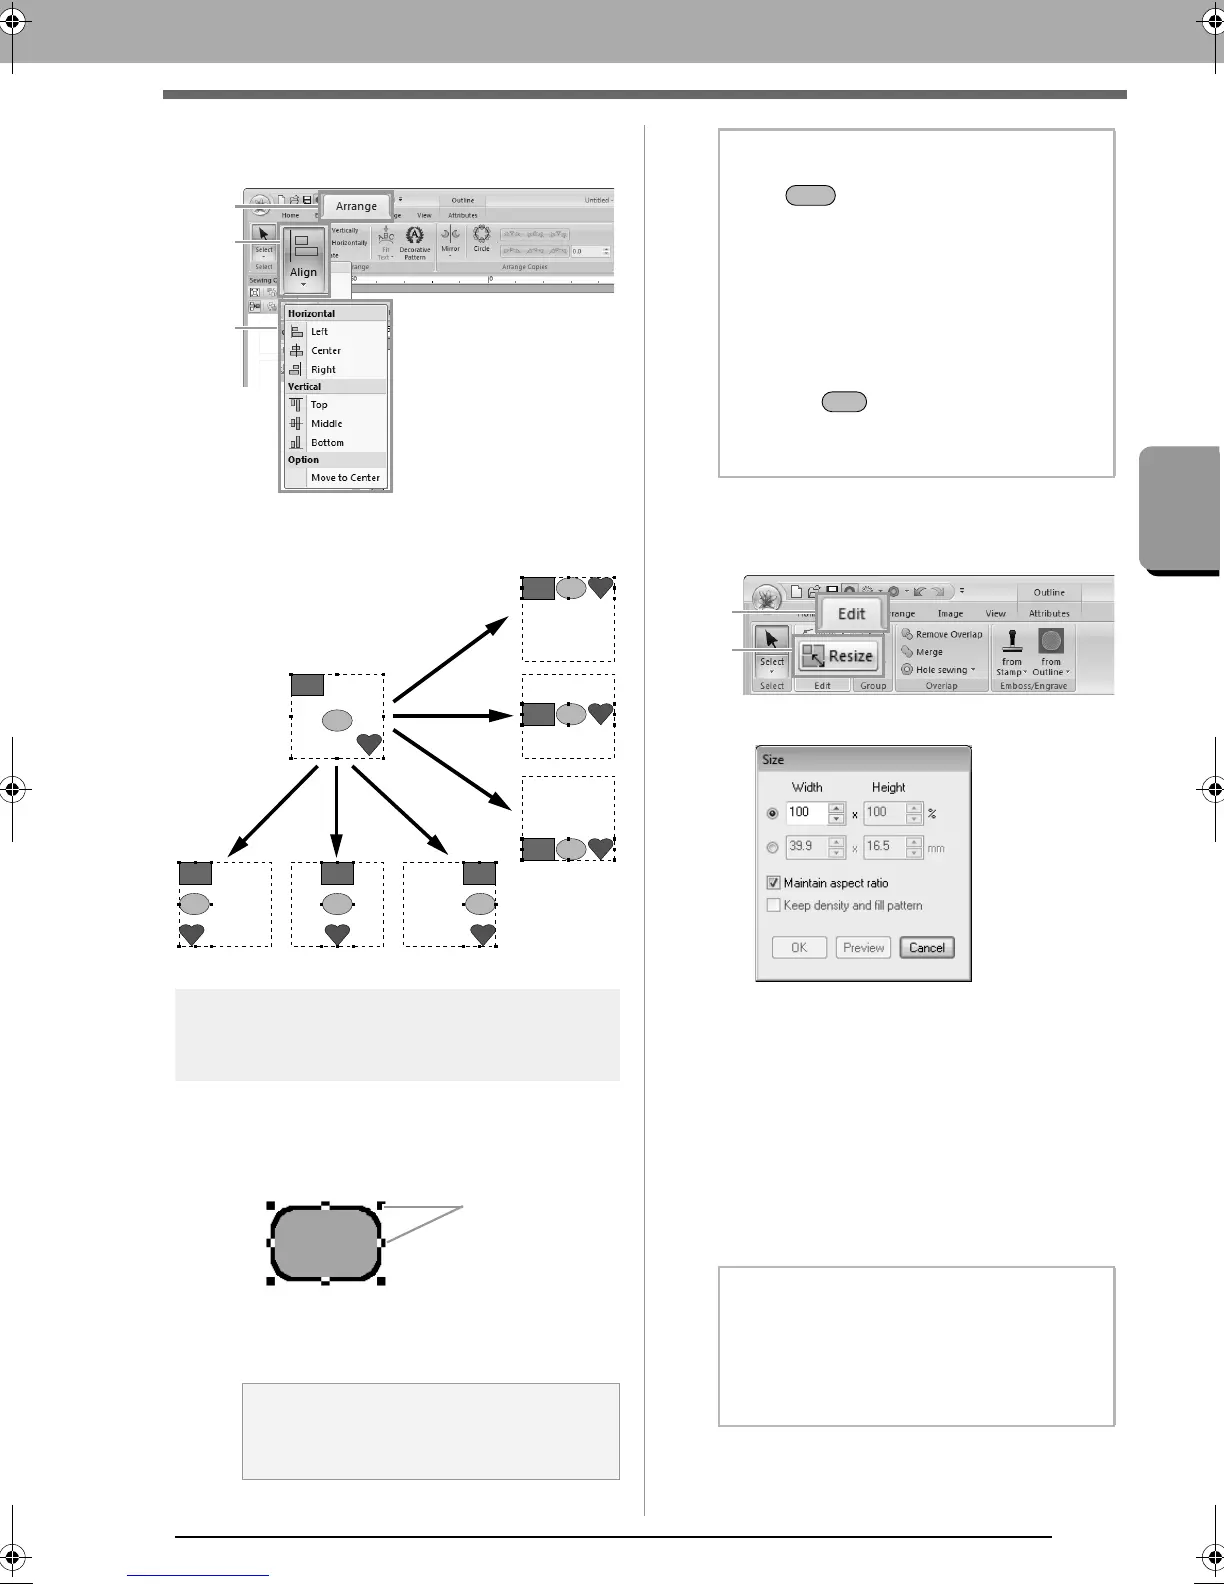
■ Aligning embroidery patterns
Select the patterns, and then click 1, then 2, then 3.
The selected patterns are aligned as
shown below.
Scaling patterns
■ Scaling manually
1.
Select the pattern(s).
2. Drag the handle to adjust the selected
pattern(s) to the desired size.
■ Scaling numerically
1. Select the pattern(s), and then click 1, then 2.
2.
Specify the size, and then click
OK
.
(1) Select the whether the width and height
will be set as a percentage (%) or a
dimension (millimeters or inches). Set the
width and height.
(2) To change the width and height
proportionally, select the Maintain
aspect ratio check box.
(3)
To resize the selected pattern while
maintaining the original density and fill
pattern, select the
Keep density and fill
pattern
check box.
a Note:
Some patterns imported from embroidery
cards cannot be scaled.
Bottom
RightCenterLeft
Middle
To p
b Memo:
• If the key is held down while a handle
is dragged, the pattern is enlarged or
reduced from the center of the pattern.
• As you drag the handle, the current size is
displayed on the status bar.
• When scaling stitch patterns, the number of
stitches remains the same, resulting in a
loss of quality. To keep density and fill
pattern of the embroidery pattern, hold
down the key while scaling.
c
“Enlarging/Reducing Stitch
Patterns” on page 268.
b Memo:
The
Keep density and fill pattern
check box
is available only if stitch pattern is selected.
c
“Enlarging/Reducing Stitch
Patterns” on page 268.
XE8656-001.book Page 51 Monday, May 24, 2010 5:44 PM
 Loading...


