121
Creating Embroidery Patterns Using Images
Auto Punch Features
Auto Punch Features
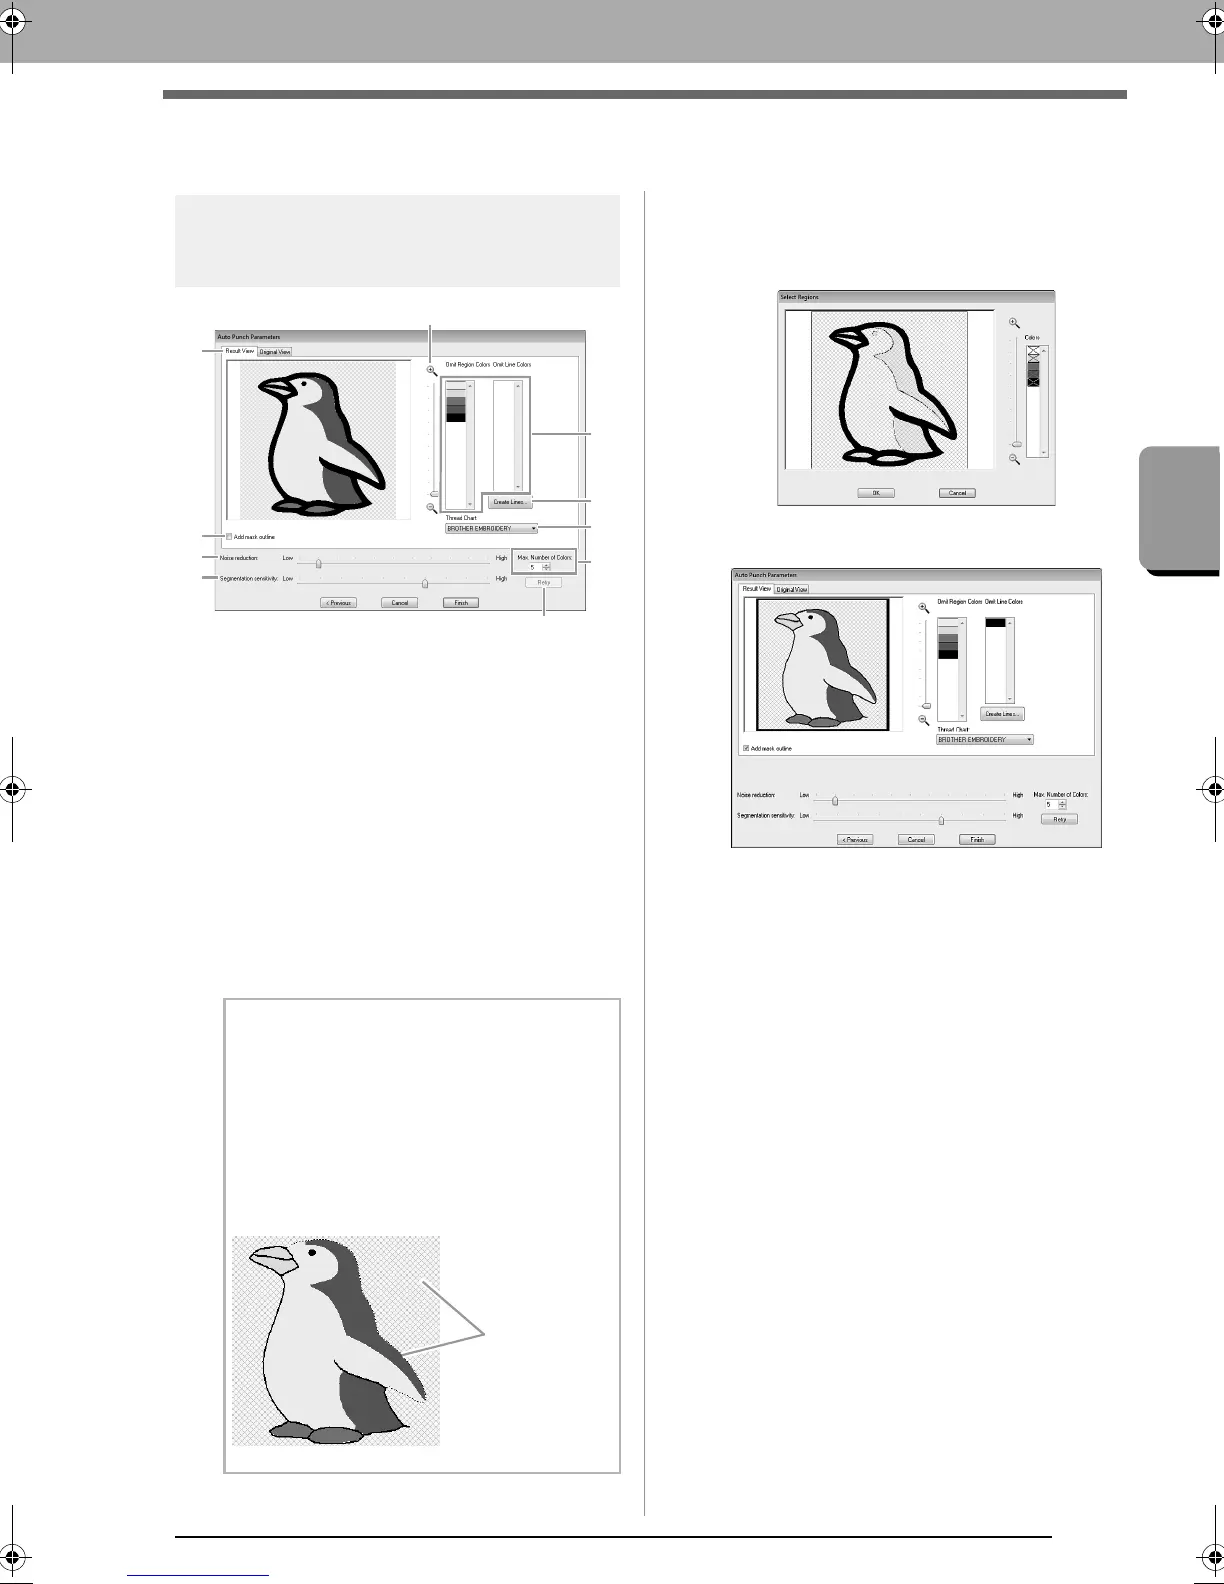
Auto Punch Parameters
dialog box
(1) Result View
The resulting analyzed image appears in
the image preview box on the Result
View tab.
To display the original image, click the
Original View tab.
(2) Omit Region Colors/Omit Line Colors
In the Omit Region Colors list and Omit
Line Colors list, click the colors to select
whether or not they will be sewn.
You can select whether or not areas will
be sewn by selecting their colors. Colors
that are crossed out are set to not be
sewn.
(3) Zoom
(4) Create Lines
Click this button to display the Select
Regions dialog box, where the areas to
be converted to lines can be selected.
Click the areas to be converted to lines,
and then click OK.
(5) Thread Chart
Select the thread chart to be used.
(6) Add mask outline
If this check box is selected, line data is
created from the mask outline.
(7) Noise reduction
Sets the level of noise (distortions) that is
removed from the imported image.
(8) Segmentation sensitivity
Sets the sensitivity for the image analysis.
(9) Max. Number of Colors
Sets the number of colors used.
(10)Retry
To view the results of the changes, click
this button.
b Memo:
• To select whether or not a part of the image
is to be sewn, click in the preview box on the
Result View
tab, or click in the
Omit
Region Colors
and
Omit Line Colors
lists.
• Areas filled with a crosshatch pattern on the
Result View
tab will not be sewn.
In addition, lines that appear as dotted lines
will not be sewn.
(1)
(5)
(4)
(9)
(7)
(8)
(6)
(2)
(3)
(10)
These areas
will not be
sewn.
XE8656-001.book Page 121 Monday, May 24, 2010 5:44 PM
 Loading...


