235
Programmable Stitch Creator
Editing a Pattern in Fill/Stamp Mode
Editing a Pattern in Fill/Stamp Mode
■ Selecting patterns
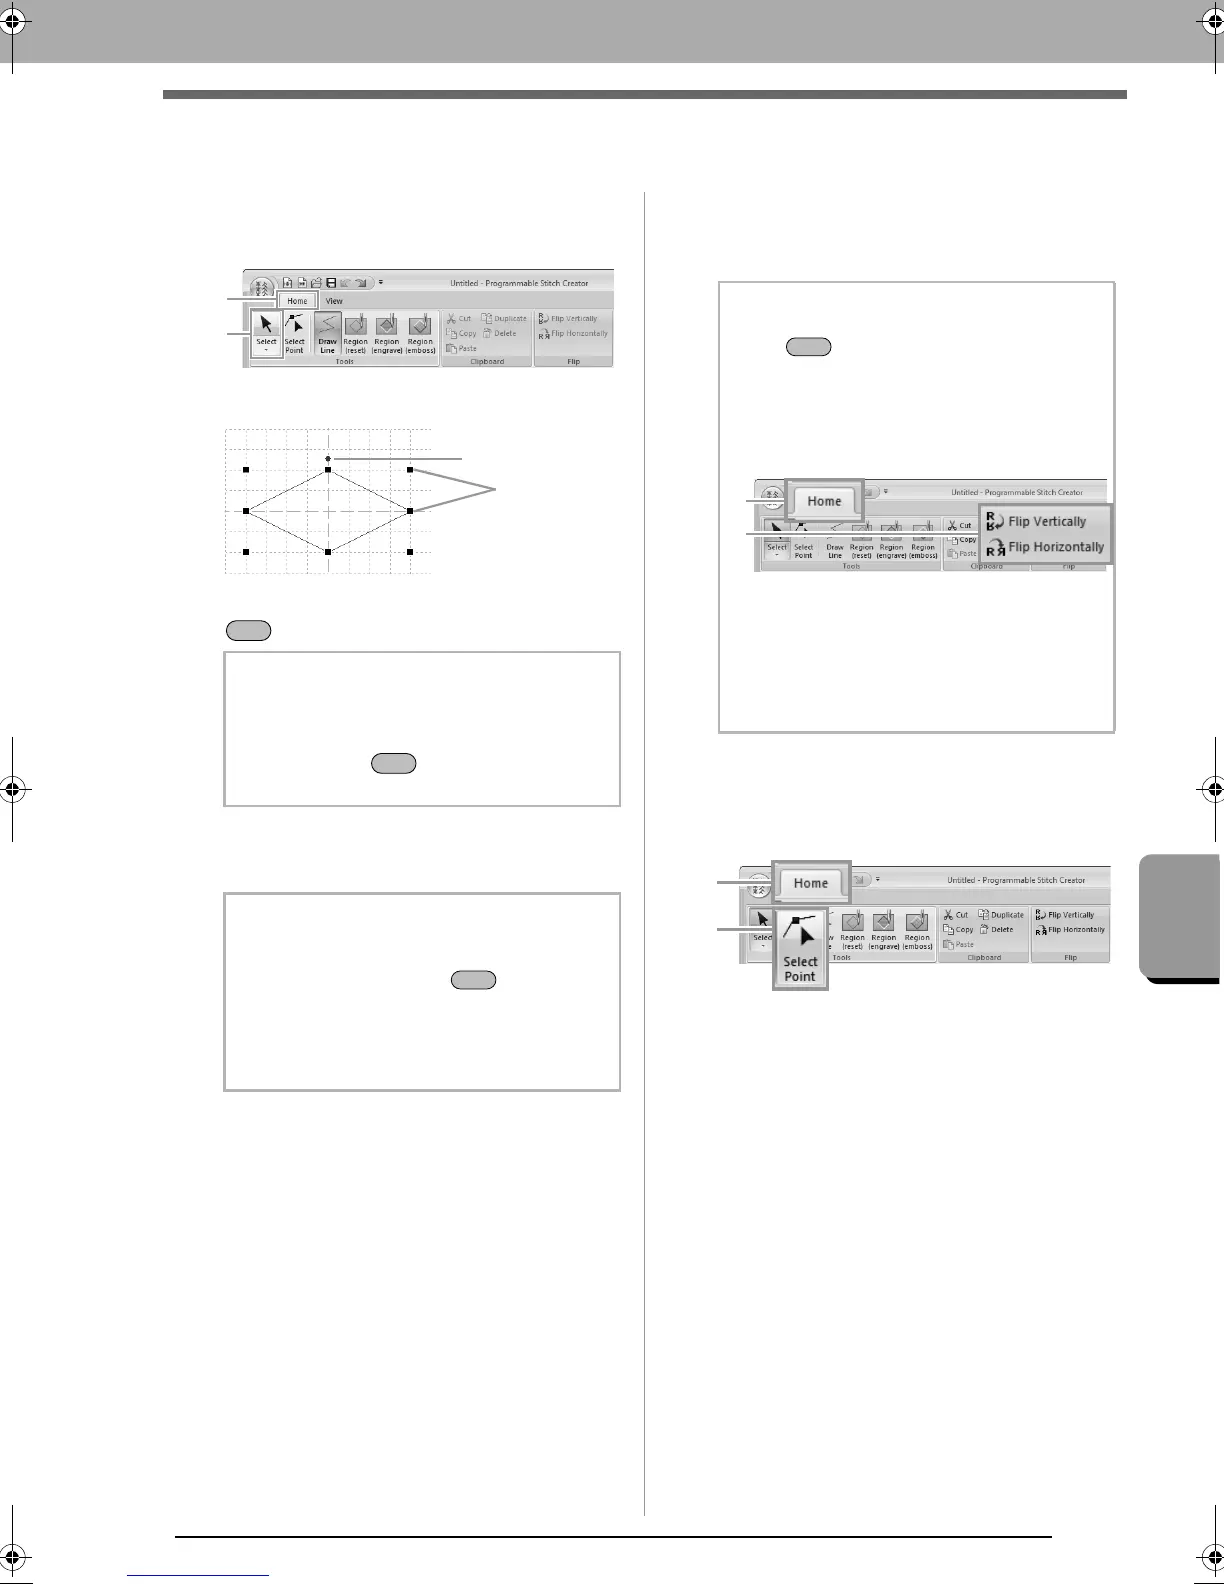
1. To use the Select tool, click 1, then 2.
2. Click the pattern.
.
3. To select an additional pattern, hold down the
key and click the other pattern.
■ Moving patterns
Selected patterns can be dragged to move them.
■ Scaling patterns
Drag a handle of the selected pattern to adjust its
size. Drag the rotation handle to rotate the pattern.
■ Reshaping a fill/stamp stitch
patterns
1. Click 1, then 2.
2. Click the broken line.
b Memo:
• You can also select patterns by dragging
the pointer across the pattern.
• Hold down the key and click a
selected pattern to deselect it.
b Memo:
• To move the pattern horizontally or
vertically, hold down the key while
dragging it.
• Pressing the arrow keys moves the
selected pattern one grid mark in the
direction of the arrow on the key.
b Memo:
• If the key is held down while a handle
is dragged, the pattern is enlarged or
reduced from the center of the pattern.
• To flip the selected pattern(s) up/down, or to
flip the selected pattern(s) left/right, click
1
,
then
2
.
• Using commands other than those
mentioned above, selected patterns can be
edited in other ways, for example,
duplicated or deleted.
c
“Menus/Tools” of “Programmable
Stitch Creator” on page 289.
XE8656-001.book Page 235 Monday, May 24, 2010 5:44 PM
 Loading...


