62
Reshaping Embroidery Patterns
Reshaping Embroidery Patterns
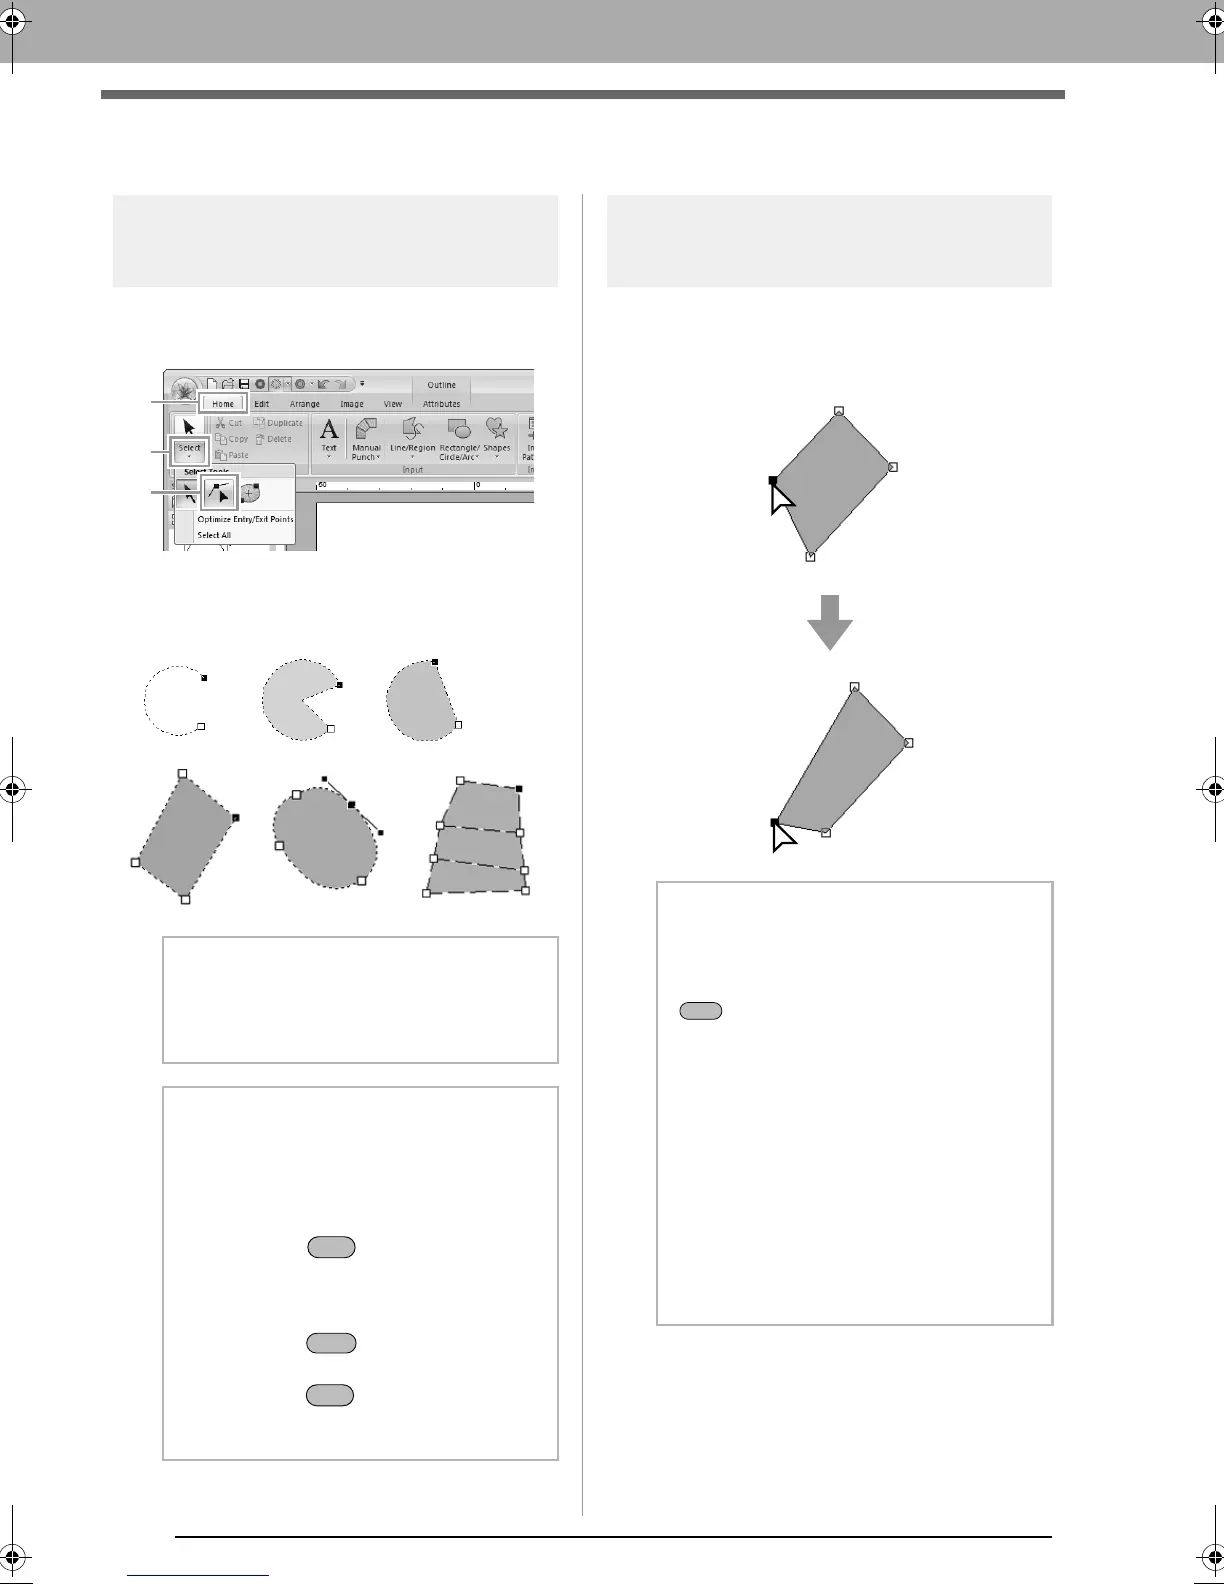
Selecting points
1. Select the Select Point tool by clicking 1, then
2, then 3.
2. Click the pattern.
3. To select a single point, click an empty square.
Moving points
1. Select the point.
2. Drag the point to the new location.
b Memo:
The pattern can be a broken line, a curve, an
arc, a fan shape, an arc & string, a manual
punching pattern, or stitch data.
b Memo:
Multiple points can be selected in any of the
following ways.
• Drag the pointer.
All points within the box are selected.
• Hold down the key while clicking the
points.
To deselect a point, click the selected
point.
• Hold down the key while pressing an
arrow key to select multiple points.
• Hold down the key while pressing an
arrow key to change the point that is
selected.
b Memo:
• To move the point of a broken line, a curve,
a manual punching pattern, or stitch data
horizontally or vertically, hold down the
key while dragging it.
• A selected point can also be moved with the
arrow keys.
• The arrow keys cannot be used to move the
end points of an Arc, Arc & String, and Fan.
• Points in patterns set for hole sewing can
also be moved. However, the point cannot
be moved to cross an outline. In order to
move the point in this way, cancel hole
sewing first.
• If you start dragging by clicking elsewhere
on the outline of the pattern, a new point will
be inserted or the selected point(s) will be
deselected.
XE8656-001.book Page 62 Monday, May 24, 2010 5:44 PM
 Loading...


