Commissioning
8
ekr CON 100 – Installation and Operating Manual 65/130
8.4 Setting the Motor Rotation Direction
When commissioning, you have to check the assignment of the
arrow keys to the positioning direction (motor rotation direction)
of the actuator.
The definition of the sensors (Sensor 1, Sensor 2, Sensor 3) is
described in chapter Designation of the Sensors, page 23.
Checking the motor rotation direction
WARNING
Danger of death from actuator movements!
During function tests, parts of your body may be crushed, cut or hit.
►
Make sure that no persons remain in the vicinity of the pivot /
traversing area of machine components that are positioned by
the actuator.
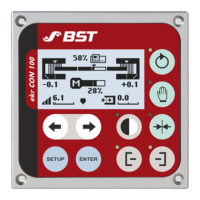
1. Press the Manual mode key.
The LED of the key will illuminate.
The controller switches to manual mode.
2. Press the left arrow key and observe the guiding device.
The guiding device must move in the direction of Sensor 1.
3. Press the right arrow key and observe the guiding device.
The guiding device must move in the direction of Sensor 2.
If only one CLS Pro600 line and contrast sensor (Sensor 3) is
connected to the controller then the guiding device must move
in the direction of the cable connection on the line and contrast
sensor.
If the guiding device moves in the opposite direction then you
have to reverse the motor rotation direction.
Reversing the motor rotation direction
The procedure depends on the type of actuator connected.
Actuator Procedure
EMS10,
EMS18,
EMS21,
EMS22,
ECOEMS22
Change DIL switch S1.1 on the processor board of
the controller
(see Setting the DIL Switches, page 64).
EMS23
Change DIL switch S4.6 on the processor board of
DriveModule160
(see separate operating instructions
DriveModule160, EDP no. MD.359).
 Loading...