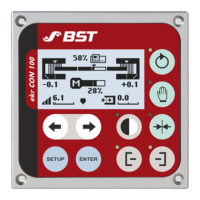
EasyManua.ls Logo

BST ekr CON 100 - User Manual

BST ekr CON 100
130 pages
Print Icon
To Next Page IconTo Next Page
Loading...
Web Guiding System
Installation and
Operating Manual
ekr CON 100
MD.461.EN.06
Translation of the Original Manual

Table of Contents

Questions and Answers

BST ekr CON 100 Specifications

General IconGeneral
BrandBST
Modelekr CON 100
CategoryController
LanguageEnglish

Summary

About This Document

What You Need to Know

Explains the purpose of the instructions and essential safety observations for users.

Target Group

Identifies the intended audience for the manual, including operating company and personnel.

Storage and Distribution

Details requirements for storing and distributing the manual for accessibility.

Meanings of the Safety Instructions and Symbols

Explains the significance of safety instructions and symbols used throughout the manual.

Safety Instructions

Defines the different levels of safety warnings (Danger, Warning, Caution, Notice) and their implications.

Symbols

Defines symbols used to convey essential information and action requirements.

Operation Using Keys

Explains how to use the controller's keys based on their visual indicators.

More Detailed Information

Provides information on accessing further documentation and online resources.

About Safety

Intended Use

Defines the system's purpose for web guiding and its intended applications and environments.

Non-intended Use

Lists uses that are not permitted and would be considered non-intended operation.

Non-intended Infringement of Guidelines

Details specific actions that violate operating, maintenance, or installation guidelines.

Non-intended Operation

Lists operations that are considered non-intended, such as unauthorized personnel or modifications.

Non-intended Modification of Electronic Data

Prohibits specific modifications to electronic data and software on BST products.

Safety Instructions

General safety instructions that must always be observed by every user working with the system.

General Safety Instructions

Provides critical safety warnings regarding explosions, moving machine parts, electrocution, and material web edges.

Qualification of the Personnel

Defines the required qualifications and training for personnel operating or working with the system.

Duties of the Operating Company and Personnel

Outlines the responsibilities of the operating company and its personnel regarding safety and system operation.

Duties of the Operating Company

Specifies the operating company's responsibilities for ensuring workplace safety, training, and system integration.

Duties of the Personnel

Details the safety responsibilities of each employee for their own safety and system operation.

Conduct in the Event of Danger and Accidents

Provides guidelines for preventative measures and actions to take during emergencies and accidents.

Personal Protective Equipment

Lists the necessary personal protective equipment (PPE) required for certain activities to prevent accidents.

Guarantee and Liability

Refers to warranty terms specified in sales documentation and outlines disclaimers.

Disclaimer

States BST GmbH's non-liability for damages arising from incorrect use or specific fault causes.

Exceptions to the Disclaimer

Specifies conditions under which BST GmbH may still be liable despite the disclaimer.

License and Liability for Software Supplied

Clarifies terms for software not produced by BST GmbH.

Design and Function

Design

Describes the physical design of the ekr CON 100 controller and its components.

Function

Explains the basic operational function of the controller in web guiding systems.

Guiding Modes

Lists the different web guiding modes supported by the controller.

Control and Display Elements

Identifies all control and display elements on the controller's front panel.

Graphic Display

Describes the information presented on the graphic display during operation.

Keys

Explains the functions of the different groups of keys on the control panel.

Message Output “System OK“

Details the "System OK" message output and the faults it signals.

Connectable Components

Illustrates the standard components that can be connected to the controller.

Designation of the Sensors

Assigns designations (Sensor 1, 2, 3) to connected sensors and their corresponding control modes.

Edge Sensors (Sensor 1;2)

Explains the installation position and definition of edge sensors used for guiding.

Line and Contrast Sensor (Sensor 3)

Describes the installation position of the line and contrast sensor for specific guiding modes.

Accessories

Refers to information regarding accessories and their order address.

Name plate

Explains the information provided on the controller's name plate with an example.

Technical Specifications

Controller

Provides technical specifications for the controller unit itself.

Ambient Conditions

Lists permissible ambient conditions for the controller's operation and storage.

Protection Category

States the controller's protection category rating.

Power Supply

Details the voltage, current, and cable specifications for the controller's power supply.

Analogue Inputs

Specifies the input signals and connections for analogue inputs like servo center transducers.

Digital Inputs

Details the voltage levels and connections for digital inputs used for remote control.

Output Motor Output Stage

Provides specifications for the motor output stage, including voltage, current, and protection.

Message Output System OK

Specifies the voltage, current, and connection for the "System OK" message output.

Interfaces

Details the specifications for CAN-Bus and Network interfaces, including connectable components and transfer rates.

Display

Specifies the size, resolution, and illumination of the LCD graphics module.

Weight and Dimensions

Provides the weight and detailed dimensions of the controller.

Power Pack

Lists approved power packs and their specifications, including voltage and output power.

Sensors

Details technical specifications for various sensors.

Edge Sensors

Provides technical data for IR 2011/40, IR 2011/70, IR 2011, IR 2012, and US 2010 optical and ultrasonic edge sensors.

Line and Contrast Sensor CLS Pro 600

Refers to a separate manual for technical specifications of the CLS Pro 600 sensor.

Electric Motor Powered Actuators

Details stroke, gearbox ratio, force, and speed for EMS 10, EMS 18/C, EMS 18/CX, EMS 18/F, EMS 21, EMS 22, EMS 23, and ECO EMS 22 actuators.

Emissions

Specifies the continuous sound level of the product.

RoHS Conformity

States compliance with the EC Directive 2011/65 (RoHS Directive).

Transport, Delivery and Storage

Transport

Provides critical safety warnings and guidelines for safe transportation of the system components.

Scope of Delivery

Instructs users to obtain the scope of delivery from order confirmation documents.

Unpacking the Delivery

Outlines the procedure for unpacking the delivery, including checking for damage and completeness.

Storage

Details the conditions required for proper storage of the system and its components to prevent damage.

Installation

Safety Instructions

Provides critical safety warnings for installation, emphasizing qualified personnel, machine safety, and avoiding unsuitable parts.

Selecting the Installation Location

Specifies criteria for selecting an appropriate installation location, including ambient conditions and clearances.

Installing the Controller

Details the process of installing the controller unit.

Installation Cut-Out

Provides dimensions for the installation cut-out required for the controller.

Space Requirement for the Connecting Cable

Illustrates the necessary space behind the controller for connecting cables.

Installing the controller

Describes the steps for physically installing the controller into the cut-out.

Electrical Connection

Safety Instructions

Emphasizes critical safety precautions for electrical connections to prevent electric shock and equipment damage.

Cable Routing

Provides guidelines for safely routing cables to prevent hazards and interference.

Connecting the Cables

Explains the correct procedure for connecting cables, including use of core end sleeves.

Ensuring Equipotential Bonding

Details the process for ensuring equipotential bonding to prevent electrostatic discharge damage.

Connections on the Controller

Shows the layout of sockets and terminal strips on the controller's back panel for component connection.

Sockets; Plugs

Provides an overview of the different sockets and plugs on the controller and their interfaces.

Overview

Lists sockets, their interfaces, functions, and important notes for system connections.

X100 - Power Supply

Details the contact assignment and wiring for the X100 power supply connector.

X101, X102 - CAN-Bus

Explains the contact assignment for CAN-Bus connections (X101, X102) for sensors and modules.

X103 - Actuator

Details the contact assignment for the X103 actuator connection, including PWM and feedback signals.

X104 - Network

Describes the network interface (X104) for connecting external control systems, noting current unsupported status.

X105 - Service

Explains the function of the X105 service interface for programming via USB.

Terminal Strips

Provides an overview of the terminal strips and their functions for various inputs and outputs.

Overview

Lists terminal strips (X1, X2, X3, X4, X5) with their functions and notes.

X1 - Digital inputs

Details the terminal assignments and functions for digital inputs (X1), including remote control and interlock.

X2 - Position feedback actuator

Explains the terminal assignments for position feedback signals from actuators.

X3 - Servo center transducer

Details the terminal assignments for the servo center transducer inputs.

X4 - Brushless motor; DC

Specifies terminal assignments for brushless and DC motor connections, including phase and position sensor inputs.

X5 - Message output System OK

Details the terminal assignments for the "System OK" message output relay contacts.

Service Indications

Explains the status indicated by service LEDs on the processor board.

Service LEDs Overview

Provides a list of service LEDs and their general display functions.

Display of Device Status

Describes the meaning of the device status indicated by the H2 LED.

Display of Bus Status

Explains the bus status indicated by the H8 LED, covering errors and operational modes.

Status Display of Power Supply

Explains the power supply status indicated by the H12 LED.

Status Display of Message Output System OK

Describes the system status indicated by the H190 LED for the "System OK" output.

Commissioning

Safety Instructions

Emphasizes critical safety warnings for commissioning, including machine startup, electric shock, actuator movements, and transport safety devices.

Requirements

Lists the prerequisites that must be met before commissioning the web guiding system.

Setting the DIL Switches

Instructs users on how to set the DIL switches on the controller for proper application configuration.

Using the DIL Switch

Provides guidance and precautionary measures for correctly using and setting the DIL switches.

Setting the DIL Switches

Details the specific settings for DIL switches S1.1-S1.8 to configure actuator and transducer selection.

Setting the Motor Rotation Direction

Explains how to check and reverse the motor rotation direction of the actuator for correct guiding.

Commissioning the Actuator Without Position Feedback

Outlines the commissioning steps for actuators that do not have position feedback.

Set the Guiding Direction for Center Positioning

Describes how to check and set the guiding direction for center positioning with servo center transducers.

Setting the Gain of the Servo Center Transducer

Guides users on setting the gain for the servo center transducer to optimize control performance.

Commissioning the Actuator With Position Feedback

Details the commissioning process for actuators equipped with position feedback.

Set the Guiding Direction for Center Positioning

Explains how to check and set the guiding direction for center positioning with position feedback actuators.

Setting Stroke Limitation and Servo-Center Position

Guides users on setting software limit switches for stroke limitation and the servo-center position, including teaching new values and exiting settings.

Performing the Material Setup

Explains the importance of material setup for optimal guiding results and automatic controller adjustment.

Adjusting the Controller Gain

Guides users on setting the controller gain for each guiding mode during commissioning, including optimizing for oscillations.

Operation

Safety Instructions

Provides essential safety warnings related to operating the web guiding system.

Control Panel

Introduces the control panel, its elements, and the functions of its keys for operating the system.

Operation Display

Explains how the operation display shows system states and control parameters.

Overview

Details the symbols and numeric values presented on the controller's operation display.

Operation Display Edge Sensors (Sensor 1;2)

Describes how the operation display shows sensor data for edge sensors and how web position is indicated.

Operation Display Line and Contrast Sensor (Sensor 3)

Explains the operation display for line/contrast sensors, showing relative position, guiding setpoints, and examples for line and contrast scanning.

Actuator Operation Display

Describes the actuator operation display, including zero position, current position, and relative position indicators.

Special Displays

Explains special symbols that appear on the display to indicate faults or extraordinary operating states.

Limit Switch Active

Describes the display symbol for an active software limit switch on the actuator.

Actuator Blocked (Motor Overcurrent)

Explains the warning symbol for an actuator blocked due to motor overcurrent.

Impermissible Supply Voltage

Describes the warning symbol for an impermissible supply voltage to the controller.

Motor Control Timeout

Explains the warning symbol for motor control timeout due to prolonged operation in one direction.

Controller Interlock Active

Describes the warning symbol for an active controller interlock that prevents guiding movements.

Actuator Bus Connection Fault

Explains the warning symbol indicating a fault in the bus connection between the controller and actuator.

Loss of the Line; Contrast Transition

Describes the display symbol for loss of the line or contrast transition during guiding.

External Motor Output Stage Fault (Drive Module 160)

Explains the warning symbol for a fault in the external motor output stage connected to the actuator.

Performing the Material Setup

Explains the process and importance of performing material setup for optimal guiding results.

Overview

Provides an overview of material setup and safety precautions.

When does a material setup have to be carried out?

Lists scenarios requiring a material setup, such as initial commissioning or material changes.

Manual or automatic material setup?

Compares automatic and manual material setup procedures and when to use each.

Generating bright; dark values

Details the procedure for generating bright and dark values for sensor calibration.

Displaying the determined bright; dark values

Explains how determined bright/dark values are displayed graphically and numerically.

Activating the Material Setup

Guides users on activating the material setup process (manual or automatic) via the setup menu.

Cancelling Material Setup

Describes how to cancel the material setup process without saving the determined values.

Procedure for Web Edge Guiding

Details the automatic material setup procedure specifically for web edge guiding.

Automatic Material Setup

Step-by-step guide for performing automatic material setup for web edge guiding.

Manual Material Setup

Details the manual material setup procedure for web edge guiding with critical contrasts.

Procedure for Web Center-Line Guiding

Details the automatic material setup procedure for web center-line guiding.

Automatic Material Setup

Step-by-step guide for performing automatic material setup for web center-line guiding.

Manual Material Setup

Details the manual material setup procedure for web center-line guiding with critical contrasts, covering bright/dark value generation for sensor 2.

Selecting the Operating Mode for the IR 2011;40 Edge Sensor

Explains how to select operating modes for the IR 2011/40 edge sensor.

Function

Describes the purpose of selecting operating modes for the IR 2011/40 edge sensor.

Requirements

Lists the requirements for using the operating mode selection function.

IR 2011;40 Operating Modes

Details the IR 2011/40 operating modes, including field of application, features, and measuring range.

Operating Mode Selection

Provides a step-by-step procedure for selecting operating modes for IR 2011/40 edge sensors.

Selecting the Guiding Mode

Explains how to select different guiding modes like edge, center-line, and line/contrast guiding.

Selecting the Operating Mode

Introduces the different operating modes for the controller.

Manual Mode

Describes the Manual Mode for changing the position of the guiding device.

Automatic

Explains the Automatic Mode for carrying out web guiding based on selected mode.

Center Positioning

Describes the Center Positioning mode where the guiding device moves to its central position.

Watchdog

Explains the Watchdog function for preventing web wandering during line/contrast guiding.

Function

Details the purpose and operation of the Watchdog function.

Requirements

Lists the requirements for operating the Watchdog function.

Before switching on

Outlines preparation measures required before switching on the Watchdog function.

Switching on the Watchdog

Provides the procedure for activating the Watchdog function, including controller key presses and setpoint adjustments.

Setting the Guiding Setpoint

Explains how to set the guiding setpoint for web edge, line, or contrast transitions using arrow keys in Automatic mode.

Optimizing the Controller Gain

Guides users on how to adjust and optimize the controller gain for different guiding modes, including identifying oscillations.

Calling up the Setup Menu

Explains how to navigate and activate functions within the controller's setup menu, listing available setting functions and service displays.

Displaying System Information

Describes how to display hardware, firmware, and bootloader versions for service queries.

Displaying System Components

Shows how to display connected system components and their types.

Displaying the DIL Switch Settings

Explains how to display DIL switch settings without opening the controller, showing switch positions and their meanings.

Displaying the Status of the Digital Inputs

Describes how to display the status of digital inputs, including terminal numbers and signal states.

Displaying the CAN-Bus Status

Explains how to display the CAN-Bus status, including RUN, ERR, and Id information.

Restoring Factory Default Settings

Details the procedure for restoring factory default settings, including DIL switch adjustments.

Remote Control (Digital Inputs)

Safety Information

Provides critical safety warnings regarding remote control movements of the actuator.

Digital Inputs

Explains how digital inputs allow remote control of functions and how they affect panel keys.

Truth Table

Presents a truth table showing the relationship between digital input states and controller functions.

Maintenance and Cleaning

Safety Instructions

Emphasizes critical safety warnings for maintenance and cleaning to prevent machine startup and electric shock.

Maintenance Table

Provides an overview of necessary maintenance tasks and their recommended intervals.

Maintenance and Cleaning work

Details specific maintenance and cleaning procedures for system components.

Cleaning the Controller Housing

Explains how to clean the controller housing using dry or liquid cleaners.

Cleaning the Edge Sensor Housing

Describes how to clean the housing and measurement window of edge sensors, including ultrasonic sensor capsules.

Cleaning the Housing of the CLS Pro 600 Line and Contrast Sensor

Refers to a separate manual for cleaning the CLS Pro 600 sensor housing.

Cleaning the Electric Motor Powered Actuator Housing

Explains how to clean the housing of electric motor powered actuators.

Troubleshooting

Actuator; Guiding Device Trembles

Addresses faults where the actuator or guiding device trembles, suggesting gain optimization or material setup.

Actuator; Guiding Device Slow or Incorrect Operation

Solves issues with slow or incorrect guiding, recommending gain adjustment or material setup.

Actuator; Guiding Device Does Not Move (DIL Switch;Gain Check)

Troubleshoots cases where the actuator/guiding device shows no movement, checking DIL switches or controller gain.

Actuator; Guiding Device Moves to End Position (Center Positioning)

Addresses center positioning issues where the actuator moves to an end position and stops.

Actuator; Guiding Device No Movement (Overcurrent;Interlock;Timeout)

Solves issues where the actuator/guiding device doesn't move due to overcurrent, interlock, or timeout.

Actuator; Guiding Device No Movement (Bus Connection Fault)

Troubleshoots no movement faults caused by bus connection issues.

EMS 23 Actuator No Movement (Output Stage Fault)

Addresses EMS 23 actuator faults related to external motor output stage errors.

Actuator;Guiding Device End Position Movement (Switch Off Failure)

Solves issues with end position movement and failed motor switch-off, often due to low supply voltage.

Incorrect Center Position Approach

Addresses incorrect center positioning, potentially due to wrong DIL switch settings for feedback.

Unit Does Not Control (Settings Correct)

Solves control issues when settings are correct but the unit doesn't operate, possibly due to low controller gain.

Controller Unresponsive (Remote Control Active)

Troubleshoots situations where the controller is unresponsive, possibly due to locked panel keys from remote control.

Undefined Controller Behavior (Proximity to HV)

Addresses undefined controller behavior, potentially caused by proximity to high-voltage components.

Line;Contrast Scan Error (Exclamation Mark)

Explains the exclamation mark symbol for Sensor 3 during line/contrast scanning and its causes.

Line;Contrast Transition Not Detected

Solves issues where the line/contrast transition is not detected, suggesting print check or setup repeat.

Line;Contrast Transition Outside Scanning Area

Addresses detection issues when the line/contrast transition is outside the sensor's scanning area.

Accessories and Spare Parts

Order Address

Provides the address and contact details for ordering accessories and spare parts.

Accessories

Lists available accessories and spare parts with their order numbers and utilization.

Customer Services

Customer Services

Provides contact information and data requirements for customer service inquiries.

Shutting Down and Disposal

Shutting Down and Disposal

Outlines procedures for shutting down the system and guidelines for disposal according to national laws.

Related product manuals