EasyManua.ls Logo

Datalogic Matrix 220 - User Manual

Datalogic Matrix 220
212 pages
Print Icon
To Next Page IconTo Next Page
Loading...
Matrix 220™
PRODUCT REFERENCE GUIDE
Image Based Reader

Table of Contents

Questions and Answers

  • J
    Jo DunnSep 12, 2025
    What to do if the power LED is not lit on my Datalogic Laboratory Equipment?
    • U
      umasonSep 13, 2025
      If the POWER LED on your Datalogic Laboratory Equipment is not lit, check the following: * Is the power connected? * If using a power adapter (like PG6000), is it connected to the wall outlet? * If using rail power, does the rail have power? * If using CBX, does it have power (check switch and LED)? Also, check if you're referring to the M12 17-pin connector or the CBX spring clamp connectors. Measure the voltage either at pin 1 and pin 2 (for the 17-pin connector) or at the spring clamp Vdc and GND (for CBX).
  • V
    Vanessa BradleySep 12, 2025
    Why is my Datalogic Laboratory Equipment reader not transmitting data to the host?
    • T
      trichardsonSep 12, 2025
      If your Datalogic Laboratory Equipment reader isn't transmitting to the host, verify the serial cable wiring is correct. If using CBX, ensure the RS422 termination switch is OFF. Confirm that the host serial port settings match the reader's. In DL.CODE, the COM LED Function can be configured to indicate Main Serial Port TX or Main Serial Port RX.
  • R
    Robert TaylorSep 12, 2025
    Why is the data transferred to the host incorrect from my Datalogic Laboratory Equipment?
    • Y
      yadamsSep 12, 2025
      If the data transferred to the host from your Datalogic Laboratory Equipment is incorrect, corrupted, or incomplete, ensure that the host serial port settings match the reader's. Also, in DL.CODE Data Formatting, check the settings of the Header and Terminator String parameters, as well as the various Message Field parameter settings.
  • E
    Erik GuzmanSep 9, 2025
    What to do if my Datalogic Laboratory Equipment reader always transmits a 'No Read Message'?
    • P
      Pamela MorenoSep 9, 2025
      If your Datalogic Laboratory Equipment reader consistently transmits a 'No Read Message', try the following: 1. Run the Rapid Configuration procedure. 2. Position the reader as described in "Mounting And Positioning Matrix 220". 3. Tune the Acquisition Delay on Trigger if the moving code is out of the reader's field of view. 4. Set the Continuous Operating Mode if no external trigger source is available. 5. Tune the Image Settings to improve the code image quality. 6. Check the parameter settings in the Advanced Setup step for 2D Codes, 1D Codes, and Postal Codes. 7. View the full-resolution code image to check the printing or marking quality.
  • D
    diana54Sep 8, 2025
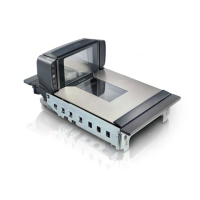
    What to do if image is focused but not decoded on Datalogic Matrix 220 Barcode Reader?
    • P
      Preston HamptonSep 9, 2025
      If the image is focused but not decoded on your Datalogic Barcode Reader, verify the Calibrate Image Density procedure.
  • C
    Christopher PerezAug 23, 2025
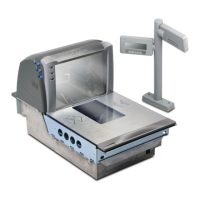
    What to do if Datalogic Matrix 220 Barcode Reader is not transmitting data?
    • M
      Marvin SchmidtAug 23, 2025
      If your Datalogic Barcode Reader isn't transmitting data to the host, check the serial cable wiring. If you're using a CBX, make sure the RS422 termination switch is OFF. Also, ensure that the host serial port settings match the reader's. You can configure the COM LED Function in DL.CODE (Device menu > Settings > Settings > LED Configuration) to indicate Main Serial Port TX or Main Serial Port RX.
  • H
    hernandezmariaSep 6, 2025
    How to fix DL.CODE Autorun or Start.hta not running for Datalogic Matrix 220?
    • G
      Gregg FarleySep 6, 2025
      To resolve DL.CODE installation issues where Autorun or Start.hta doesn’t run for your Datalogic Barcode Reader, check your Windows settings to ensure Autorun is enabled. Also, associate the .hta file type with the Microsoft HTML Application host mshta.exe located in Windows\System32.
  • M
    Maria MillerSep 5, 2025
    Why no image in DL.CODE window when TRIGGER LED is blinking on Datalogic Barcode Reader?
    • D
      Danielle HoweSep 5, 2025
      If the ”TRIGGER” LED is correctly blinking but no image is displayed in the DL.CODE win­ dow for your Datalogic Barcode Reader, ensure that the Phase frequency is lower than the maximum frame rate.
  • C
    Christopher HollowaySep 4, 2025
    Why can't I access environment parameters in DL.CODE for Datalogic Barcode Reader?
    • M
      Marc ThomasSep 4, 2025
      If you cannot access environment parameters in DL.CODE (Device>Settings>Settings menu item is grey) for your Datalogic Barcode Reader, verify that you are using the Installer - Expert User level. If not, change it in the Options>Change User menu.
  • K
    kendra80Sep 3, 2025
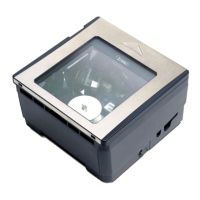
    How to find order number of Datalogic Matrix 220?
    • J
      Jerry RoblesSep 3, 2025
      To find the Order Number for your Datalogic Barcode Reader, which consists of 9 numbers, compare the Device Model (found in DL.CODE Device Menu > Settings > Settings > About Device) with the product models listed on the Datalogic website.

Summary

PREFACE

ABOUT THIS MANUAL

Provides overview of the manual's content and purpose.

Manual Conventions

Explains symbols and formatting used throughout the document.

TECHNICAL SUPPORT

Details how to obtain technical assistance from Datalogic.

Support Through the Website

Information on accessing support resources and downloads online.

Reseller Technical Support

Guidance on seeking assistance from authorized Datalogic resellers.

COMPLIANCE

GENERAL

General instructions regarding installation and maintenance safety.

POWER SUPPLY

Information on power requirements and connection guidelines for the product.

EMC COMPLIANCE

Guidelines for meeting Electromagnetic Compatibility (EMC) requirements.

CE COMPLIANCE

States compliance with essential requirements of applicable European directives.

FCC COMPLIANCE

Details compliance with Federal Communications Commission rules.

EAC COMPLIANCE

Information regarding Eurasian Conformity certification.

LED SAFETY

Safety information related to LED light emissions according to IEC 62471.

HANDLING

GENERAL VIEW

CHAPTER 1 RAPID CONFIGURATION

STEP 1 - CONNECT THE SYSTEM

Instructions for connecting the Matrix 220 reader to a system for initial setup.

CBX100;CBX500 Pinout for Matrix 220

Detailed pinout information for CBX connection boxes used with the reader.

STEP 2 - MOUNT AND POSITION THE READER

Guidance on physically mounting and orienting the reader for optimal performance.

STEP 3 - AIM AND AUTOFOCUS THE READER

Procedure for using the built-in aiming system and autofocus feature.

STEP 4 - X-PRESS CONFIGURATION

Steps for configuring the reader using the X-PRESS interface.

Aim

Procedure to use the aiming system for reader positioning.

Setup

Procedure to perform image acquisition parameter calibration.

Learn

Procedure to automatically detect and configure unknown codes.

Reset Reader to Factory Default Environment (Optional)

How to reset reader parameters back to their original factory settings.

STEP 5 - INSTALLING DL.CODE CONFIGURATION PROGRAM

Instructions for installing the necessary software for reader configuration.

Device Discovery

Process of finding and identifying connected devices within the DL.CODE software.

STEP 6 - DEVICE CONFIGURATION

Detailed steps for configuring reader settings via software.

Automatic or Advanced Setup

Overview of the two primary methods for reader configuration.

Automatic Setup

Guides through the automated process for optimizing reading parameters.

Advanced Setup

Explains how to fine-tune optical and decoding parameters for complex applications.

CHAPTER 2 INTRODUCTION

PRODUCT DESCRIPTION

An overview of the Matrix 220 reader's features and capabilities.

Standard Application Program

Describes the pre-loaded software that controls basic reader functions.

Programmability

Information on customization options and custom application programs.

Excellent Performance

Highlights key performance aspects like sensor resolution and decoding speed.

Ease of Setup

Details features that simplify installation and initial configuration.

Ease of Use

Focuses on user-friendly aspects like LED feedback and intuitive interfaces.

Flexible Solution

Discusses the product's adaptability through accessories and connectivity options.

Versatility

Explains the reader's adaptability to various applications and barcode types.

Industrial Strength

Details the product's robustness and suitability for harsh environments.

INDICATOR AND KEYPAD BUTTON

Explains the function of the reader's LEDs and physical buttons.

MODEL DESCRIPTION

How to interpret the model number to understand reader specifications.

Internal Lighting Systems

Description of different internal illumination options available for the reader.

AVAILABLE MODELS

Lists the different part numbers and their corresponding model descriptions.

ACCESSORIES

Information on compatible accessories for extending reader functionality.

APPLICATION EXAMPLES

Illustrates various use cases and applications for the Matrix 220 reader.

Document Handling

Examples of using the reader for automated document processing.

Direct Part Marking

How the reader performs in Direct Part Marking (DPM) applications.

Color Code;Background

Using different light colors to improve contrast with colored codes/backgrounds.

Laser Marking;Etching Technology

Reading codes marked using laser or etching techniques.

Digimarc Barcode

Information on reading Digimarc Barcodes for enhanced product packaging.

High Dynamic Range (HDR) feature

Explains how the HDR feature improves image contrast and readability.

CHAPTER 3 INSTALLATION

PACKAGE CONTENTS

Lists all items included in the product packaging for verification.

MECHANICAL DIMENSIONS

Provides detailed physical measurements and diagrams of the reader.

MOUNTING ACCESSORY COVERS

Instructions for attaching protective ESD or YAG filter covers.

MOUNTING FLEXIBLE CABLES

Guidelines for installing flexible cables for power and Ethernet connections.

CHAPTER 4 ELECTRICAL CONNECTIONS

CBX CONNECTION BOX PINOUT

Pin assignments for the CBX100/500 connection box terminal blocks.

CAB-DS0 X-S PINOUT

Pinout details for the CAB-DS0x-S accessory cable.

POWER SUPPLY

Specifies power requirements and connection methods for the reader.

Power Over Ethernet (PoE) Models

Ethernet pinout and power delivery details for PoE models.

MAIN SERIAL INTERFACE

Information on connecting and configuring the primary serial communication interface.

RS232 Interface

Details regarding the RS232 serial interface for point-to-point connections.

RS422 Full Duplex Interface

Information on using the RS422 interface for longer or noisier connections.

ID-NET INTERFACE

Description of the high-speed interface for reader interconnections.

ID-NET Cables

Specifications and recommendations for ID-NET network cabling.

ID-NET Response Time

Graph showing network response time based on the number of nodes.

ID-NET Network Termination

Instructions on how to properly terminate the ID-NET network.

ID-NET Connection Diagrams

Visual representations of ID-NET network configurations.

AUXILIARY RS232 INTERFACE

Details for using the secondary RS232 interface for communication monitoring.

INPUTS

Information on the reader's optocoupled polarity insensitive inputs.

External Trigger Input Connections Using Matrix 220 Power

Wiring diagram for connecting an external trigger using reader power.

External Trigger Input Connections Using External Power

Wiring diagram for connecting an external trigger using external power.

Input 2 Connections Using Matrix 220 Power

How to connect Input 2 using the reader's power supply.

Input 2 Connections Using External Power

How to connect Input 2 using an external power source.

Input 3 Connections (CBX500 Only)

Connection details for Input 3, available only with CBX500.

OUTPUTS

Information on the reader's general purpose opto-isolated outputs.

Output 1 and 2 Connections Using Matrix 220 Power

Wiring for Outputs 1 & 2 when powered by the reader.

Output 1 and 2 Connections Using External Power

Wiring for Outputs 1 & 2 using an external power source.

Output 3 Connections Using Matrix 220 Power (CBX500 Only)

Wiring for Output 3 (CBX500 only) using reader power.

Output 3 Connections Using External Power (CBX500 Only)

Wiring for Output 3 (CBX500 only) using external power.

ON-BOARD ETHERNET INTERFACE

Details on using the integrated Ethernet port for communication.

USER INTERFACE - SERIAL HOST

Pinout information for connecting to a serial host via RS232.

OPC UA PROTOCOL

Explanation of the OPC UA protocol for industrial communication.

OPC UA on DL.CODE

How to enable and configure the OPC UA server within DL.CODE software.

CHAPTER 5 TYPICAL LAYOUTS

ETHERNET CONNECTION

Describes typical network configurations using Ethernet connections.

SERIAL CONNECTION

Illustrates common setups for serial data transmission.

FIELDbus CONNECTION

Details how the reader integrates into a Fieldbus network.

PASS-THROUGH

Explains the pass-through layout for multi-device data flow.

ID-NET MULTIDATA NETWORK (PASS-THROUGH)

Configuration for ID-NET networks supporting multiple data streams.

ID-NET SYNCHRONIZED NETWORK

Setup for synchronized ID-NET networks involving multiple readers.

CHAPTER 6 READING FEATURES

FOV CALCULATION

Formula and data for calculating the Field of View (FOV) for applications.

GLOBAL FOV DIAGRAMS

Diagrams showing the maximum obtainable Field of View for various codes.

READING DIAGRAMS

Performance references for typical reading conditions with different codes.

MAXIMUM LINE SPEED AND EXPOSURE TIME CALCULATIONS

Method for calculating maximum line speed based on exposure time.

CHAPTER 7 SOFTWARE CONFIGURATION

DL.CODE SYSTEM REQUIREMENTS

Specifies the hardware and software requirements for installing DL.CODE.

READER CONFIGURATION

General guidance on configuring the reader using software.

Auto-Calibration

Describes the automated process to optimize image acquisition parameters.

Manual Calibration

Steps for manually adjusting parameters like exposure and gain.

Under-exposure

Procedure to correct images that are too dark by adjusting exposure and gain.

Over-exposure

Procedure to correct images that are too light by adjusting gain and exposure.

Moving code out of the Field of View

Solutions for ensuring the code remains visible in the Field of View.

MULTI IMAGE ACQUISITION SETTINGS

Managing multiple sets of image acquisition parameters for varying conditions.

Automatic Image Settings Selection

Automatically cycling through image settings for optimal reading.

External Image Settings Selection

Selecting specific image settings based on external triggers or conditions.

IMAGE CROPPING

How to reduce the image area to improve processing speed and performance.

DIRECT PART MARKING APPLICATIONS

Specific considerations and settings for DPM applications.

Code Positioning with Respect to Illumination

How illumination affects code visibility and positioning in DPM.

Code Contrast

Strategies for maximizing code contrast against different surfaces.

Image Filter

Using image filters like Erode, Dilate, and Close to improve decodeability.

PASS-THROUGH CONFIGURATIONS

Setting up data pass-through between devices in a network.

INTERNAL NETWORK CONFIGURATIONS

Configuring Master/Slave setups for internal ID-NET networks.

Multidata ID-NET Network Configurations

Setting up ID-NET for multiple data streams from slaves to master.

Synchronized ID-NET Network Configurations

Configuring synchronized ID-NET networks for simultaneous reading.

Verify Master;Slave Synchronized Configuration

Steps to verify and troubleshoot synchronized network setups.

CHAPTER 8 MAINTENANCE

CLEANING

Instructions for periodic cleaning of the reader's lens cover.

CHAPTER 9 TROUBLESHOOTING

GENERAL GUIDELINES

General advice and information needed for effective troubleshooting.

APPENDIX A TECHNICAL FEATURES

ELECTRICAL FEATURES

Technical specifications regarding power and electrical interfaces.

OPTICAL FEATURES

Details about the image sensor, lenses, and aiming system.

ENVIRONMENTAL FEATURES

Specifications for operating temperature, humidity, and resistance ratings.

PHYSICAL FEATURES

Information on the reader's dimensions, weight, and materials.

SOFTWARE FEATURES

Overview of supported code symbologies, operating modes, and configuration methods.

APPENDIX B ALTERNATIVE CONNECTIONS

POWER, COM AND I;O CONNECTOR FOR STANDARD MODELS

Pinout for the M12 17-pin connector on standard models.

COM AND TRIGGER CONNECTOR FOR POE MODELS

Pinout for the M12 5-pin connector on PoE models.

ON-BOARD ETHERNET CONNECTOR

Pinout details for the standard M12 8-pin Ethernet connector.

Power over Ethernet (PoE) Models

Information on the Ethernet connector for PoE models.

ID-NET NETWORK TERMINATION

How to properly terminate the ID-NET network with resistors.

GLOSSARY

Datalogic Matrix 220 Specifications

General IconGeneral
Resolution0.3 mm / 12 mils (depending on model)
Dimensions31 x 66 x 41.5 mm / 1.2 x 2.6 x 1.6 in
Weight75 g / 2.6 oz
ConnectivityWired
Drop Specification1.5 m
Current Consumption500 mA
Cable Length2 m
InterfaceUSB, RS-232, Ethernet
Scan Rate60 frames per second
Decoding Capability1D and 2D barcodes
Storage Temperature-20°C to 70°C
Humidity5% to 95% (non-condensing)
Field of View40° (H) x 28° (V)
LightingLED illumination

Related product manuals