Part II: Settings and Measurements
Trigger Recording Setup
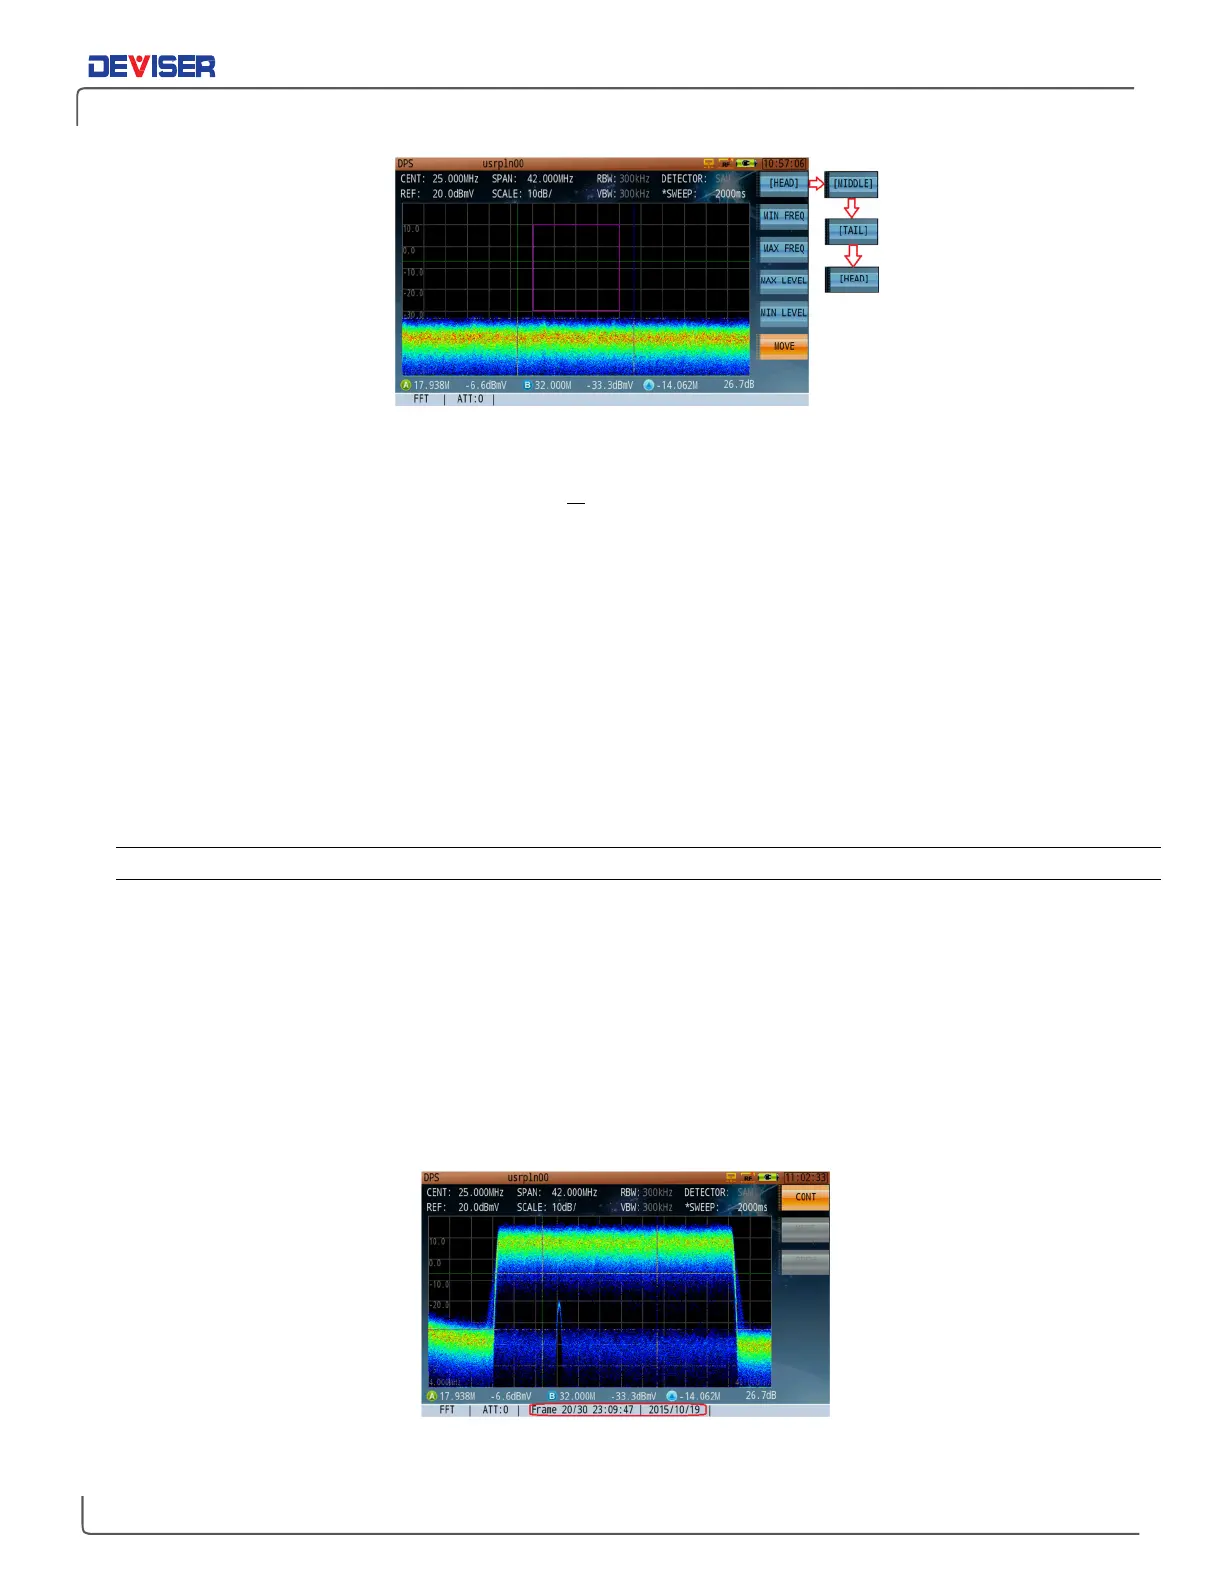
Trigger Condition
In the figure above, the purple rectangle indicates the trigger condition. If the signal amplitude is higher
than the amplitude range covered by this area, or if the signal enters the trigger area from the left or right
sides, then persistence recording will not trigger. Recording will only occur if the signal enters the "rectangle
from below, and does not reach higher than the top side. If these conditions are met, the signal will trigger
the persistence recording function.
Setting Up the Trigger Pattern
1.
In Record > Trigger > Setup, press
Min Freq
(F2) and use the arrow keys to shift the rectangle’s left side
(minimum frequency) left or right. You can also turn the rotary knob for more sensitive adjustments, 10%
the speed of the arrow keys. Then press
Max Freq
(F3) and define the rectangle’s right side (maximum
frequency).
2.
Press
Max Level
(F4) and use the arrow keys and rotary knob to shift the rectangle’s top side (max signal
level) up or down. Then press
Min Level
(F5) and define the rectangle’s bottom side (min. signal level).
3.
Press
Move
(F6). Here, you can adjust the entire trigger zone’s position on the measurement grid. Use
the arrow keys to move it up or down, and the rotary knob to move it left or right.
11-4.3 Playing Back Persistence Recordings
To play back a recording, enter the following sequence:
Record
(F7);
Next
(F7);
Load
(F2). Choose one of
the listed recordings and click the rotary knob to confirm. Go back to the last menu page (F7) and press
Replay
(F3) to view the recording.
You can view recordings at normal speed by pressing
Cont
(F1), or use the
Next
(F2) and
Prev
(F3) keys to
examine the current recording frame-by-frame. The current frame number and timestamp are displayed at
the bottom of the screen.
Alternatively, you can view recordings on a PC with the proper software. Contact Deviser Instruments for
more information.
Playback Persistence Record