2. Select Settings on the home screen on the printer's control panel.
3. Select Maintenance > Print Quality Adjustment per Paper.
If the item is not displayed,
ick
the screen upward to display it.
4. Select how to adjust from Print Pattern or Enter Set Value.
5. Select the paper type you loaded in the printer.
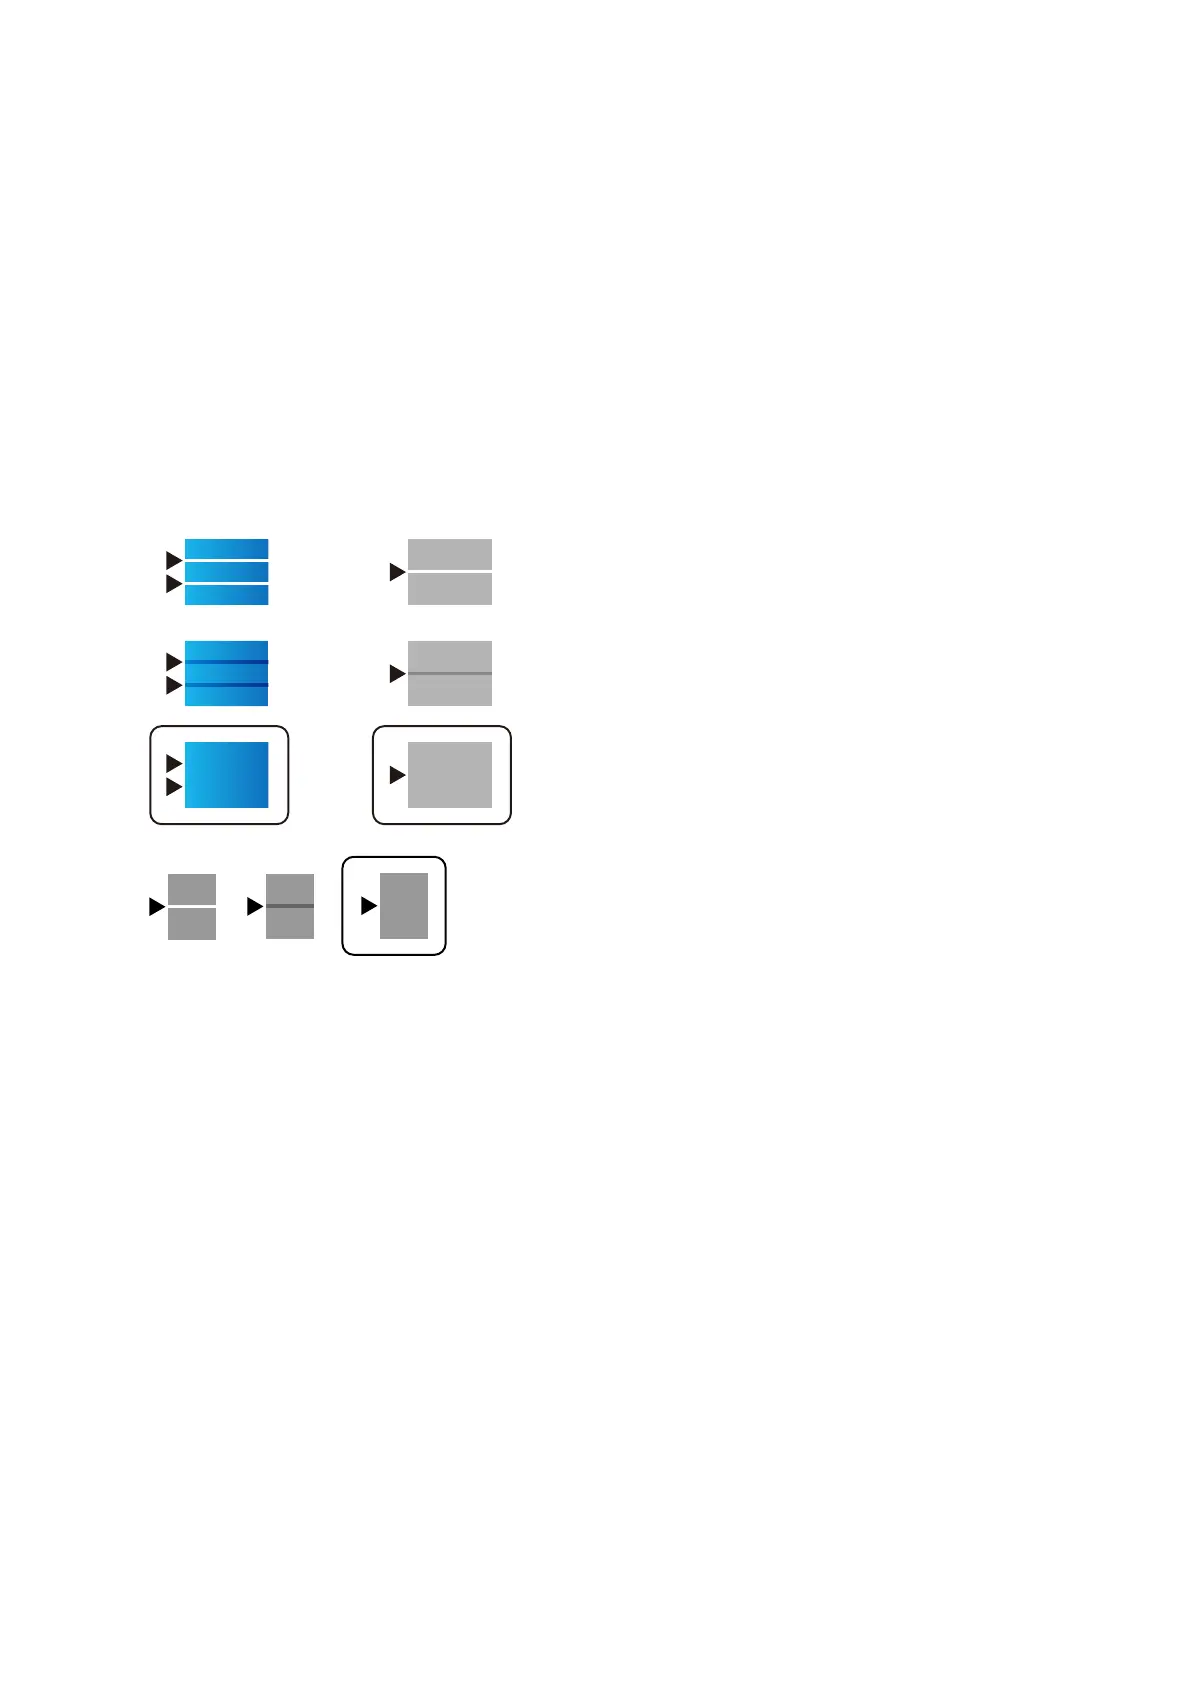
6. Follow the on-screen instructions to align the print head.
is pattern aligns if you see horizontal banding at regular intervals.
Find and enter the number for the least separated and overlapping pattern.
Note:
When you print the paper that can be adjusted the quality, select Auto Select (plain papers) on Paper Type for printer
driver, so adjustment value is automatically applied.
7. Close the information screen.
If the print quality is not improved aer performing this adjustment, performPrint Quality Adjustment to set
the standard adjustment values, and then perform adjustments again according to the paper type.
Printout is Scued or Color is Missing
If you have not used the printer for a long time, the print head nozzles may be clogged and ink drops may not be
discharged. Perform a nozzle check, and then clean the print head if any of the print head nozzles are clogged.
Related Information
&
“Checking and Cleaning the Print Head” on page 231
User's Guide
Solving Problems
269

 Loading...


