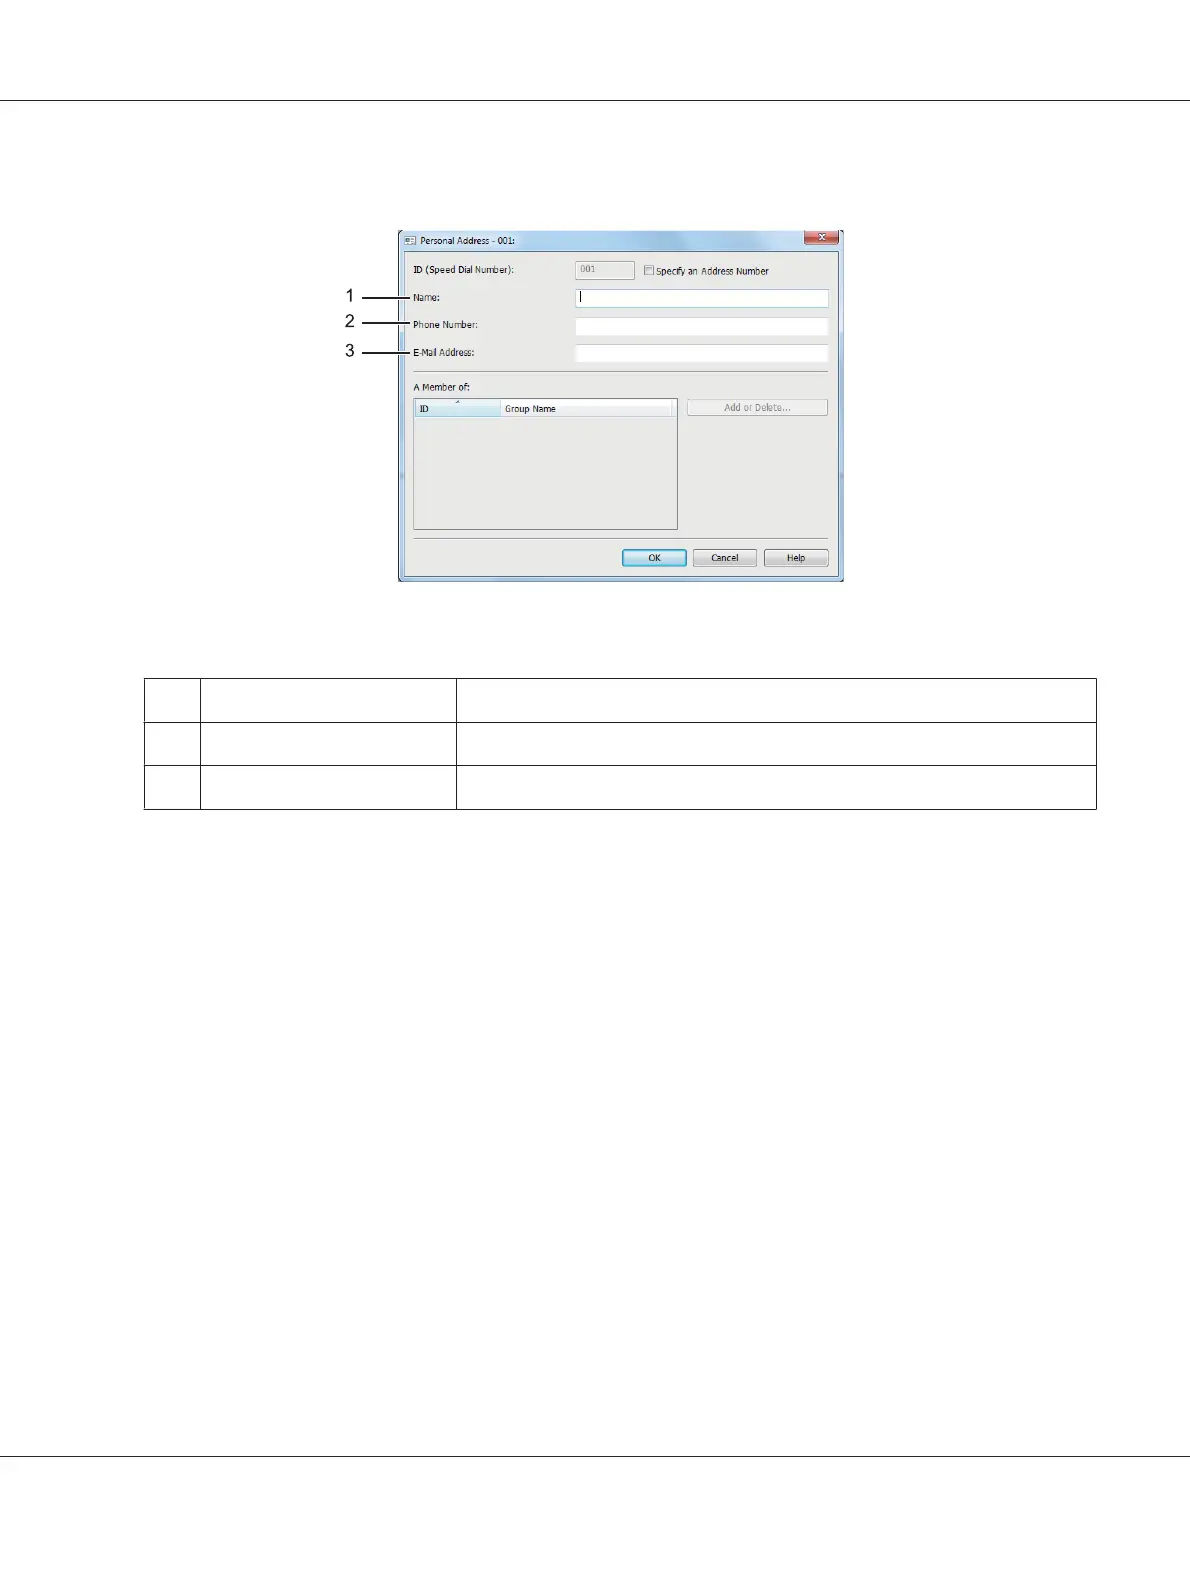
The Personal Address dialog box appears.
To fill in the fields, enter the information as follows:
1
Name
Enter a friendly name that you want it to appear on the Address Book.
2
Phone Number
Enter the recipient’s phone number.
3
E-mail Address
Enter the recipient’s E-mail address.
Note:
❏ If you want to change the automatically assigned address ID, select the Specify an Address
Number check box, and then enter a value from 1 to 99 for ID (Speed Dial Number).
❏ The first eight entries in the Address Book correspond to the one-touch buttons on the operator
panel.
4. Click OK.
5. On the File menu, select Save All.
Sending a Fax Using Speed Dialing
1. Load a document(s) face up on the Automatic Document Feeder (ADF) with the top edge going in
first; or place a single document face down on the document glass and close the document cover.
See Also:
❏ “Loading a Source Document on the Automatic Document Feeder (ADF)” on page 225
AL-MX200 Series User’s Guide
Faxing 246