Do you have a question about the Fagor 8070 BL and is the answer not in the manual?
Safety guidelines for handling the unit during repair procedures.
Measures to prevent personal injury when operating or servicing the CNC unit.
Safety measures before cleaning, emphasizing power disconnection and authorized personnel.
Comprehensive list of G functions with their meanings and related chapters.
List of M functions for controlling machine elements like spindle and coolant.
Comprehensive list of statements and instructions with their meanings and related chapters.
Explains the purpose and formation of coordinate systems for defining target point positions.
Describes machine, fixture, and part reference systems used for positioning.
Explains the synchronization operation used when the CNC loses origin point position.
Details programming points using absolute or incremental coordinate systems.
Covers programming using Cartesian and Polar coordinate systems.
Describes selecting main work planes using G17, G18, G19, and G20 functions.
Uses G20 to define work planes and longitudinal axis, with arguments for axis type and alignment.
Explains programming movements relative to machine zero using #MCS and #MCS ON/OFF instructions.
Details temporarily setting the machine coordinate for an axis or spindle using function G174.
Describes applying fixture offsets to select different fixture systems and defining their positions.
Covers setting part zero at different positions using zero offsets, including activation and definition.
Explains programming machining feedrate using the "F" code and its units.
Covers functions related to feedrate programming units and blending.
Explains selecting spindle speed using "S" code and its units (RPM or m/min).
Identifies the tool selected for machining, specifying its location in the magazine or tool holder.
Selects tool dimensions for radius or length compensation, associated with a specific tool.
Covers M functions related to overall program execution and machine control.
Defines the master spindle and criteria for its selection after program events.
Covers programming spindle speed using the "S" code and its units (RPM or m/min).
Defines spindle startup and stop using auxiliary functions M03, M04, and M05.
Describes stopping the spindle and positioning it at a specific angle using M19.
Executes rapid positioning along a straight line from current to programmed point.
Activates linear movement at a programmed feedrate "F" for programmed movements.
Executes movements along a circular tool path at a programmed feedrate in the active plane.
Allows jogging axes using handwheels or jog keys while the program executes.
Interrupts program execution to allow axis jogging via handwheels or jog keys.
Configures feedrate for continuous and incremental jog modes.
Executes programmed thread in a single pass without axis-spindle interpolation.
Executes programmed thread with variable pitch, allowing entry angle definition.
Performs rigid tapping by interpolating longitudinal axis movement with spindle.
Defines safety distance for axis withdrawal when interrupting threading operations.
Enters square corner mode, ensuring axes reach programmed positions before next movement.
Starts next movement upon theoretical interpolation completion, without waiting for axes.
Allows controlling corner rounding and radius blend using G05 (modal) or G61 (non-modal).
Rounds corners with a specific radius without calculating intersection points, using G36.
Inserts chamfers of specific sizes without calculating intersection points, using G39.
Repeats machining operations symmetrically across one or more axes using mirror image functions.
Rotates the coordinate system around the active reference system or a programmed rotation center using G73.
Enlarges or reduces the scale of programmed paths and contours using G72 or #SCALE.
Defines restricted areas for tool movement (no-exit or no-entry zones) for safety.
Sets linear and circular limits for work zones using G120, G121, and G123 functions.
Enables or disables work zones as no-exit or no-entry, specifying tool monitoring.
Temporarily interrupts program execution for a specified period using G04 or #TIME.
Sets software limits on linear and rotary axes to prevent reaching mechanical hard stops.
Manages parameter sets for axes and gear changes for Sercos drives.
Improves machining continuity and surface quality by smoothing path and feedrate.
Introduces compensation types: tool radius (milling/lathe) and tool length.
Compensates for length differences between programmed tools, activated with tool offset.
Applies radius compensation in active work plane using G41, G42, and G40 functions.
Cancels tool radius compensation using G40, with cancellation behavior depending on G138/G139 and G136/G137.
Applies tool length compensation to longitudinal axis for milling and considers new tool dimensions for lathes.
Allows changing tool orientation during path based on tool dimensions and shape, using paraxial or normal vector compensation.
Covers commands for calling subroutines (L, LL, #CALL, #PCALL, #MCALL, #MDOFF).
Subroutines defined by manufacturer, executed by PLC to interrupt program execution.
Starts execution of a second program in another channel in parallel using #EXEC.
Executes a specific block in another channel or the current channel using #EXBLK.
Allows aborting program execution and resuming from a defined block or another program using #ABORT.
Defines the block or program where execution resumes after interruption using #ABORT.
Enables spindle as C axis for face or side machining operations using #CAX.
Activates face machining using #FACE instruction, defining work plane and C axis.
Activates side machining using #CYL instruction, defining work plane and C axis.
Activates or deactivates angular transformation for movements in Cartesian system using #ANGAX.
Activates or deactivates tangential control for rotary axes using G45 or #TANGCTRL.
Explains machine, part, and tool coordinate systems and their interactions.
Selects the active kinematics for coordinate transformation, allowing up to 6 different kinematics.
Defines, activates, saves, and cancels machining and fixture coordinate systems using #CS and #ACS instructions.
Positions the tool perpendicular to the active inclined plane using #TOOL ORI.
Represents length compensation in space, allowing tool orientation changes without modifying part tip position.
Corrects implicit tool length compensation by defining length difference between real and theoretical tools.
Orients the tool considering active kinematics and defined coordinate systems.
Discusses selecting chordal error in CAM and CNC for optimal HSC machining results.
Explains using user subroutines G500 and G501 for enabling/disabling HSC modes.
Recommended mode for optimizing velocity profile and surface quality, reducing vibrations.
Modifies geometry using algorithms to eliminate unnecessary points and generate polynomials for contour error optimization.
Enables fast mode for programs with short blocks, restoring continuity and optimizing feedrate.
Cancels HSC mode using #HSC OFF or by programming other functions like G05, G07, G50.
Activates virtual tool axis transformation using #VIRTAX, allowing position value definition.
Cancels virtual tool axis transformation using #VIRTAX OFF.
Covers commands defined with "#" for operations like displaying errors, programming movements, and synchronizing channels.
Analyzes blocks in advance to detect loops or collisions, providing warnings and stopping movements.
| Manufacturer | Fagor |
|---|---|
| Spindles | 2 |
| PLC | Integrated |
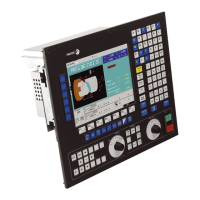
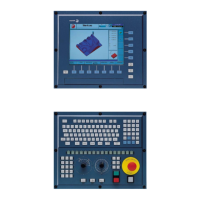
| Display | 10.4" Color LCD |
| Programming | ISO |
| Communication | Ethernet |