8 Appendix
284
Appendix
8
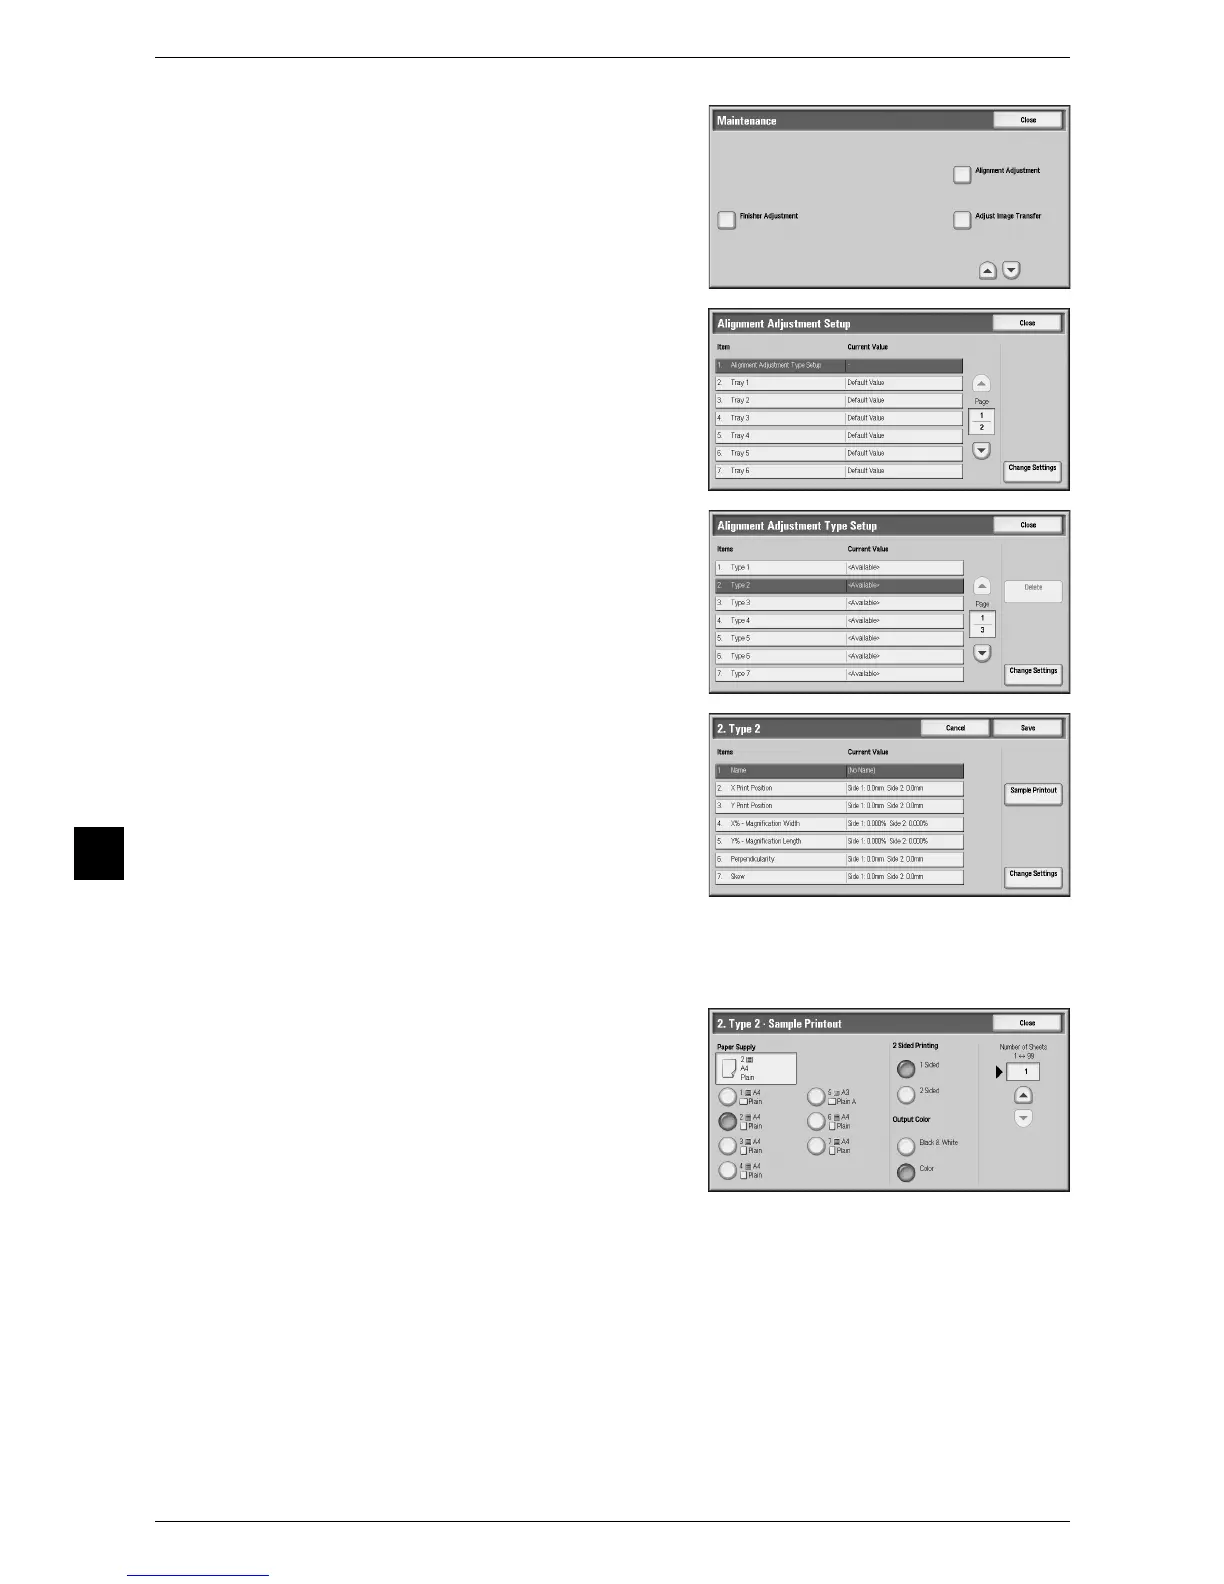
6 Select [Alignment Adjustment].
7 Select [Alignment Adjustment Type Setup],
and press [Change Settings].
8 Select the alignment adjustment type you
want to set or adjust, and press [Change
Settings].
9 Select [Name], and press [Change Settings].
10 Enter the type name, and press [Save].
Important •
We recommend using a name such as "A4 Plain" that allows you to know what the content is.
11 Press [Sample Printout].
12 Select the tray in which you loaded paper in
Step 1, and then select both sides or single
side and the number of sheets.
Important • When adjusting perpendicularity, select
A3 for the paper size.
• We recommend printing about 10 sheets
in order to calculate the average value of
the variations.
13 Press the <Start> button.
The current sample printout is printed.
If the position of the sample printout is correct, a line is printed at a position 10 mm from
the edge of the paper. If the position of the line on the sample printout is misaligned,
make adjustments.
Note • Two lines are printed on the image of Side 1 and one line is printed on the image of Side 2 of
the sample that is printed with [Sample Printout] to indicate the paper feed direction.
 Loading...