Changing the Paper Size
41
Paper and Other Media
2
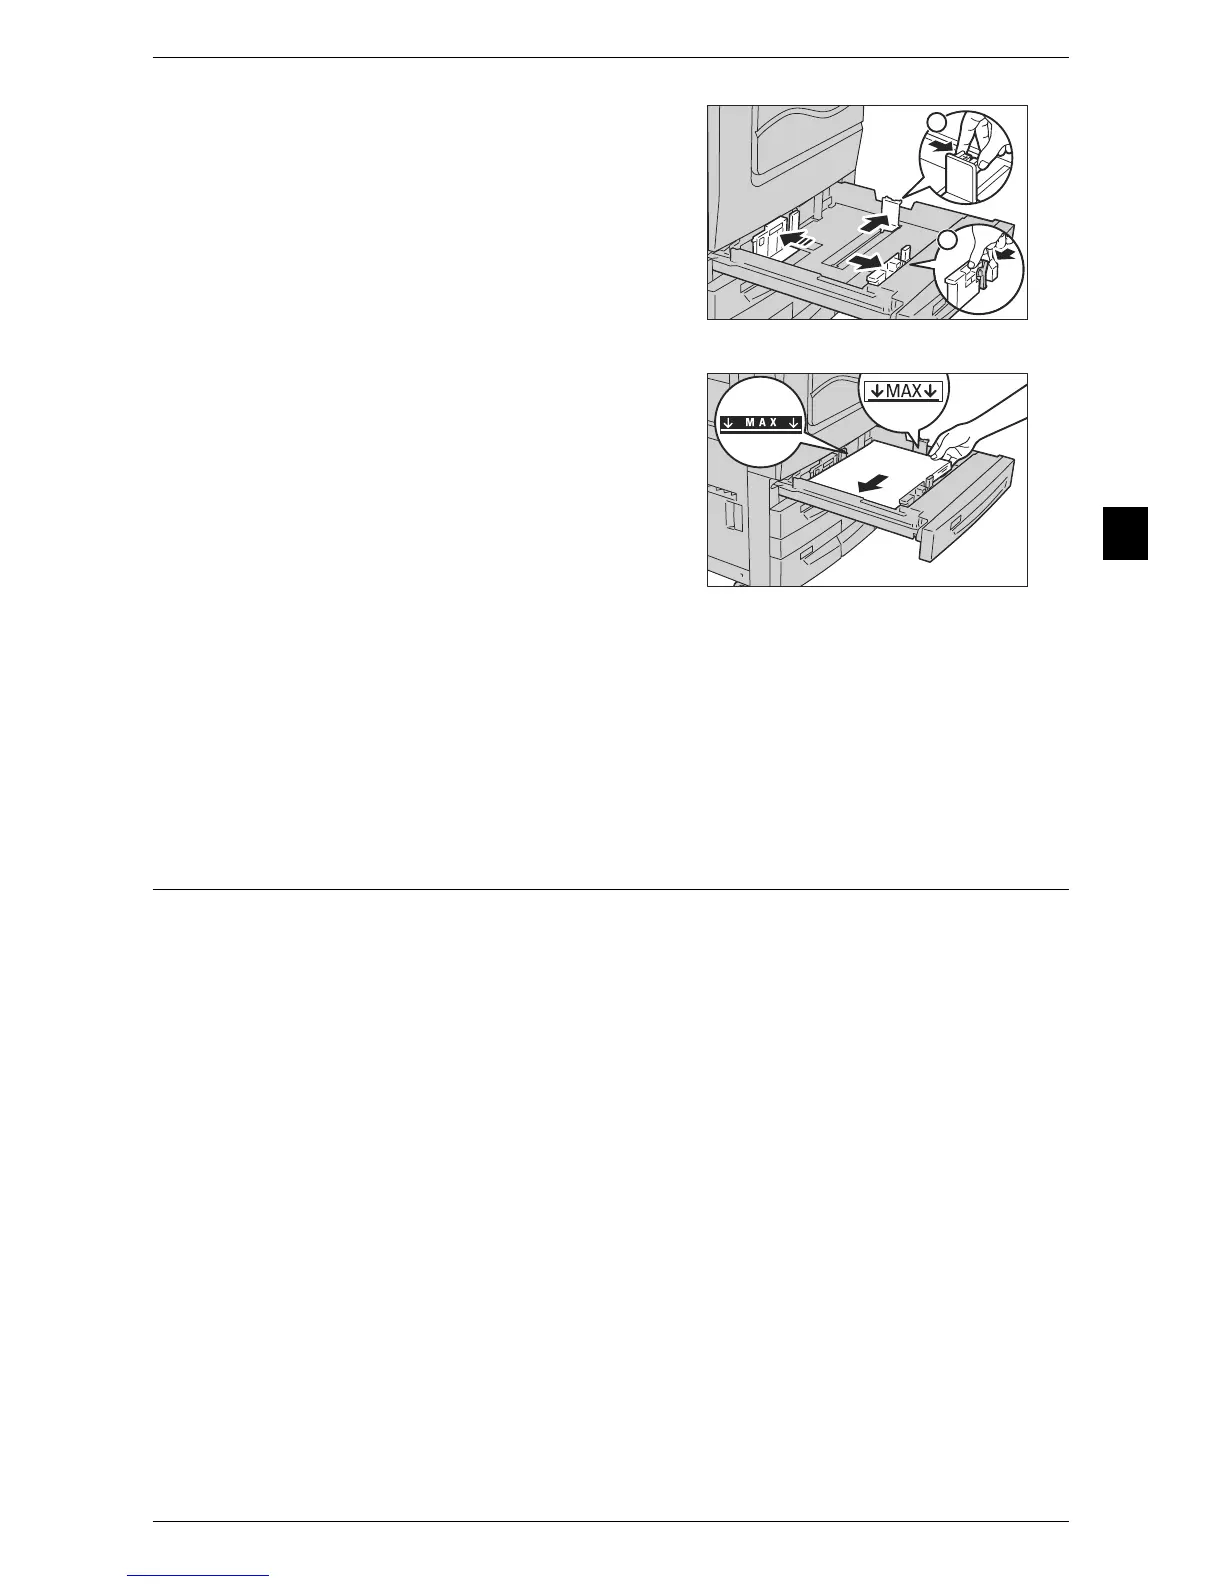
3 While pinching the long-side paper guide,
move it to match the size of the paper to be
loaded (1). While pinching the short-side
paper guide, move it to match the size of the
paper to be loaded (2).
Note • If loading tab paper, move the paper
guides to the edges of the tray, load the
paper, and then move the guides so that
they lightly contact the edges of the
paper.
4 Load and align the edge of the paper against
the left side of the tray, with the side to be
copied or printed on facing down.
Important • Do not load paper above the maximum fill
line ("MAX" in the right illustration).
• Do not place any paper or objects in the
empty space on the right side of Trays 1
and 2. It may cause paper jams or
machine malfunction.
5 Push the tray in gently until it comes to a stop.
Important • When inserting the tray, push it gently. Forcibly pushing in the tray may cause machine
malfunction.
Note • Affix the paper size label to the front of the paper tray.
6 If you have changed the paper type, you need to change the tray settings.
For more information on paper type settings, refer to "Changing the Paper Settings" (P.47).
Changing the Paper Size for Tray 3
The following describes how to change paper size in Tray 3.
Note • The types of paper in Tray 3 are preset. The available preset paper types are: Plain,
Recycled, Plain Reload, Punched, Letterhead, Transparency, Heavyweight, HW Reload,
Extra-HW, X-HW Reload, Hole Punched HW 1, Hole Punched HW 2, Gloss, Gloss Reload,
Heavyweight Gloss, HW Gloss Reload, Labels, Heavyweight Labels, Pre-Printed, Custom 1
to 5, and normally, plain paper is set. When changing to a different paper type, change the
paper quality settings to match the type of paper to be loaded so that you can maintain high
quality printing.
For more information on paper type settings, refer to "Changing the Paper Settings" (P.47).
For more information on supported paper sizes, refer to "Paper Size Settings" (P.126).
1
2
 Loading...