Saving measurement results 6 Data Recorder
DMS Go+ Edition 4 (05/2014) 6-15
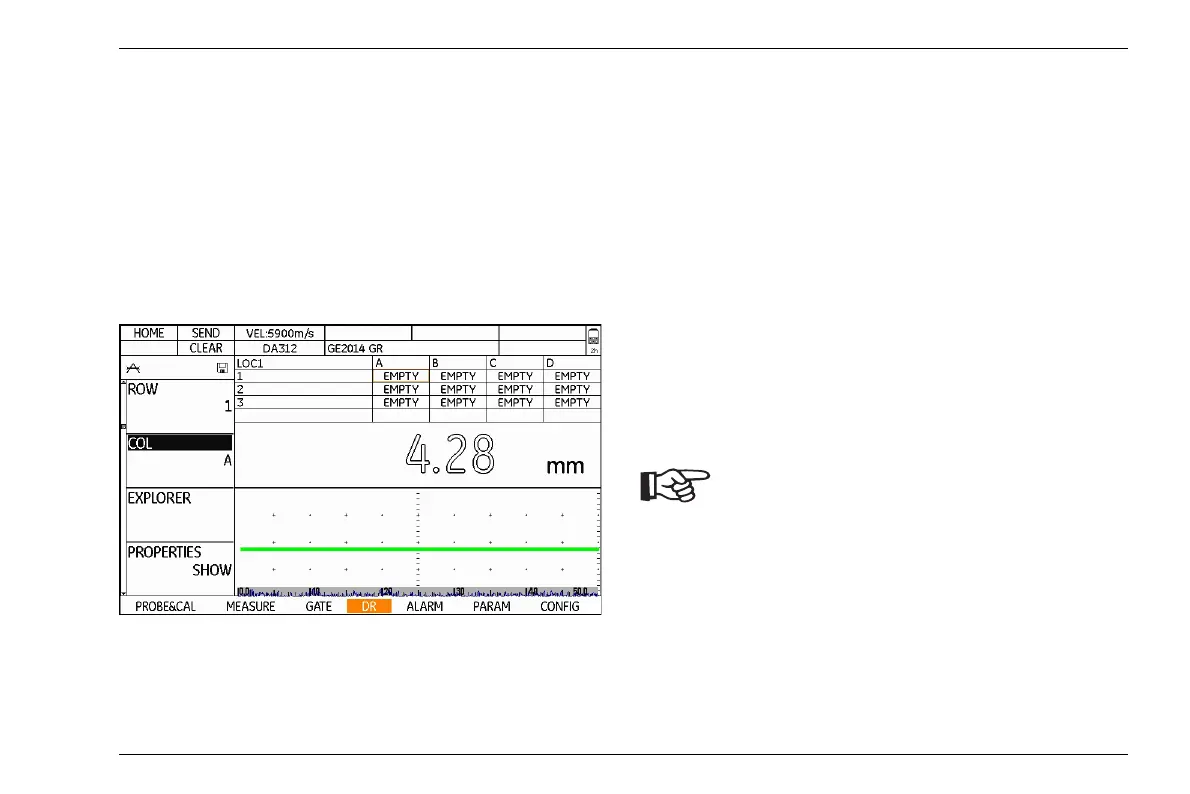
Saving readings
After selecting a file, the empty data points for saving
the readings are displayed above the A-scan. The dis
-
play mode and designation of the measuring points de-
pends on the file type and on the options chosen for the
file.
The current target data point for saving the next reading
is marked with a broader frame.
– Carry out a measurement as usual (see Section Car-
rying out measurements, page 5-32).
– Press the function key 3 (function SEND). The read-
ing is saved to the marked data point. The marking
advances automatically to the next data point.
– Save other readings in the same way.
If a measurement cannot be carried out at the planned
measuring point, you can save a corresponding remark
for this measuring point.
– Press the center key of the keypad long. The func-
tions of the function keys change.
– Press the function key 3 (function OBSTR). The re-
mark OBSTR is saved to the marked data point.
You can assign the function OBSTR togeth-
er with function CLEAR to the function key 4
(
see Section Assignment of function key
4, page 5-7).