9 Replacing components
HSD S.p.A. © - h0108k01a.fm120718
163
9
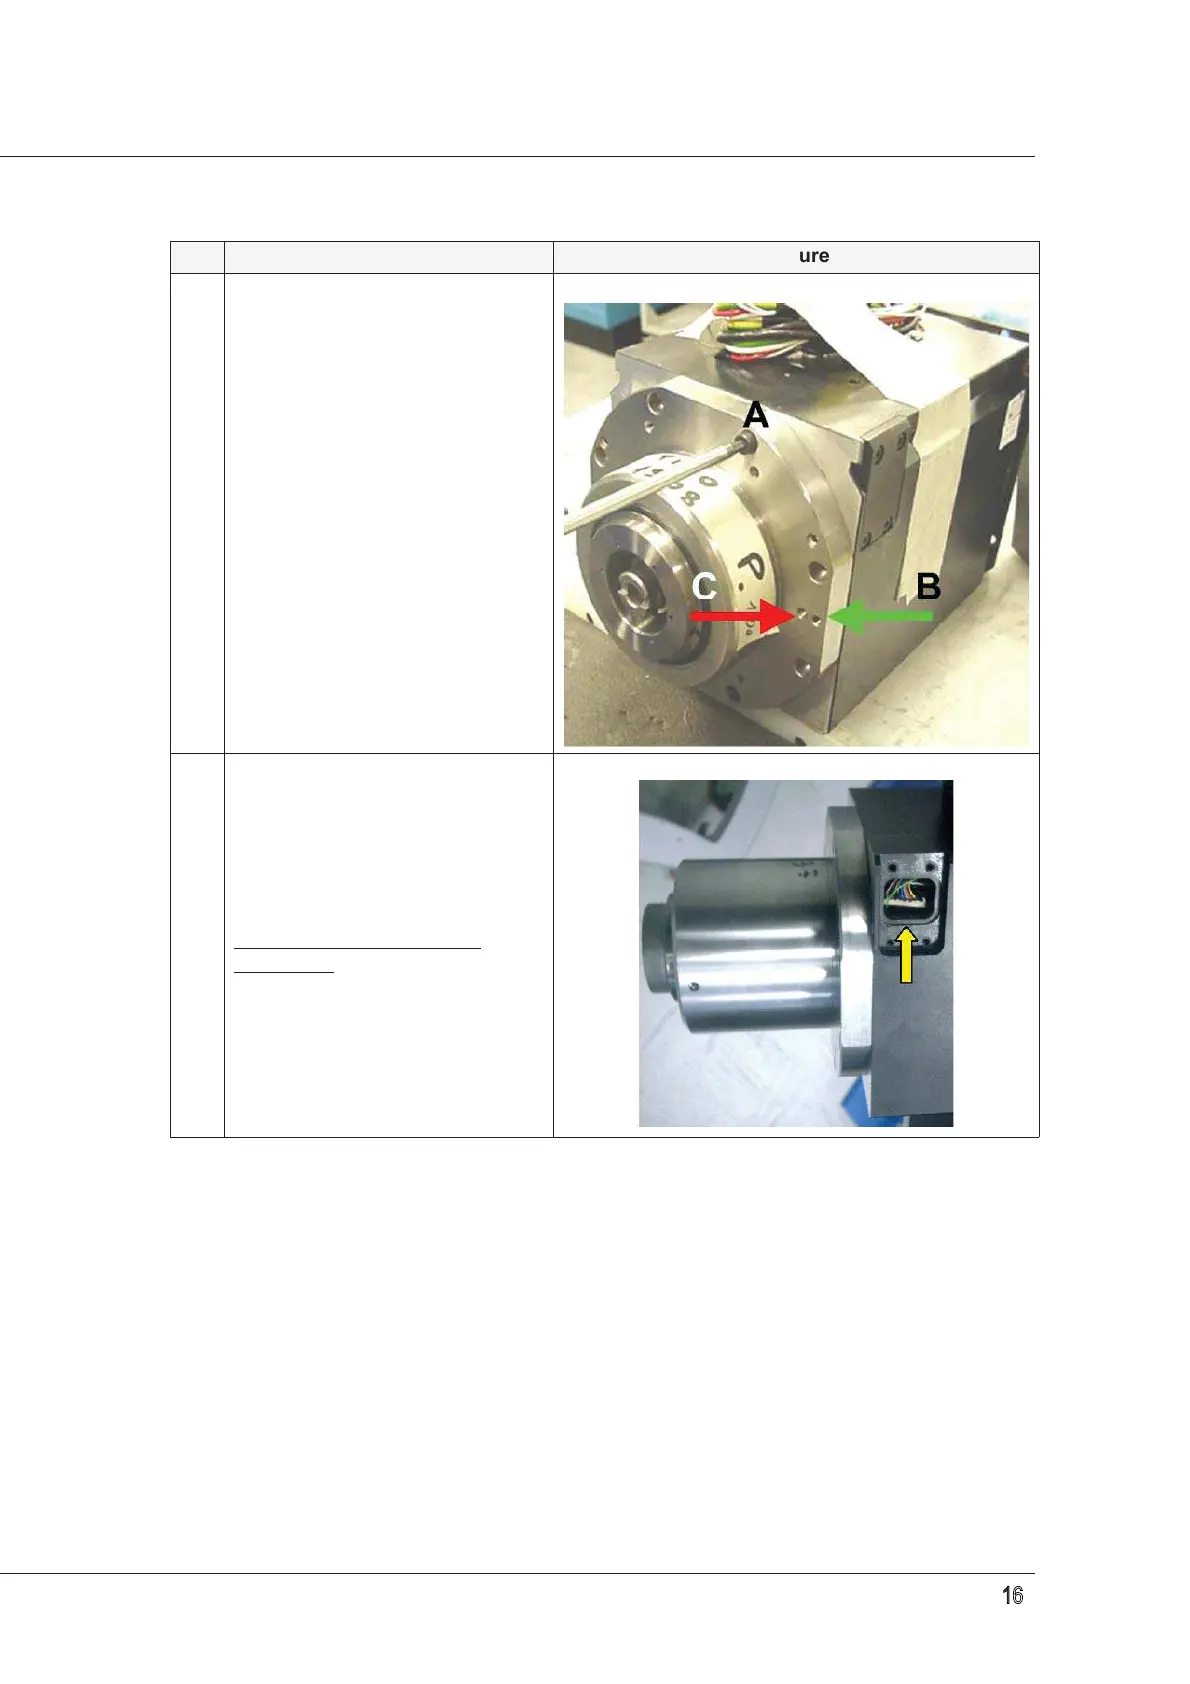
From the front part of the
electrospindle (the “nose”), remove
the eight 5x20 screws that hold the
shaft [adjacent figure, (C)].
To take out the shaft kit, use two
headless flat-bit screws (UNI
5923), M5x20 or longer.
Insert the screws in the holes
indicated by (B) (the outer holes,
one on each side).
DO NOT use the holes indicated
by (C) (the inner ones).
10
Carefully pull the shaft kit out by a
few centimetres.
FOR VERSIONS WITH AN
ENCODER: using the inspection
window, make sure the encoder
wiring isn't entangled.
Op. Description Picture