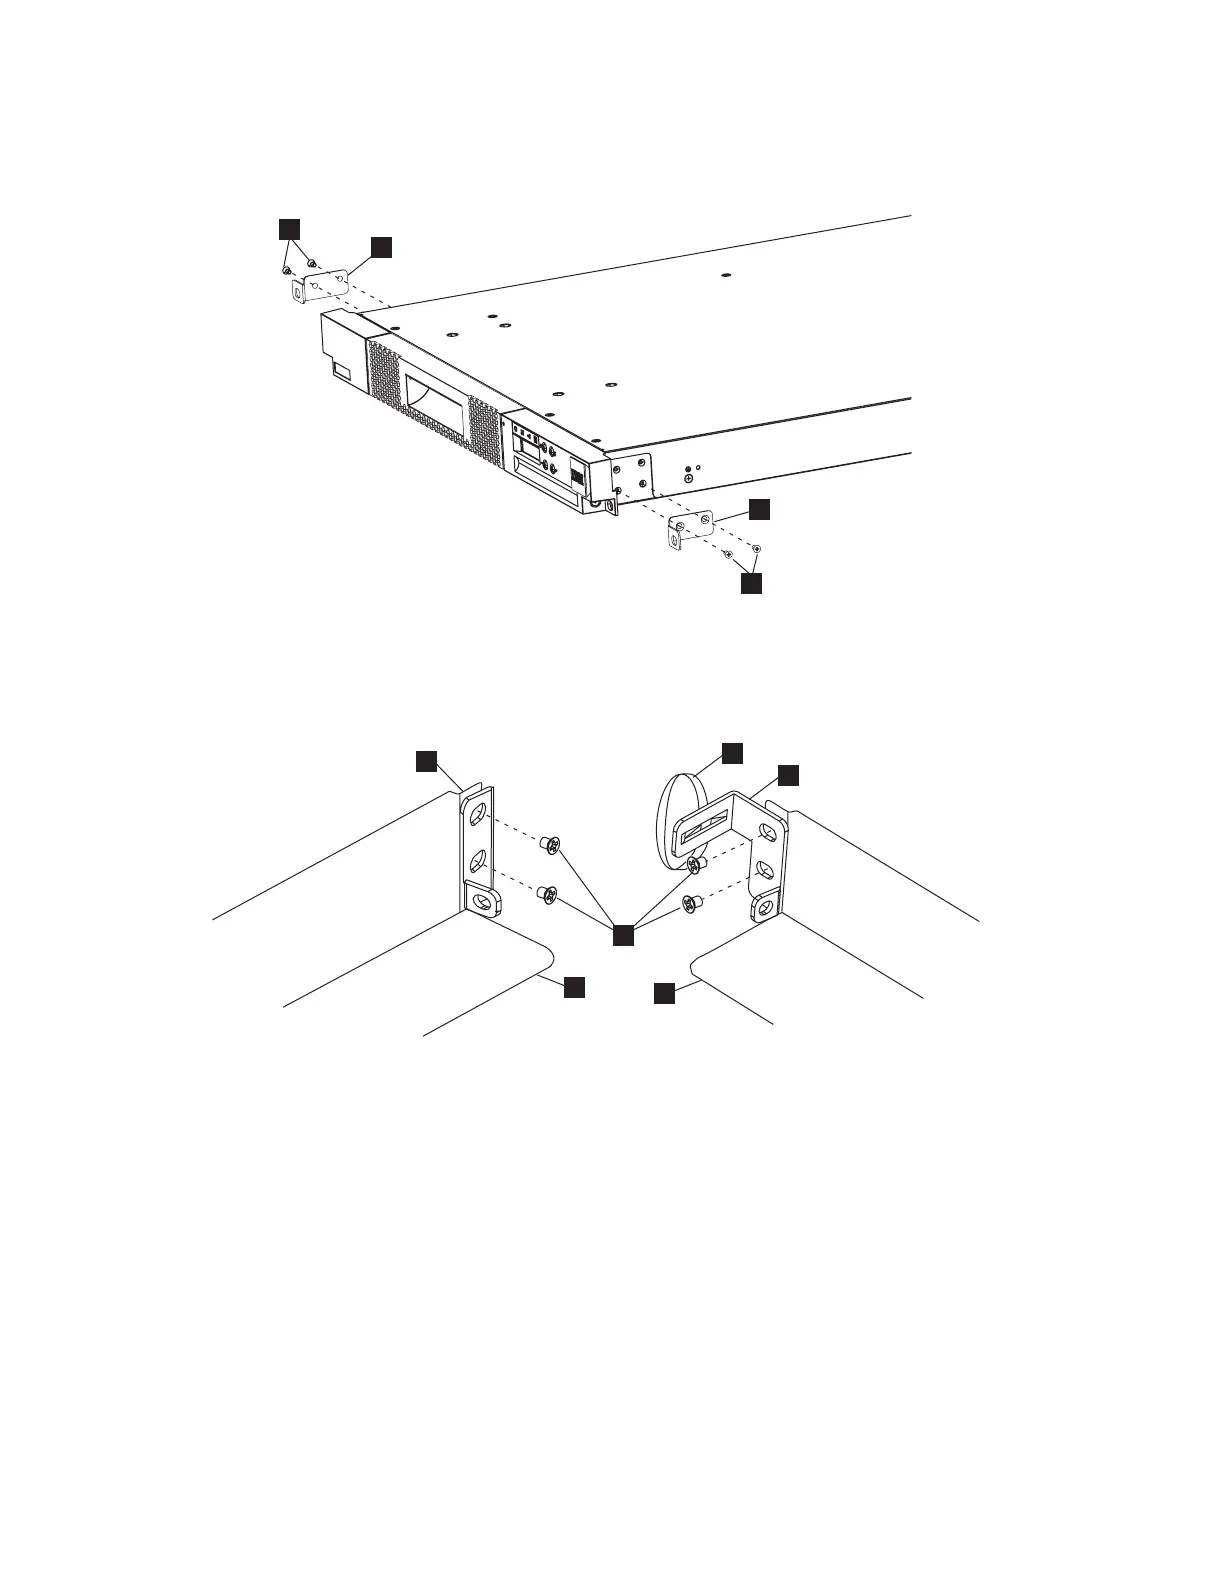
3. Attach the left ▌3▐ and right ▌4▐ (Figure 23) front brackets to the front of the library chassis with 2
flat-head screws ▌8▐ on each side. Use the bottom two screw holes on each side.
4. Attach the left ▌1▐ and right ▌2▐ rear brackets to the left ▌5▐ and right ▌6▐ front rails with 2
round-head screws ▌10▐ on each side (Figure 24).
Important: Do NOT tighten these screws completely.
5. Slide in the rear rails ▌7▐ from back to front, to create the rail assemblies. Ensure that the screw holes
face outwards (Figure 25 on page 31).
Figure 23. Attaching the front brackets to the library chassis
Figure 24. Attaching the rear brackets to the rails
30 IBM TS2900 Tape Autoloader: Setup, Operator, and Service Guide Machine Type 3572