SECTION 4 - HYDRAULICS
3121642 – JLG Lift – 4-11
pump remains in neutral. With the engine at normal operating
RPM, slowly check for forward and reverse machine operation.
Charge pressure may slightly decrease during forward or
reverse operation. Continue to cycle slowly between forward
and reverse for at least five minutes.
Shut down engine, remove gauges, and plug ports. Check res-
ervoir level and add filtered fluid if needed.
The machine is now ready for operation.
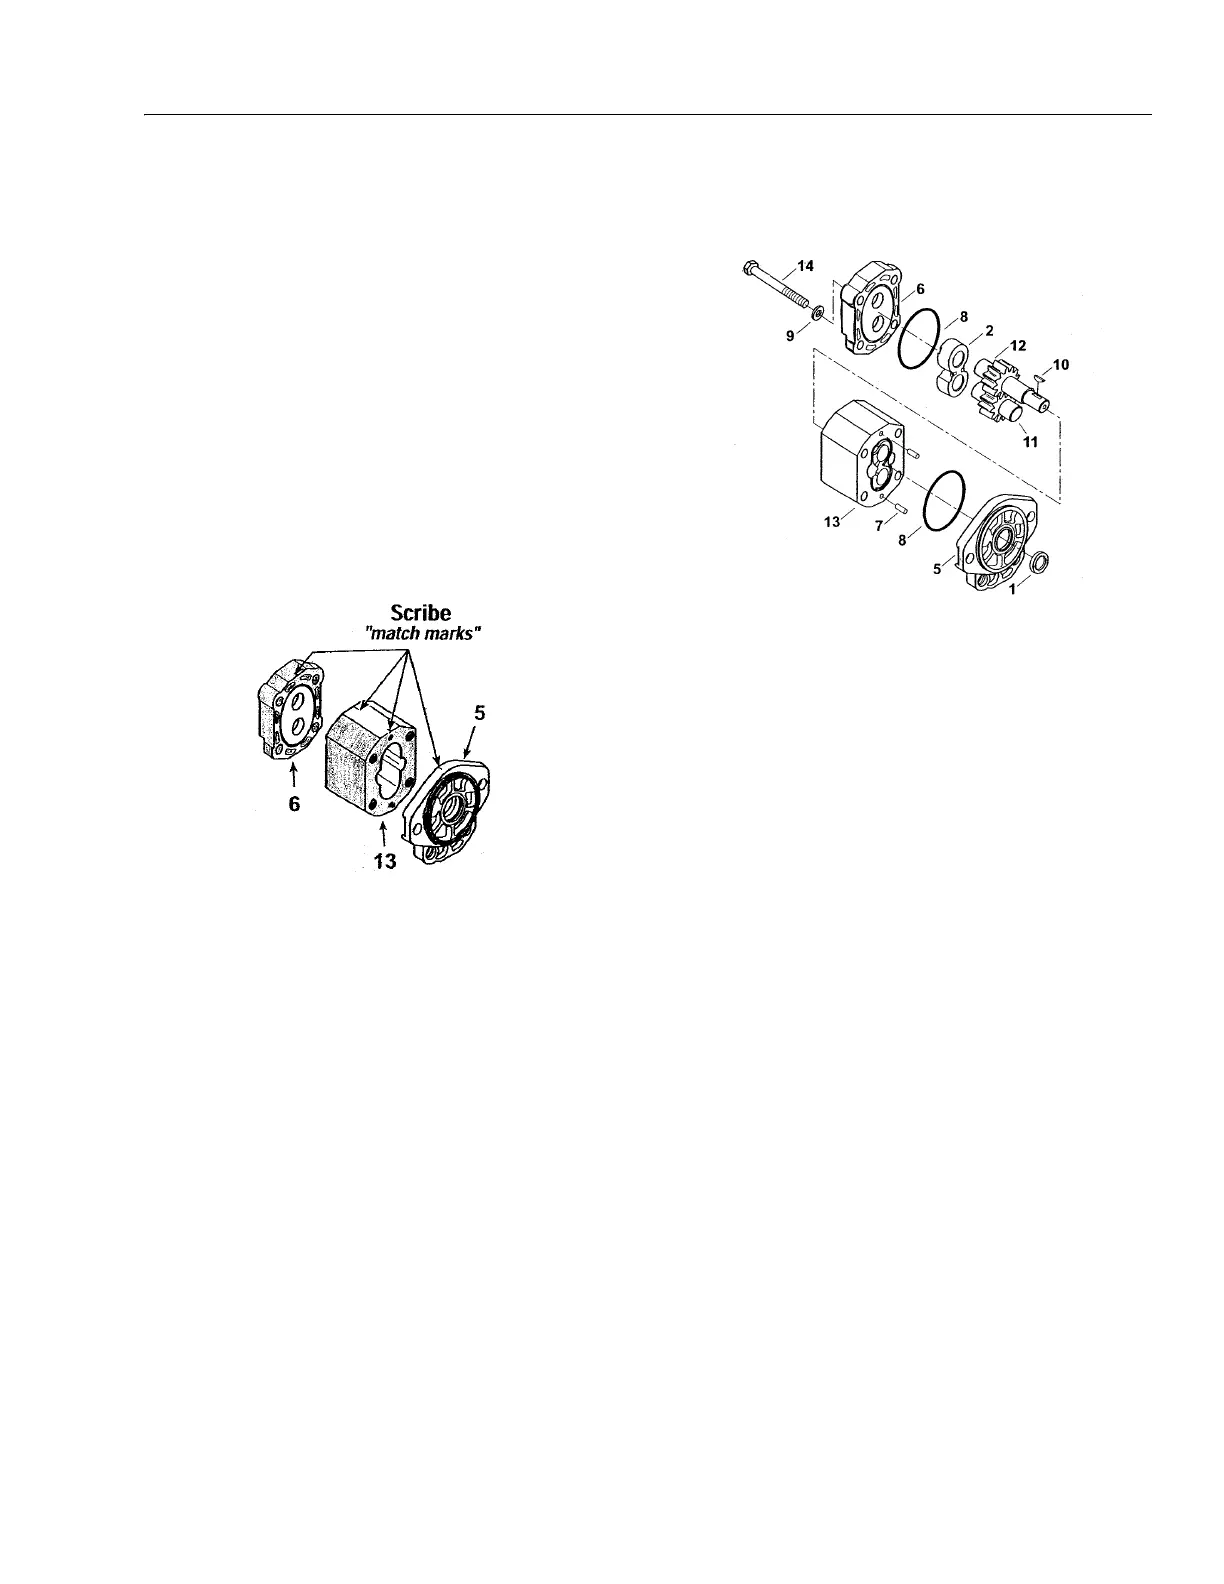
4.8 HYDRAULIC GEAR PUMP
Overhaul pump only in a clean, dust free location, using clean
tools and equipment. dirt and grit will damage the highly
machined surfaces and will result in leakage or premature fail-
ure of the pump.
Before beginning disassembly, scribe "match marks" on the
body (13) and covers (5 and 6) to ensure that the pump will be
reassembled in the same manner as it was shipped from the
factory. If the body or rear cover is replaced during overhaul,
scribe a match mark on the new part in the same location as
on the part it replaced.
Pump Disassembly
1. Clean outside of pump with a good grade solvent and
dry thoroughly.
2. On models with a splined drive shaft, proceed to step 3.
On models with a keyed drive shaft, remove drive key
(10) from drive shaft. Using a file or stone, remove burrs
from shaft end of keyway.
3. Using light clamping pressure on the ears of the front
cover, secure unit in vise with shaft side down. Remove
the cap screws (14) and washers (9).
4. Separate rear cover (6) from the body (13). The static seal
(8) may remain either with the body or the cover. In
either case, remove the static seal and discard.
5. Lift out the rear bearing block (2), drive gear (12), and
driven gear (11).
6. Separate body (13) from front cover (5). Dowel pins (7)
and the front static seal (8) may remain with either the
body (13) or the front cover (5). In either case, remove
the static seal and discard.
7. The front bearing block (2) will typically remain in the
body (13). Invert the body and lift out the bearing block.
8. Invert front cover (5) with shaft seal up. Remove the
shaft seal (1) by prying it out with a large screwdriver.
NOTE: During disassembly, take special note of the wear patterns
on the bearing blocks (2) and body (13). Relate these pat-
terns to the inlet and outlet sides of the pump. The large
port ,whether in the body (13) or the rear cover (6), corre-
sponds to the inlet side of the pump. The inlet side of the
body can be identified by the gear contact pattern in the
gear bore. The bearing block will have somewhat heavier
wear patterns on the inlet side.
Parts Inspection
1. Wash all parts and dry thoroughly.
2. Inspect front and rear bearing block. Replace if scoring
or uneven wear is observed.