SECTION 3 - CHASSIS, PLATFORM & SCISSOR ARMS
3-30 – JLG Lift – 3121642
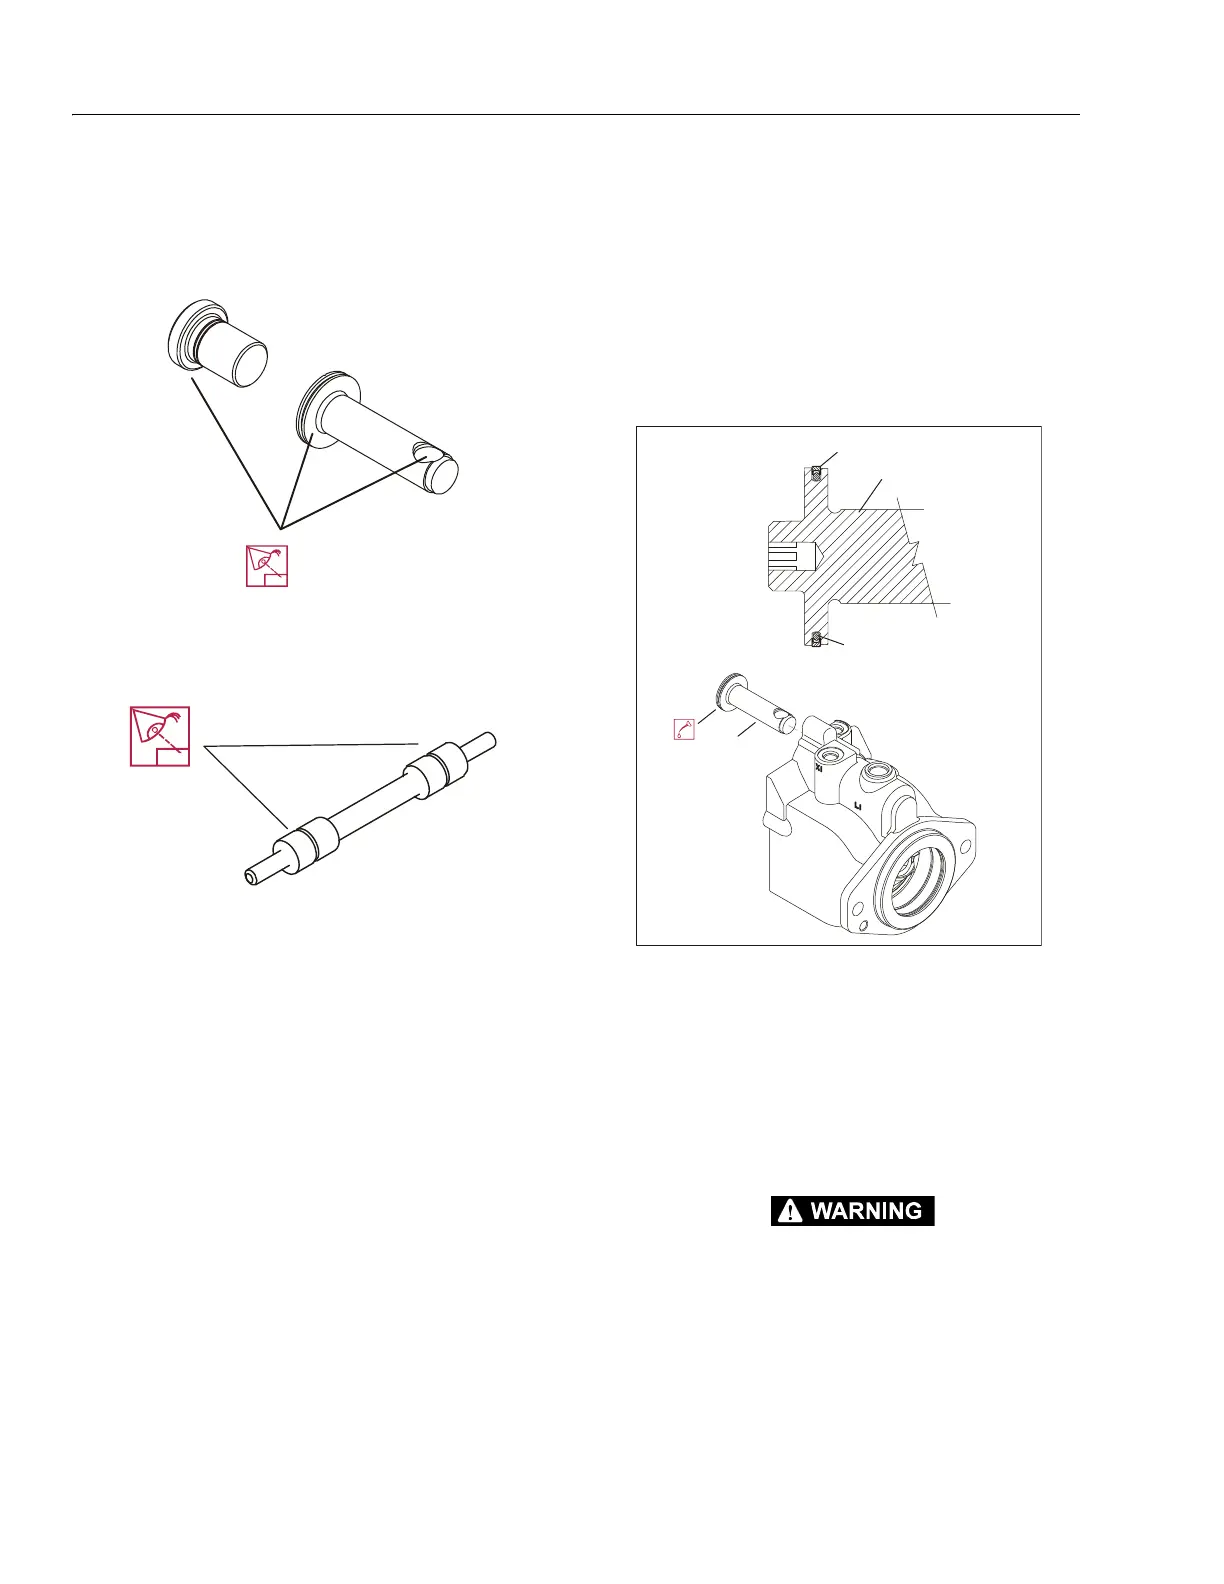
SERVO PISTON AND MINIMUM ANGLE STOP
Inspect the minimum angle stop, servo piston head, and servo
piston ball-socket for damage or excessive wear. Replace if
necessary.
LOOP FLUSHING SPOOL
Inspect the loop flushing spool. Check for cracks or damage.
Replace if necessary.
Assembly
1. Install new O-ring (1) and piston seal (2) to the servo pis-
ton (3). Install the piston seal over the O-ring.
Installing the piston seal stretches it, making it difficult
to install the servo piston in its bore. Allow 30 minutes
for the seal to relax after installation. To speed up seal
relaxation, compress the seal by installing the piston
head into the servo cavity in the end-cap and let it stand
for at least five minutes.
2. After piston seal has relaxed, lubricate and install servo
piston into the housing bore. Align the piston with the
ball socket facing the inside of the housing.
RISK OF PERSONAL INJURY: COMPRESSING THE BLOCK SPRING REQUIRES
ABOUT 80 TO 90 LBF (350 TO 400 N) OF FORCE. USE A PRESS SUFFICIENT TO
MAINTAIN THIS FORCE WITH REASONABLE EFFORT. ENSURE THE SPRING IS
SECURE BEFORE ATTEMPTING TO INSTALL THE SPIRAL RETAINING RING.
RELEASE THE PRESSURE SLOWLY AFTER THE RETAINING RING IS INSTALLED.
1. O-ring
2. Piston Seal
3. Servo Piston
Figure 3-17. Servo Piston