FILTER ELEMENT REPLACEMENT
1. Follow normal procedures and shut down the
engine. Clean dirt and dust off area around air
cleaner element cover (4, Figure 5-1).
2. Loosen large wing nut (5, Figure 5-2) on air cleaner
cover to free main element assembly (10). Pull
main element clear of assembly.
3. Inspect filter element carefully for possible dam-
age, holes, breaks, etc., which might affect reuse
of element. If element appears serviceable other
than being dirty, proceed with the cleaning proce-
dure. If defects are found in filter element, wing
nut assembly (5) must be removed from element
assembly and installed on the new filter element.
4. Check safety (secondary) filter element indicator
nut (7). If solid red area is showing, safety filter
replacement is required. If center is green, safety
element does not require service.
Have a new safety (secondary) filter element on
hand before removing old one. Do not keep intake
system open to the atmosphere any longer than
absolutely necessary.
5. If indicator indicates safety filter replacement is
required, remove indicator and remove safety fil-
ter element. Discard element; DO NOT attempt to
clean the safety element.
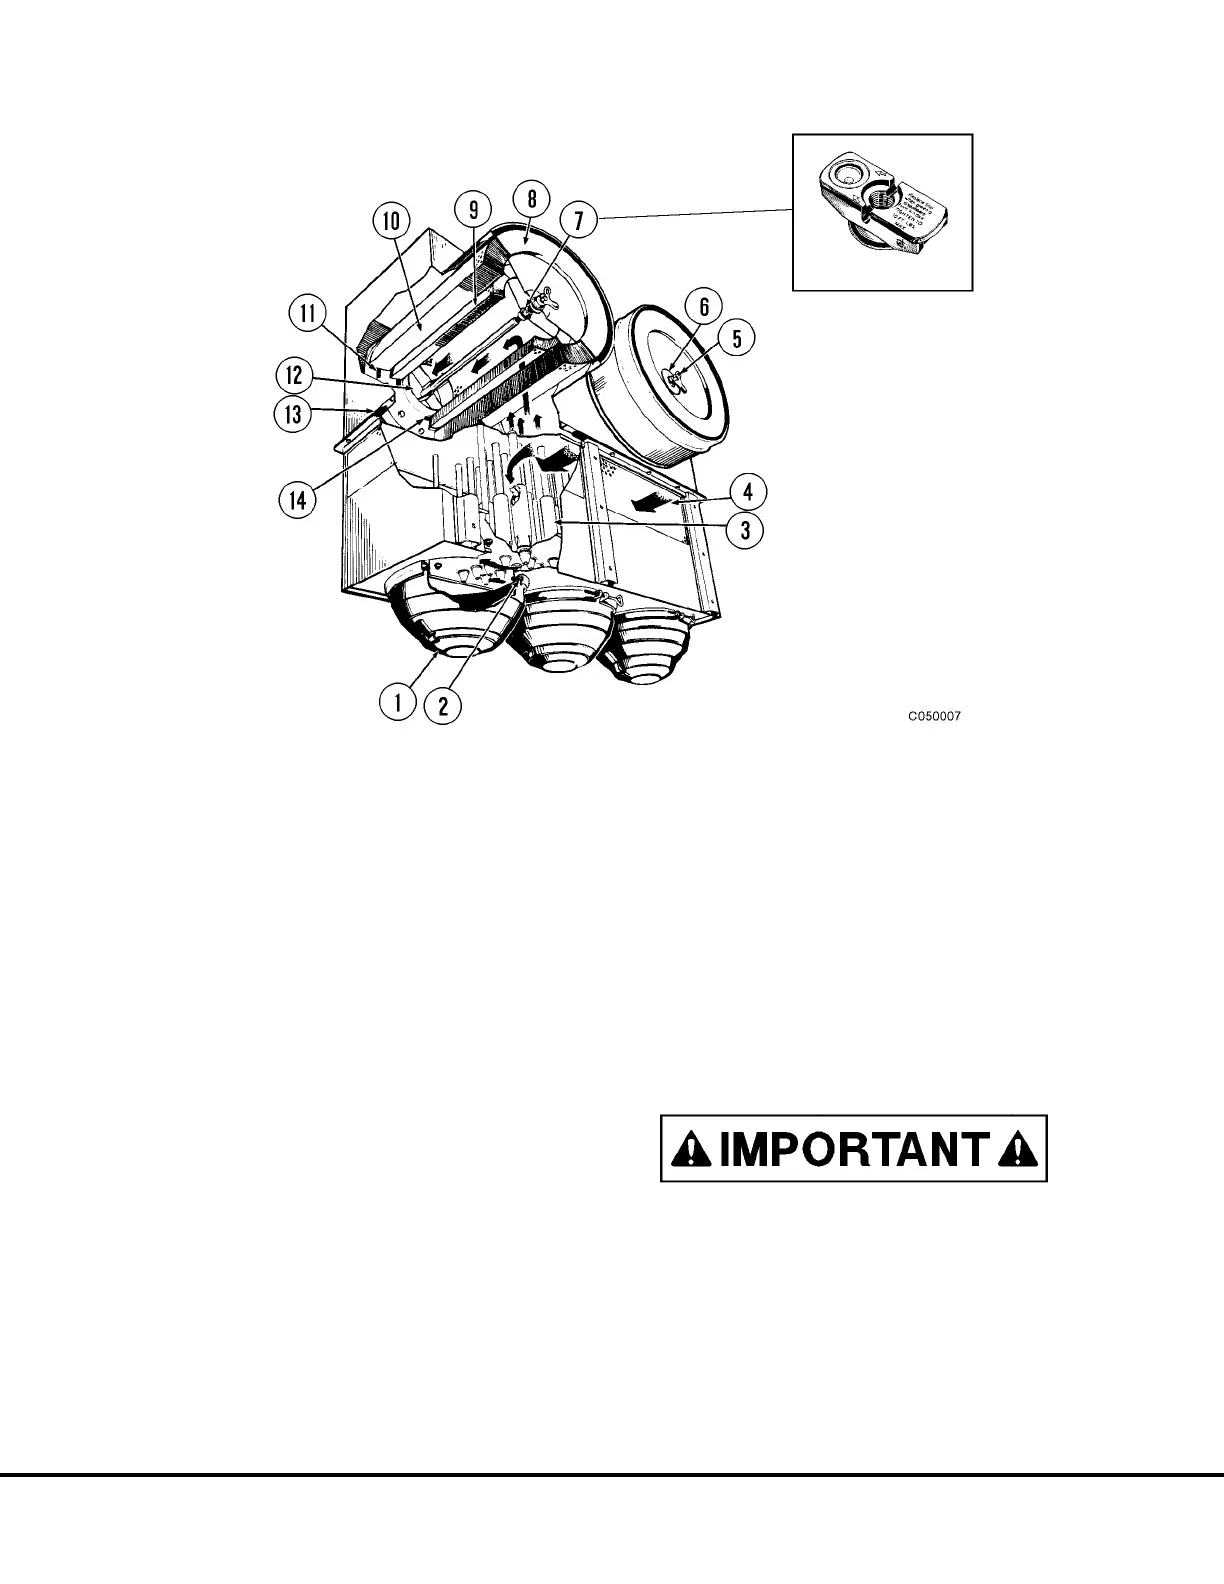
FIGURE 5-2. AIR CLEANER ASSEMBLY
1. Dust Cap
2. Dust Cap Gasket
3. Tube
4. Unfiltered Air Inlet
5. Wing Nut
6. Wing Nut Gasket
7. Safety Element Indicator
8. End Cover
9. Safety Filter Element
10. Main Filter Element
11. Main Element Gasket
12. Clean Air Outlet
13. Pre-Cleaner Gasket
14. Safety Filter Element
Gasket
C5-2 Air Filtration System C05013 5/98