BODY PADS
It is not necessary to remove the dump body to replace
body pads. Pads should be inspected during sched-
uled maintenance inspections and replaced if worn
excessively.
1. Raise the body to a height sufficient to allow
access to all pads.
Place blocks between the body and frame. Secure
blocks in place.
2. Remove hardware attaching pads to the dump
body. Refer to Figure 3-4.
3. Remove body pad and shims. Note number of
shims installed at each pad location.
(The rear pad on each side should have one less
shim than the other pads.)
4. Install new pads with the same number of shims
as removed in step 3.
5. Install the mounting hardware and torque to 65
ft.lbs. (88.1 N-m)
6. Remove blocks from frame and lower body onto
the frame.
Adjustment
1. Vehicle must be parked on a flat, level surface for
inspection.
2. All pads, except the rear pad on each side, should
contact the frame with approximately equal com-
pression of the rubber.
3. A gap of approximately 0.06 in. (1.5 mm) is re-
quired at each rear pad. This can be accom-
plished by using one less shim at each rear pad.
4. If pad contact appears to be unequal, repeat the
above procedure.
! IMPORTANT !
Proper body pad to frame contact is required to
assure maximum pad life.
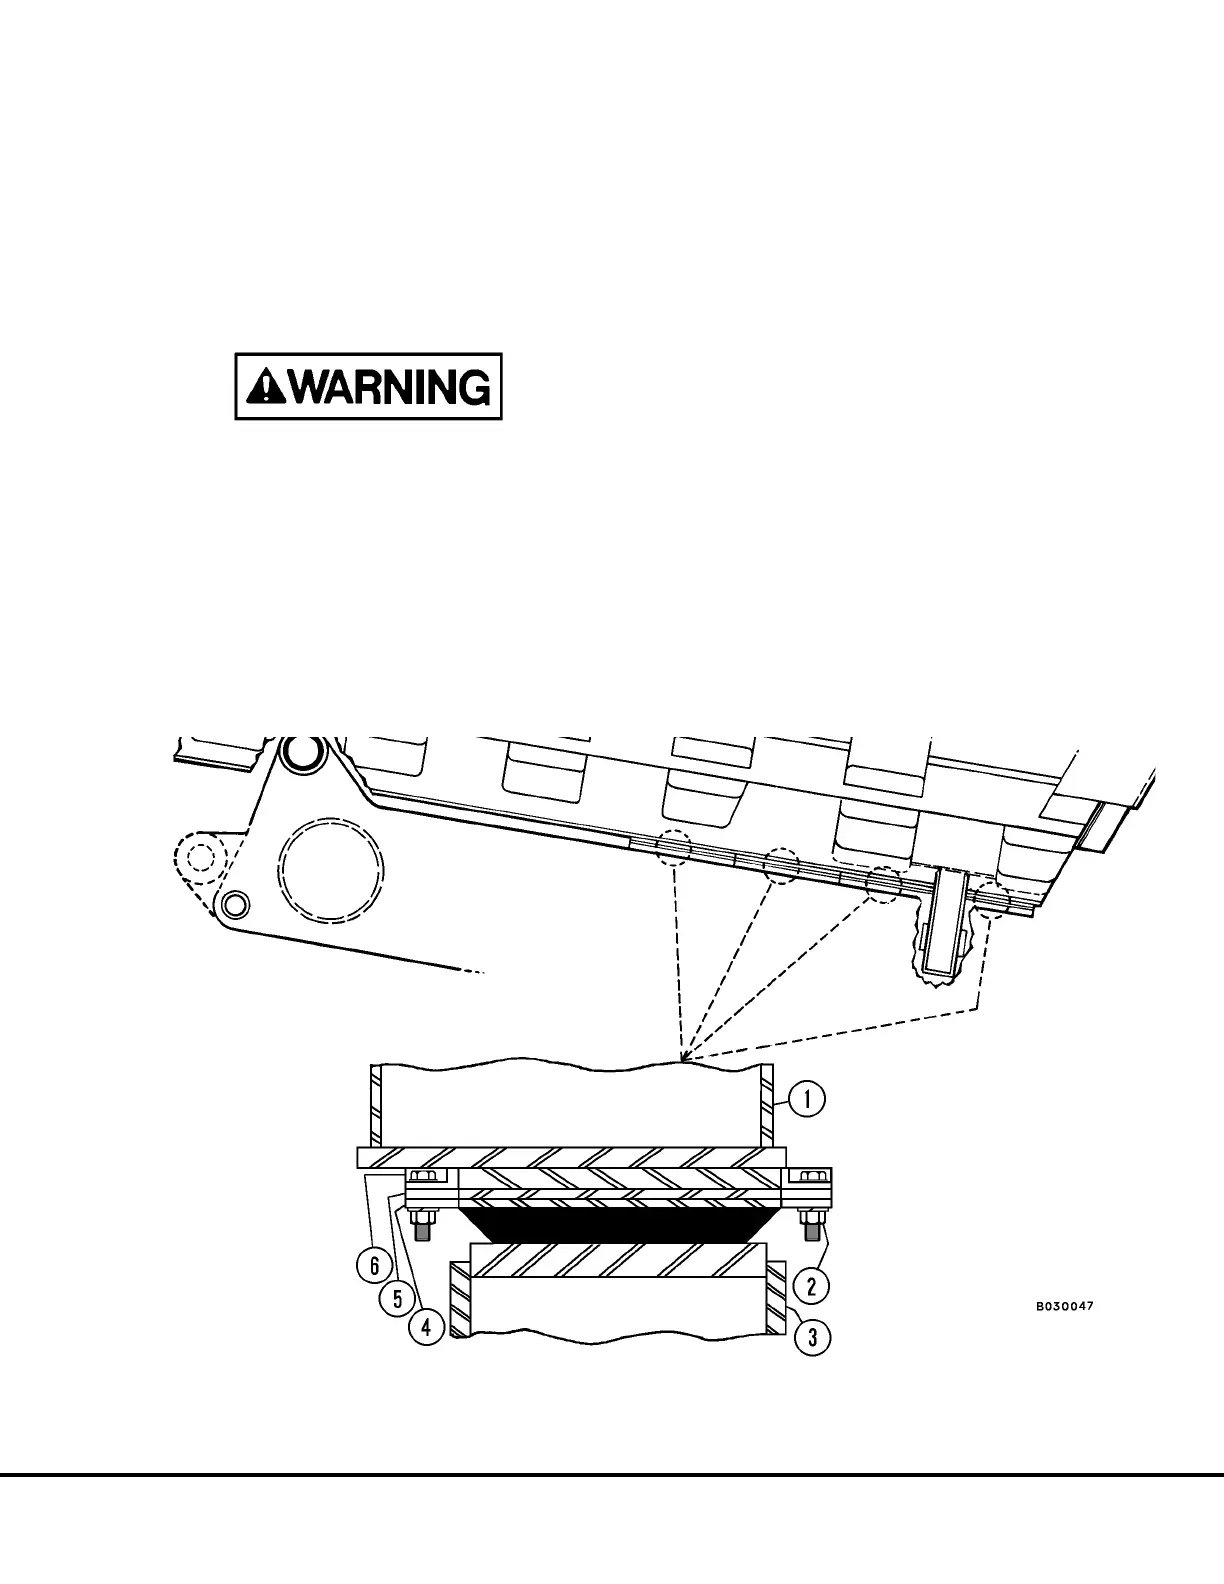
FIGURE 3-4. BODY PAD INSTALLATION
1. Dump Body
2. Pad Mounting Hardware
3. Frame
4. Body Pad
5. Shim
6. Mounting Pad
B03013 03/01 Dump Body B3-3