74
Example 2)
For tracks 1, 2 and 3, set the “MIDI Channel” (2–1a) to 01,
02, and 03 respectively, and set “Status” (2–1a) to INT.
Assign arpeggiator A to tracks 1 and 2, and arpeggiator B
to track 3. Check the “Arpeggiator Run A, B” (7–1a) set-
ting.
• In “Track Select,” choose Track01.
Playing the keyboard when the front panel ARPEGGIA-
TOR [ON/OFF] key is off will play the sound assigned to
track 1.
Playing the keyboard when the front panel ARPEGGIA-
TOR [ON/OFF] key is on will cause arpeggiator A to
operate for tracks 1 and 2, and produce sound for both
tracks.
• In “Track Select,” choose Track02.
Playing the keyboard when the front panel ARPEGGIA-
TOR [ON/OFF] key is off will play the sound assigned to
track 2.
Playing the keyboard when the front panel ARPEGGIA-
TOR [ON/OFF] key is on will cause arpeggiator A to
operate for tracks 1 and 2, and produce sound for both
tracks.
• In “Track Select,” choose Track03.
Playing the keyboard when the front panel ARPEGGIA-
TOR [ON/OFF] key is off will play the sound assigned to
track 3.
Playing the keyboard when the front panel ARPEGGIA-
TOR [ON/OFF] key is on will cause arpeggiator B to
operate for track 3, and play the sound assigned to track
3.
• Alternatively, you could choose Track01 in “Track
Select” to run arpeggiator A for tracks 1 and 2, and use
an external MIDI device connected to the TRITON’s
MIDI IN to send note data to MIDI channel 3 to play
arpeggiator B.
Arpeggiator Run A, B
When the ARPEGGIATOR [ON/OFF] key is on, the arpeg-
giator(s) that are checked here will function for the track(s)
to which they are assigned by “Arpeggiator Assign.” When
the arpeggiator is on, A and B can be turned on/off indepen-
dently.
▼ 7–1: Page Menu Command
7–1A: Copy Arpeggiator
This command copies arpeggiator settings.
☞ “Combination 7–1A: Copy Arpeggiator.”
7–3: Arpegg. A (Arpeggiator A)
7–4: Arpegg. B (Arpeggiator B)
In the Arpegg. A tab you can make settings for arpeggiator
A, and in the Arpegg. B tab you can make settings for arpeg-
giator B. The “Copy Arpeggiator” (7–1A) page menu com-
mand can also be used to copy arpeggiator settings from
another mode such as Program mode.
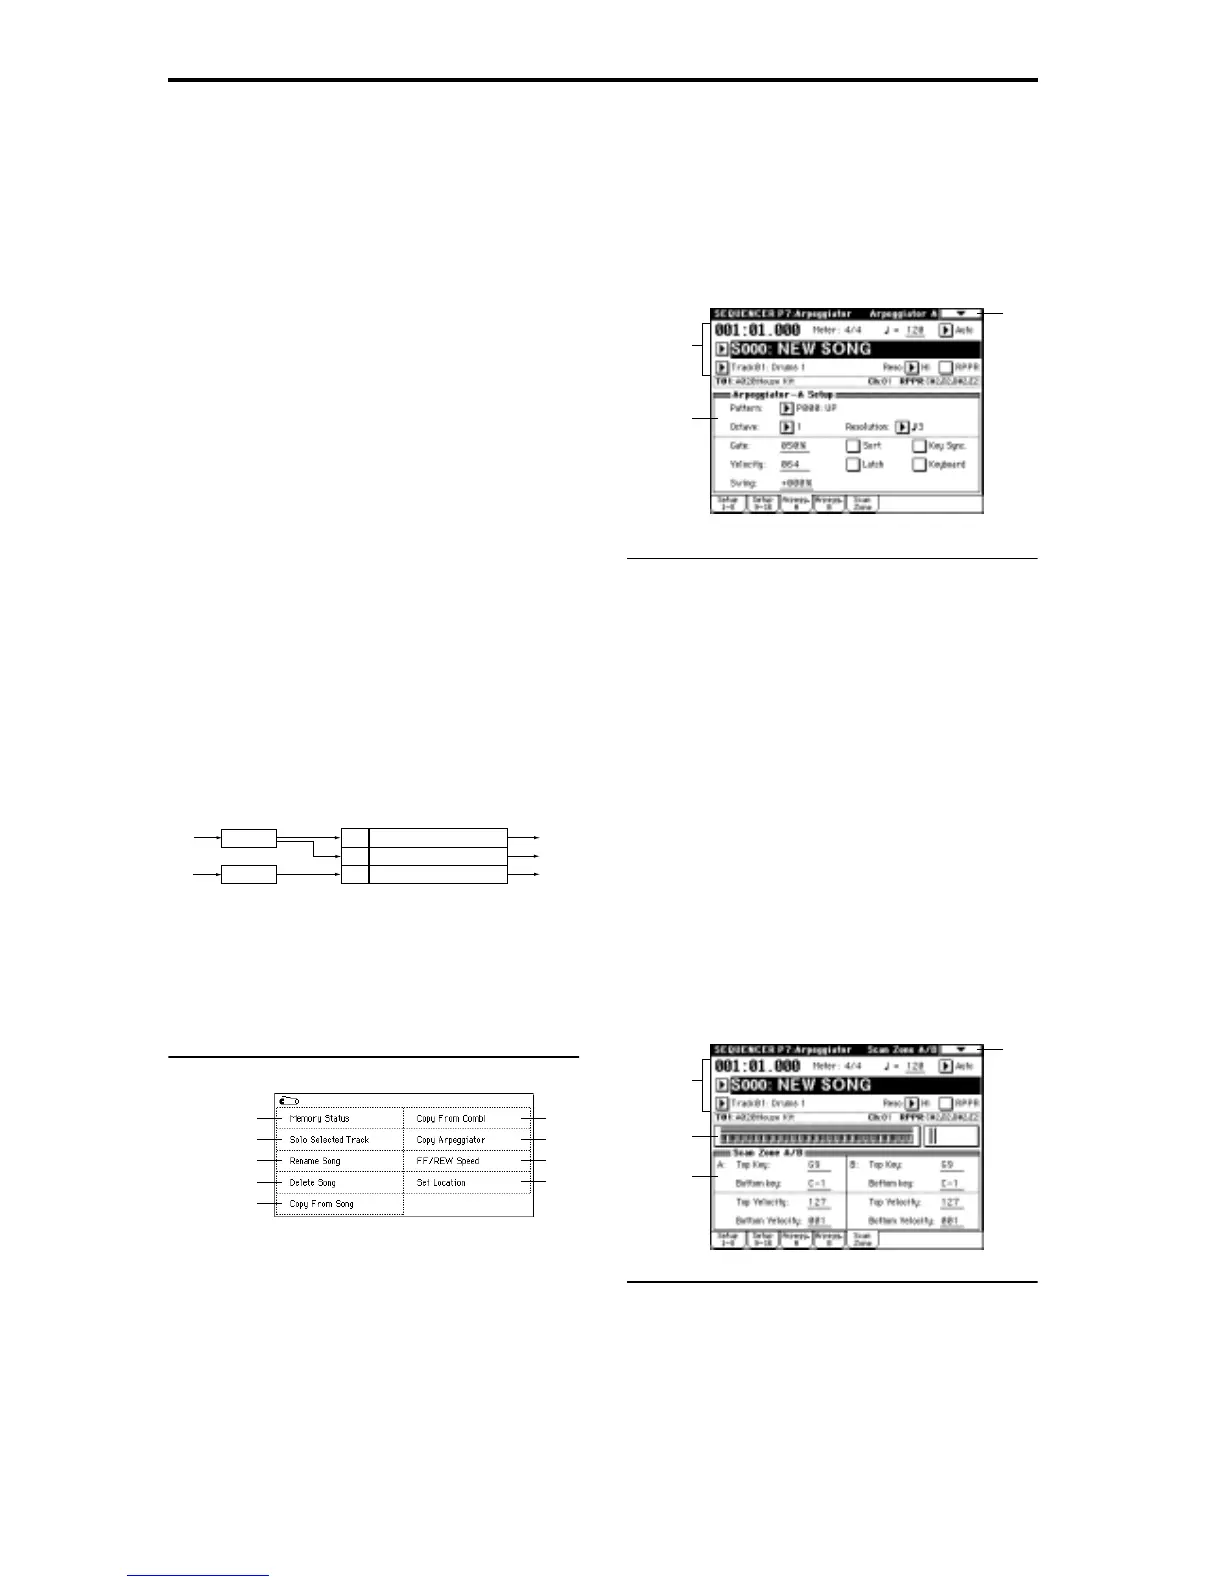
7–3(4)a: Arpeggiator–A(B) Setup
Pattern (Pattern No.)
[P000...P004, U000(A/B)...U231(D)]
Octave [1, 2, 3, 4]
Resolution [ , , , , , ]
Gate [000...100(%), Step]
Velocity [001...127, Key, Step]
Swing [–100...+100(%)]
Sort
Latch
Key Sync. (Keyboard Synchronize)
Keyboard
These are the arpeggiator parameters for the song. (☞“Pro-
gram 7–1: Arpegg. Setup (Arpeggiator Setup)”)
7–5: Scan Zone (Scan Zone A/B)
Specify the range of notes and velocities that will trigger
each arpeggiator A and B.
7–5a: Zone Map
This shows the “Scan Zone” settings for arpeggiators A and
B (
☞Combination “Zone Map” 7–4a).
Pattern - B
Pattern - A
Pattern - A
Track2 MIDI Ch=2ch Status=INT
Arpeggiator
A
Arpeggiator
B
Arpeggiator
Assign
A
A
Pattern - A
Pattern - B
Trigger
= Ch1, Ch2
Trigger
= Ch3
Track3 MIDI Ch=3ch Status=INTB
Track1 MIDI Ch=1ch Status=INT
0–1A
0–1B
0–1C
0–1D
0–1E
0–1F
7–1A
0–1I
0–1J
0–1a
.
.
.
0–1g
7–1
7–3a
0–1a
.
.
.
0–1g
7–1
7–5b
7–5a