Sampling
P0
P1 P2 P3 P4 P8
87
If you increase this value, you will always be sampling
more than you need. Normally you should leave this
set at 000ms, and set it to a minimal value only when
necessary.
ADC OVERLOAD !!
The “ADC OVERLOAD!!” indication will appear if the sig-
nal level from AUDIO INPUT 1 and 2 exceeds the maximum
level. If this occurs, adjust the [LEVEL] knob or the output
level of the external sound source (
☞“Recording Level [dB]”
0–1d).
0–2c: Recording Level [dB]
[–inf, –72.0... 0.0...+18.0]
☞ Link: 0–1d
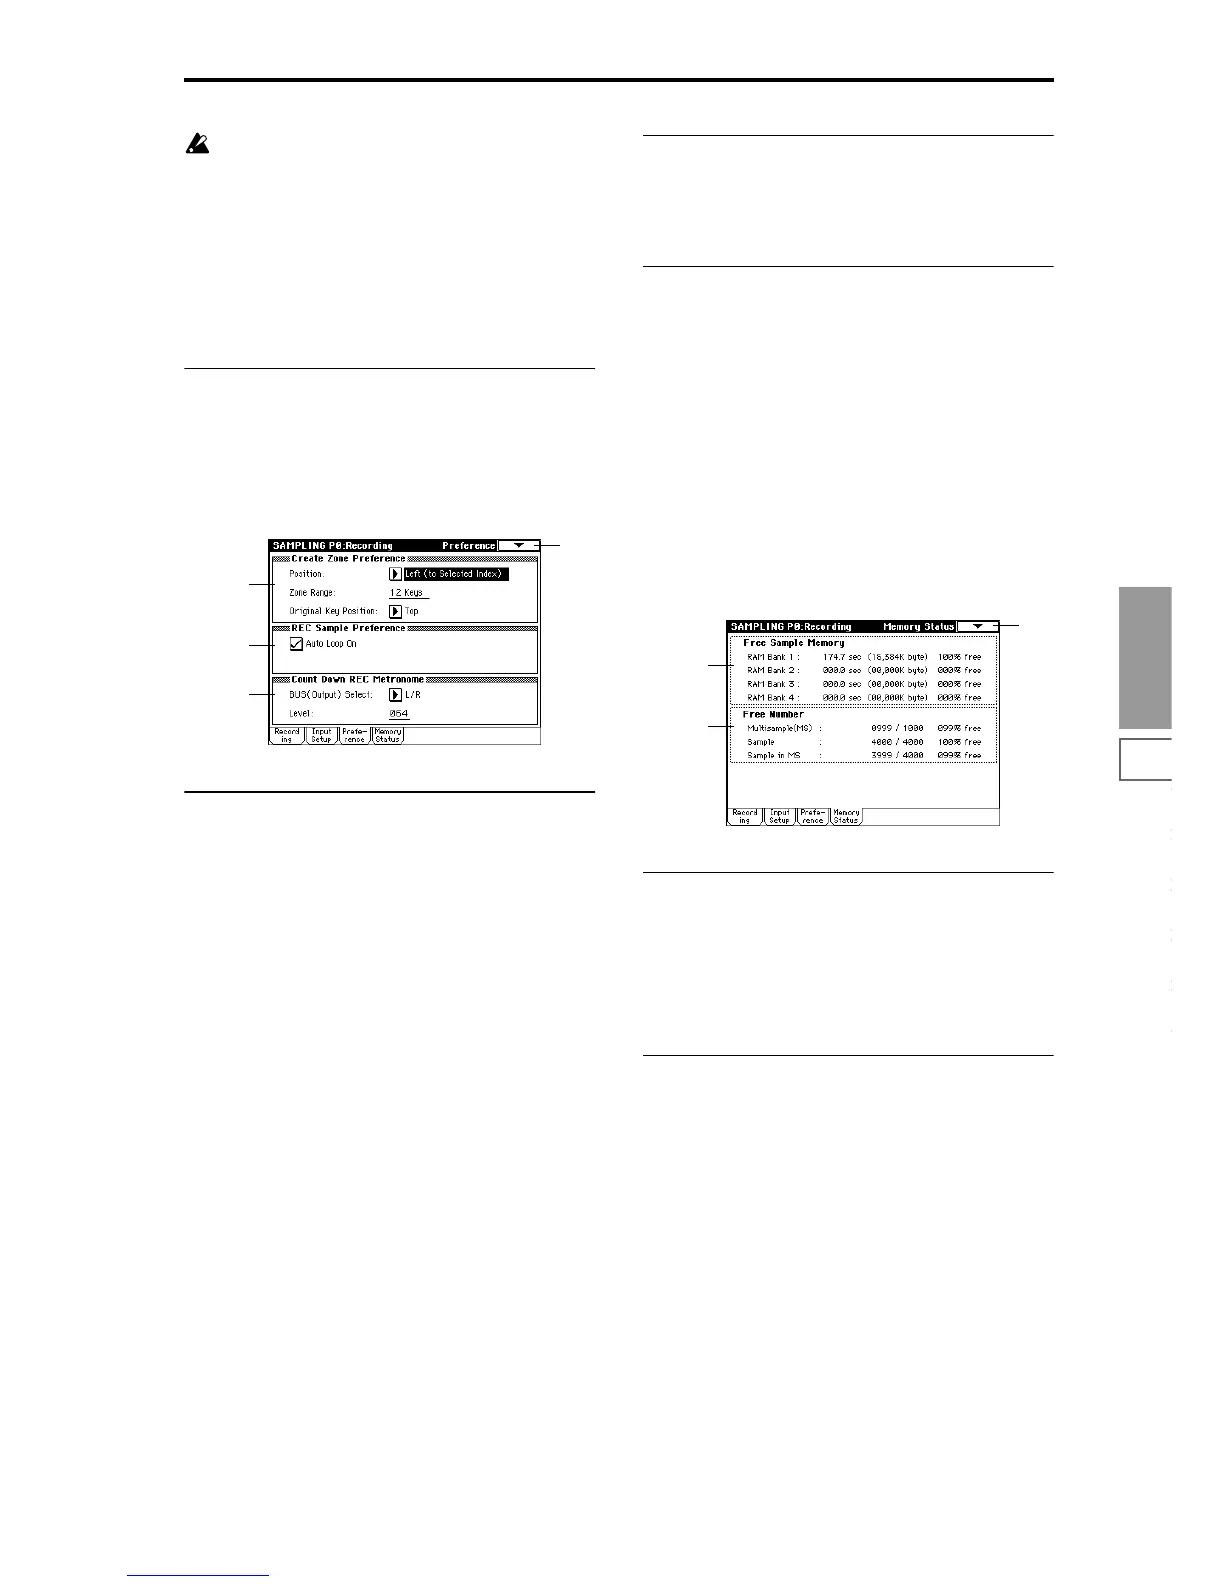
0–3: Preference
0–3a: Create Zone Preference
These settings determine the initial state of the indexes that
are created when you press the Create button (0–1b, 3–1c).
Each new index will be created according to the settings you
make here, but you are free to modify the settings later.
Position [Right, Left]
Specify whether the new index will be created at the right or
left of the selected index.
Right (to Selected Index): The new index will be created at
the right of the currently selected index.
Left (to Selected Index): The new index will be created at
the left of the currently selected index.
Zone Range [1 Key...127 Keys]
Specify the key range of the zone of the newly created index.
1Key: Each individual note of the keyboard will be an index.
The sample of an index will sound at its original key when
you play that note. This setting allows you to trigger multi-
ple samples across the keyboard.
2 Keys–127 Keys: The sample will change pitch in semitone
steps across the specified number of keys, centered on the
original key “OrigKey” (0–1b, 3–1b). If “Constant Pitch” (3–
1b) is checked, the pitch will not change.
Original Key Position [Bottom, Center, Top]
Specify where the original key will be located in the zone
(specified by “Zone Range”) for a newly created index.
Bottom: The lowest key in the zone will be the original key.
Center: The middle key in the zone will be the original key.
Top: The top key in the zone will be the original key.
0–3b: REC Sample Preference
Auto Loop On
Checked: The recorded sample will automatically be played
with looping turned on (
☞“P2: Loop Edit page”).
0–3c: Count Down REC Metronome
BUS(Output) Select (BUS Select) [L/R, 1, 2, 3, 4]
Specify the output destination of the metronome sound
played by “Count Down REC” (0–2b).
L/R: The metronome will be output from OUTPUT (MAIN)
L/Mono, R, and the headphones.
1, 2, 3, 4: The metronome will be output from OUTPUT
(INDIVIDUAL) 1, 2, 3, or 4 respectively.
Level [000...127]
Specify the level of the metronome sound played by “Count
Down REC.”
0–4: Memory Status
0–4a: Free Sample Memory
This shows the remaining amount of memory (the time
available for sampling, the size of the sample files that can
be loaded in Disk mode, or the size available for editing) in
RAM banks 1, 2, 3, and 4. The amount is shown in seconds,
bytes, and a percentage (%). The display will depend on the
amount of memory that is installed (
☞“RAM Bank” 0–1c).
0–4b: Free Number
This shows the maximum number of samples available in
Sampling mode for multisamples and samples. The remain-
ing number is also shown as a percentage (%) of the maxi-
mum.
Multisample(MS) [0000...0999/1000 000...099%]
Sample [0000...4000/4000 000...100%]
Sample in MS [0000...3999/4000 000...099%]
0–1
0–3a
0–3b
0–3c
0–1
0–4a
0–4b