Appendices
239
Option board/memory installation
procedure
Before you perform the installation, be sure to read the
foregoing section “Please note when installing an
option board/memory.”
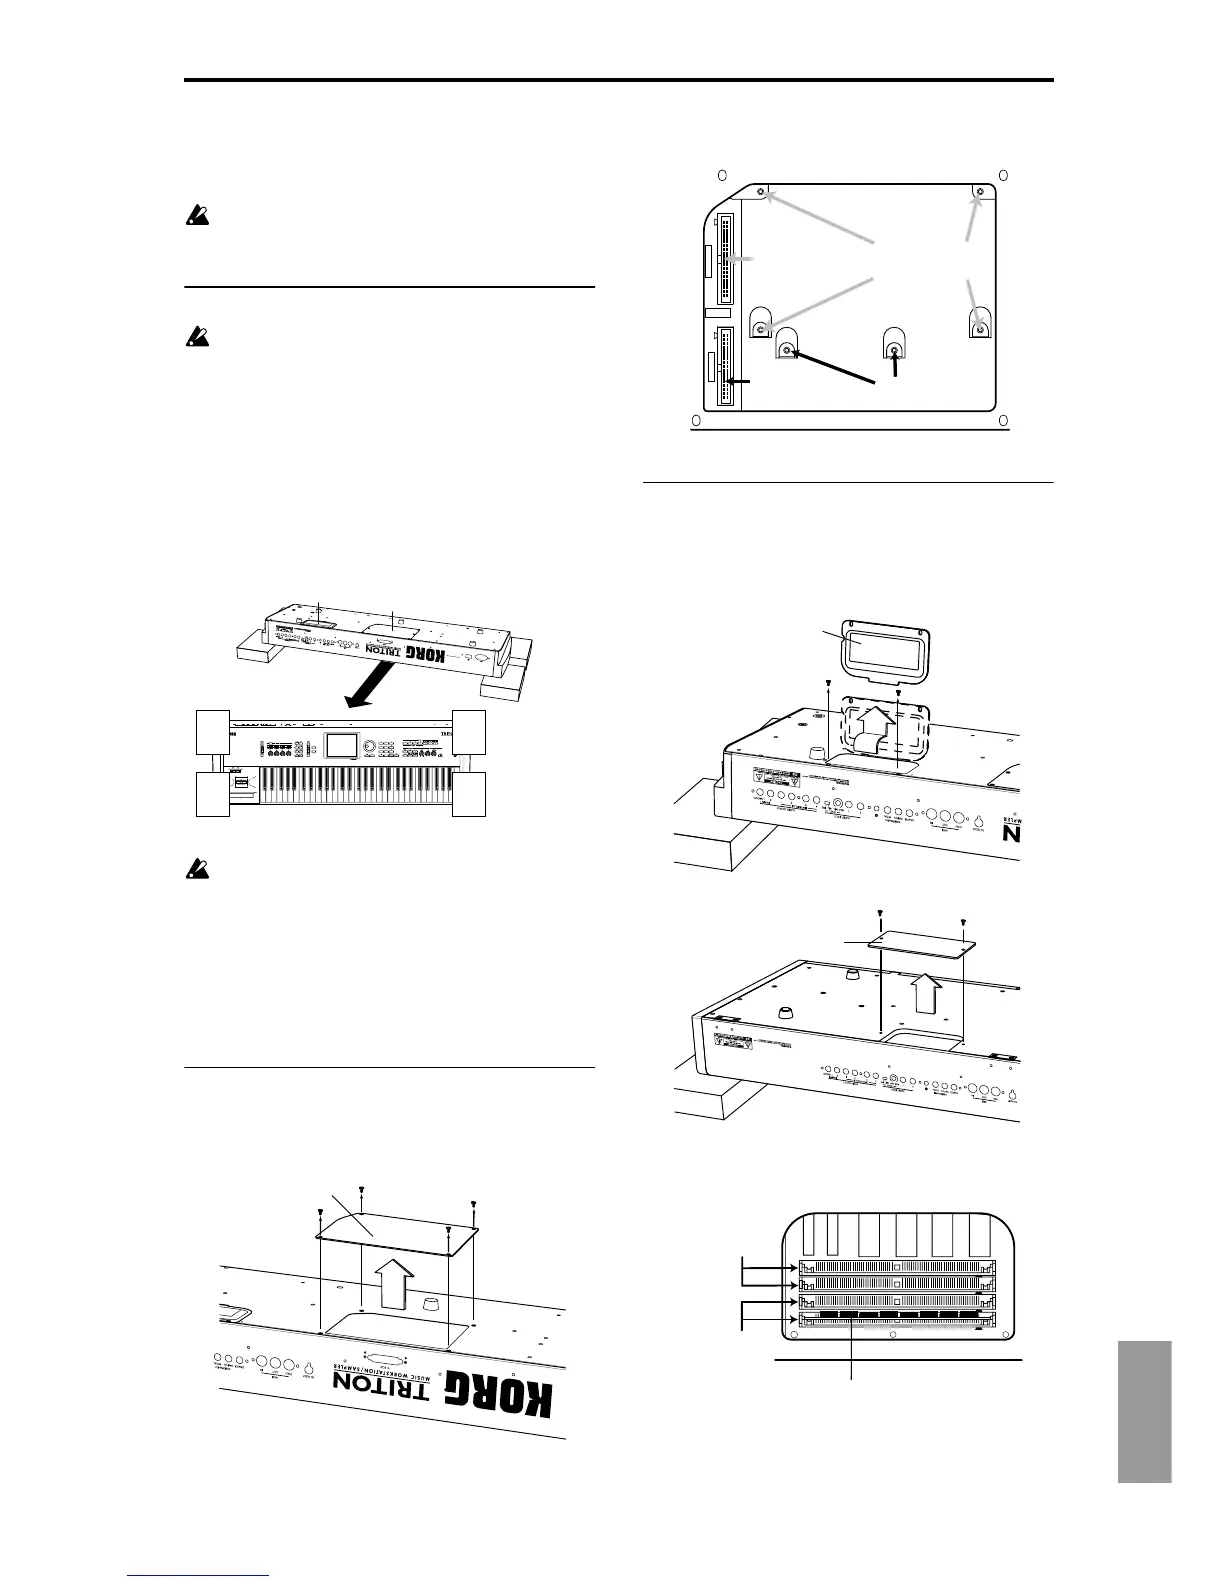
1. Preparations for installation
During the installation, be careful not to cut your hand
on any sharp edges of the TRITON or of the option
board/memory.
1 You will need a “+” (plus) screwdriver, and some maga-
zines or other material (to prevent damage to the joystick
and knobs etc.: see diagram below).
2 Turn off the TRITON, and disconnect the AC power sup-
ply cable and any other cables by which other devices are
connected.
3 As shown in the following diagram, place four maga-
zines etc. at the four corners of the instrument to prevent
damage to the joystick and knobs, and place the TRITON
upside down on top of them.
When turning the TRITON upside down, be careful not
to loose your balance and drop the instrument.
4 Detach the appropriate cover for the option board/mem-
ory you wish to install.
When installing the EXB-SCSI or EXB-MOSS, detach
cover “A.” When installing the EXB-PCM or DRAM
SIMM, detach cover “B.”
(
☞Detaching the cover is described in the following sec-
tions “1–A” or “1–B.”
1–A. Detaching cover “A” for the EXB-SCSI or EXB-
MOSS
5 Use a screwdriver to remove four screws from cover “A.”
When the TRITON is upturned and the rear panel is
toward you, cover “A” is the large one at the right.
1–B. Detaching cover “B” for EXB-PCM or DRAM
SIMM
5 Use a screwdriver to remove two screws from cover “B.”
When the TRITON is upturned and the rear panel is
toward you, cover “B” is the small one at the left.
View from below
Place in each of the four corners so that joystick and knobs are not contacted
Cover “A”
Cover “B”
Cover “A”
EXB–MOSS
EXB–SCSI
Screw holes for
installing EXB-MOSS
Rear panel
Connector for
EXB-MOSS
Connector for
EXB-SCSI
Screw holes for
installing EXB-SCSI
When cover “A” is removed
Factory-installed DRAM SIMM module
Slots for DRAM
SIMM modules
Slots for
EXB-PCM
Cover “B”
When cover “B” is removed
Cover “B”
TRITON proX
TRITON
TRITON pro
EXB-PCM
Slot2
EXB-PCM
Slot1
SIMM
Slot2
SIMM
Slot1