88
Here you can edit the sample data (waveform data) that you
sampled or loaded in Disk mode.
Editing operations such as deleting unwanted portions of
the waveform, reversing the waveform, or lowering the
sampling frequency can be performed in detail while view-
ing the “sample waveform display.”
The editing range specified in “Edit Range Start” and
“Edit Range End” (1–1c) will be played when you press
the [START/STOP] key, allowing you to audition the
results (
☞“Keyboard & Index” 0–1a).
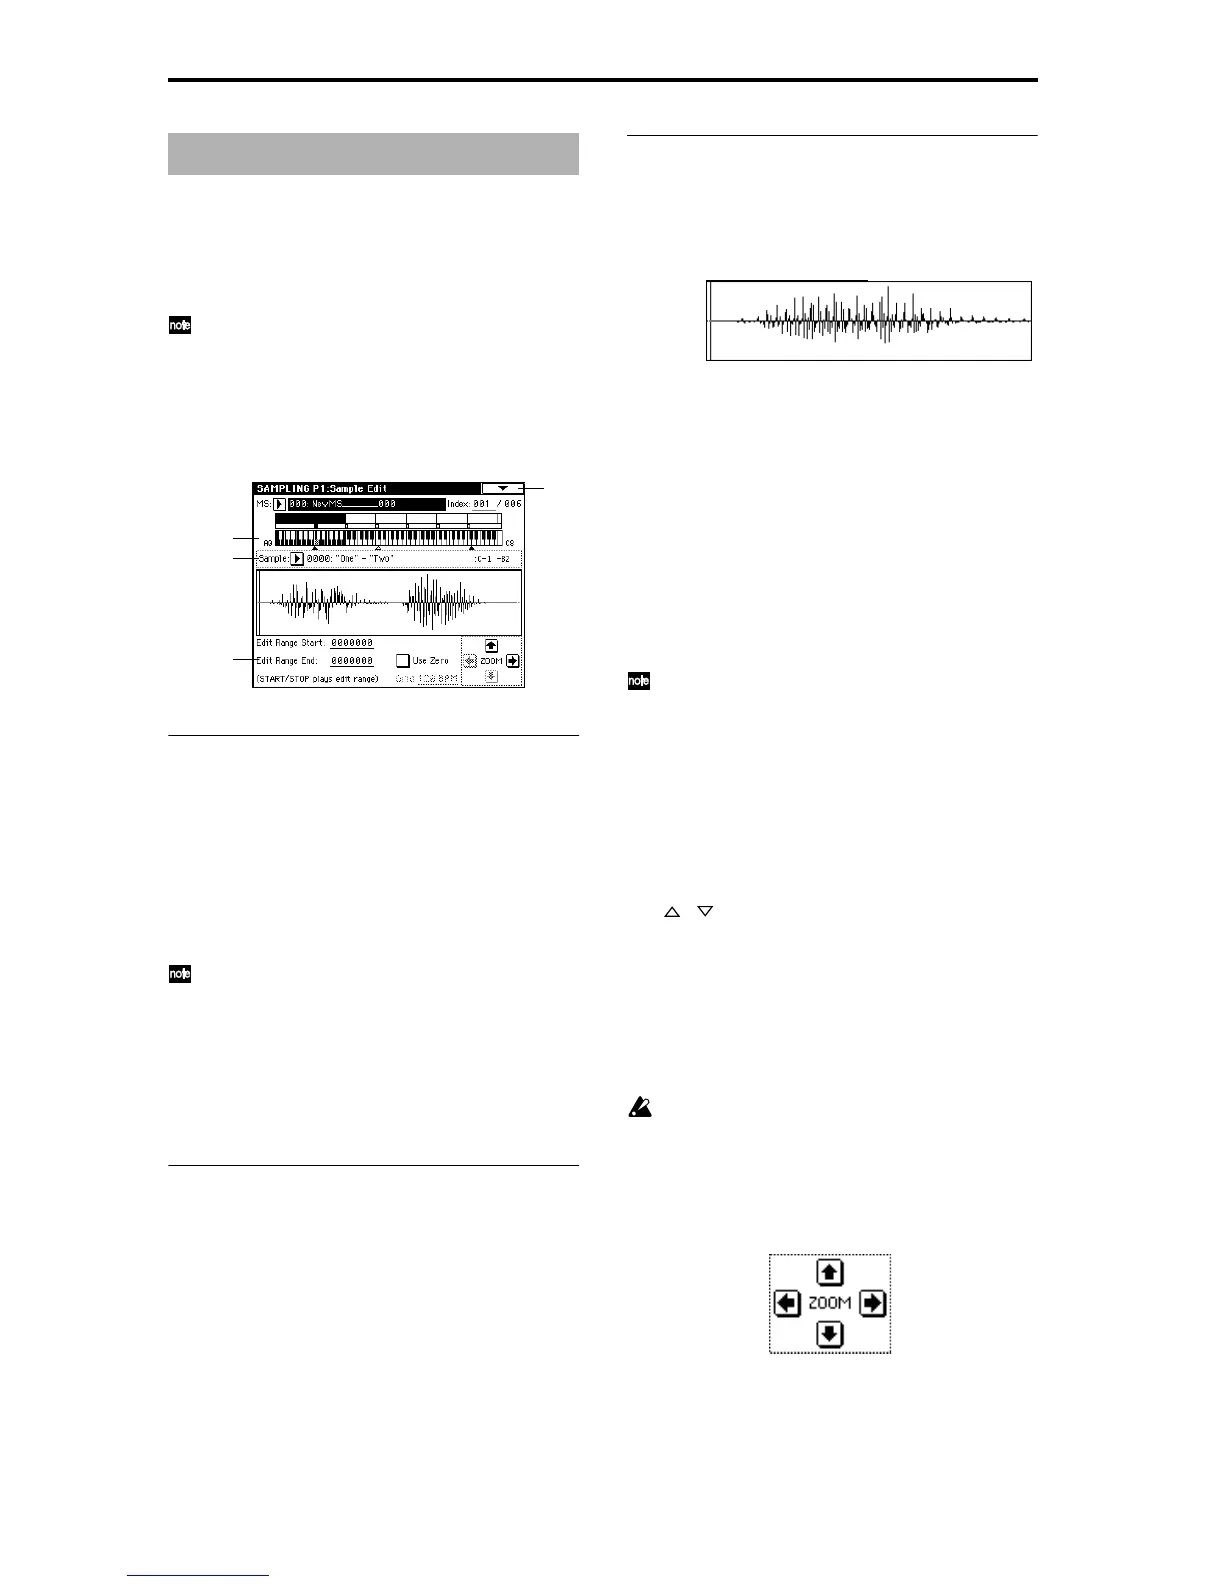
1–1: Sample Edit
1–1a: MS (Multisample), Index, Keyboard & Index
MS (Multisample) [000...999]
Select the multisample that contains the sample you wish to
edit (
☞Link: 0–1a).
Index [xxx (001...128)/yyy (001...128)]
Select the index of the sample you wish to edit. Your editing
will affect the sample of the index that you select here, and
the waveform will appear in the “sample waveform dis-
play” (
☞Link: 0–1a).
An index can also be selected by holding down the
[ENTER] key and playing a note on the keyboard. The
index that includes this note will be selected. The key
you played will be the base key, and will be displayed
in gray in “Keyboard & Index” (
☞“Keyboard & Index”
0–1a).
Keyboard & Index
(☞Link: 0–1a)
1–1b: Sample, Range
Sample [----: ---No Assign----, 0000...3999]
Range [C–1...B9 — C–1...B9]
This shows the sample number and name for the selected
index, and the range. If you modify “Sample,” the sample
you specify here will be assigned to this index (
☞Link: 0–
1b).
1–1c: Sample waveform display, Edit Range Start,
Edit Range End, Use Zero, Grid, ZOOM
Sample waveform display
This displays the waveform of the selected sample. The hor-
izontal axis is the sample address (time axis), and the verti-
cal axis is the sample level.
The thick line above the display border indicates the portion
of the entire sample waveform that is displayed. As you
zoom-in on the time axis, this will indicate which portion of
the entire waveform is currently being viewed. If a stereo
multisample or sample is selected, the L channel sample
data of the multisample will be displayed in the upper half,
and the R channel sample data in the lower half.
Edit Range Start [0000000...]
Edit Range End [0000000...]
This specifies the range (start address and end address) of
the sample that will be edited by page menu commands.
(This is shown in sample address units.)
The range you specify here will be highlighted in the “sam-
ple waveform display.”
To audition the selected range, press the [START/
STOP] key. The sample in the area between “Edit Range
Start” and “Edit Range End” will sound at the pitch of
the currently selected key (displayed in gray) (
☞“Key-
board & Index” 0–1a).
Use Zero
Checked: When setting “Edit Range Start” and “Edit Range
End,” it will be possible to select these only to locations
where the waveform level is ±0 (i.e., where the waveform
crosses the center line of the “sample waveform display”).
You can use the front panel [VALUE] slider, [VALUE] dial,
and [ ] [ ] keys [0]–[9] to automatically search for zero-
cross addresses. By using the numeric keys you can search
for the zero-cross address nearest to the value that you
input.
Unchecked: “Edit Range Start” and “Edit Range End” can
be set in increments of one. This is the normal setting.
Grid [040 BPM...480 BPM]
(☞Link: 2–1c)
This has no relation to the setting of the front panel
[TEMPO] knob.
ZOOM
These buttons let you zoom-in and zoom-out the “sample
waveform display” in the horizontal axis (sample addresses)
or vertical axis (sample level).
By zooming-in on the horizontal direction, you can move
from the overall display where the waveform is shown as a
solid line (1X magnification) to 2X or 4X magnification.
Sampling P1: Sample Edit
1–1
1–1a
1–1b
1–1c
Vertical zoom-in
Vertical zoom-out
Horizontal zoom-out
Horizontal zoom-in