Sampling
P0
P1 P2 P3 P4 P8
99
5 Press the front panel [REALTIME CONTROLS] key to
make the “B” LED light.
6 Rotate knob [1], [2] and the panning of the external input
sound and the delay will change. You can sample the
sound while you modify it.
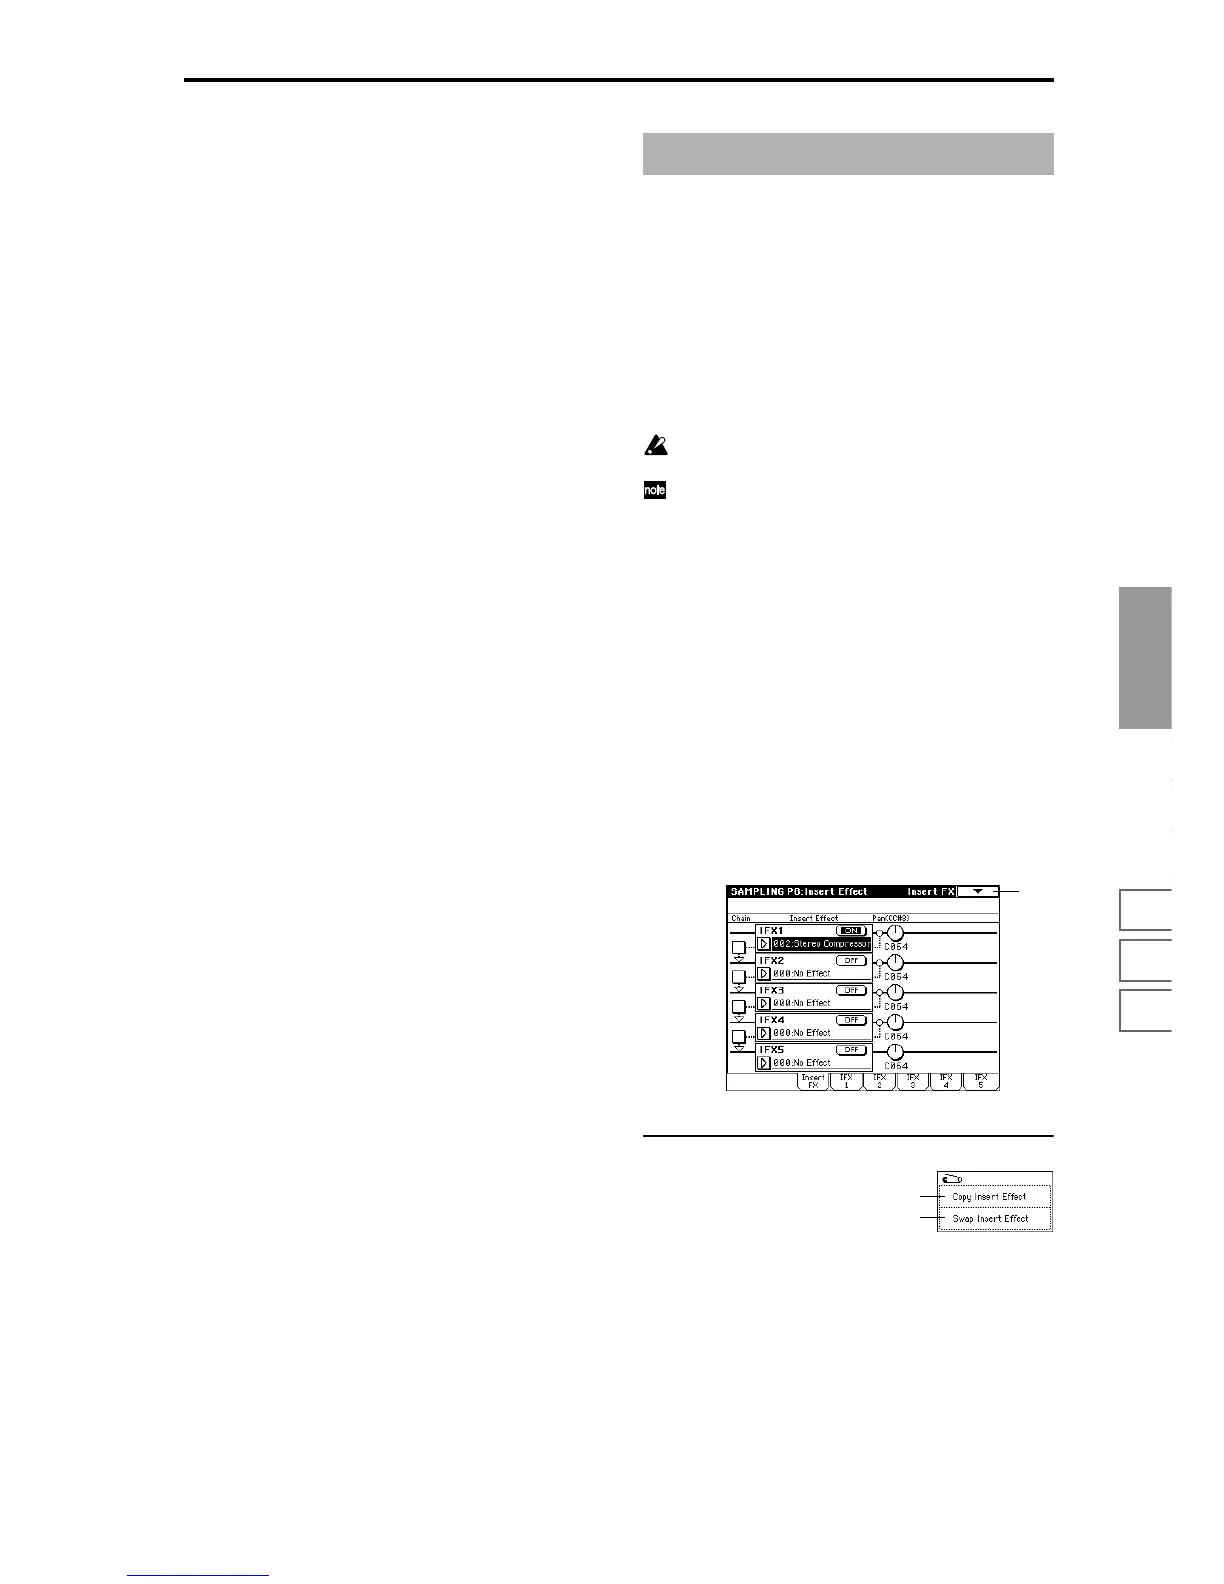
Here you can make insert effect settings for use in Sampling
mode.
When you set the P0: Recording Input/Setup tab Audio
Input (SAMPLING) parameters “Input 1, 2 BUS (IFX)
Select” to IFX1, 2, 3, 4, or 5, the external input sound from
the rear panel AUDIO INPUT 1 and 2 jacks will be sent to
IFX1, 2, 3, 4, or 5 (insert effects 1, 2, 3, 4, 5) respectively. By
selecting insert effects and making settings for them in this
page, you can apply insert effects to the sound of the exter-
nal input, and sample the result.
☞ For details on insert effects, refer to p.146 “8. Effect
Guide.”
In Sampling mode, master effects 1 and 2 and the mas-
ter EQ cannot be used.
Insertion effect settings in Sampling mode are not
backed up when the power is turned off. If you wish to
keep the insertion effect settings, you can use “Copy
Insert Effect.”
For example, you can copy the insertion effect settings
of Sampling mode to a program or combination in
order save them. When you write the program or com-
bination, the settings will be saved in internal memory.
In Sampling mode, you can use “Copy Insert Effect” (8–
1A) to copy these effect settings from the program or
combination back into Sampling mode and use them.
8–1: Insert FX
Here you can select insert effects, switch them on/off, make
chain settings, and specify the pan of the sound after pass-
ing through the insert effect.
These parameters are the same as in Program mode.
☞Pro-
gram mode “8–2: Insert Fx”
▼ 8–1: Page Menu Command
8–1A: Copy Insert Effect
☞ “Program P8: 8–1A: Copy Insert Effect.”
8–1B: Swap Insert Effect
☞ “Program P8: 8–1B: Swap Insert Effect.”
Sampling P8: Insert Effect
8–1
8–1A
8–1B
 Loading...