86
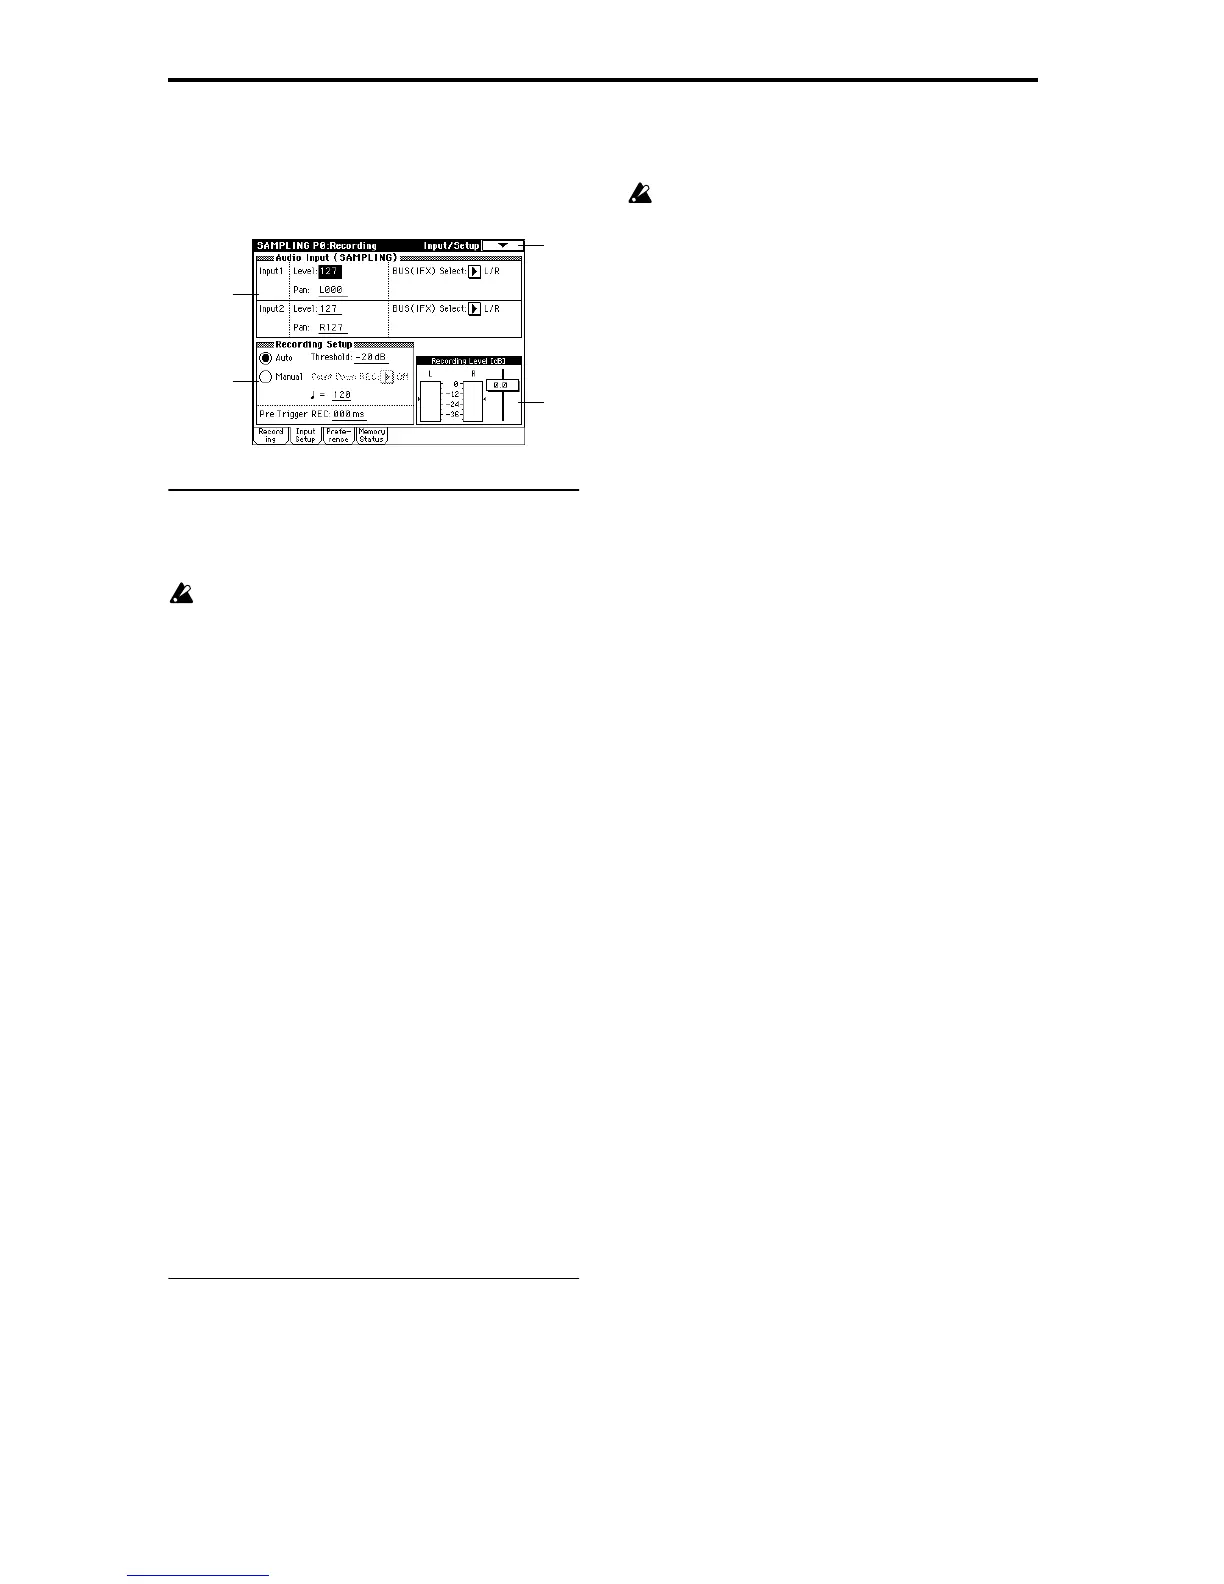
0–2: Input/Setup
Here you can make input level, pan, and bus settings for the
rear panel AUDIO INPUT 1 and 2. Setup for recording can
also be performed here.
0–2a: Audio Input (SAMPLING)
Here you can make adjustments for the input stage of the
audio signal received at AUDIO INPUT 1 and 2.
These settings are valid only in Sampling mode. These
settings will also be valid when you move from Sam-
pling mode to Global mode.
In modes other than Sampling mode, settings for Audio
Input 1 and 2 are made in “Audio Input (COMBI,
PROG, SEQ, S.PLAY)” (Global P0: 0–3a).
Level [000...127]
Specify the level of the signal immediately after the analog
audio signal from AUDIO INPUT 1 and 2 is converted into a
digital signal. Normally you will set this to 127.
If you hear distortion even after lowering this level, it is pos-
sible that the distortion is occurring before the A/D con-
verter. Adjust the [LEVEL] knob or the output level of your
external sound source so that the “ADC OVERLOAD!!”
indication above the “Recording Level” display does not
appear.
Pan [L000...C064...R127]
Set the panning of the analog audio signal from AUDIO
INPUT 1 and 2. Normally you will set Input 1 to L000 and
Input 2 to R127. This allows you to sample a stereo audio
source in stereo (
☞ For example settings, refer to p.78 in the
Basic Guide).
BUS(IFX) Select [L/R, IFX1...5, Off]
Select the bus.
L/R: Select this when you wish to sample the incoming ana-
log audio signal without applying an insert effect. Normally
you will select L/R.
IFX1...5: Select one of these when you wish to apply an
insert effect to the incoming audio sample as you sample it
(
☞For details on using the insert effects, refer to p.148).
Off: The analog audio signal will not be input.
0–2b: Recording Setup
REC Mode [Auto, Manual]
Select the method by which sampling will be started.
Auto: Sampling will begin automatically when the input
level exceeds the “Threshold” setting.
1 Press the [REC/WRITE] key to enter sampling standby
mode.
2 Use the “Recording Level [dB]” slider to adjust the sam-
pling level.
Be careful of changes in the monitoring volume level
(
☞“Recording Level [dB]” 0–1d).
3 Adjust the “Threshold” setting. The black triangles at
both sides of the “Recording Level [dB]” level bar display
will indicate the “Threshold” level. Normally, this should
be set as low as possible without allowing noise to trigger
sampling.
4 Press the [START/STOP] key. Sampling will automati-
cally begin when the input level exceeds the “Threshold”
setting.
5 To stop sampling, press the [START/STOP] key once
again. Sampling will end automatically if you continue
sampling to the end of the “Sample Time” (0–1c).
Manual: You can manually begin sampling from the sam-
pling standby condition by pressing the [START/STOP] key.
1 Perform steps 1 and 2 above.
2 Press the [START/STOP] key, and sampling will begin.
(If you use the “Count Down REC” function, sampling
will begin after a count-down sounded by the metro-
nome.)
3 To stop sampling, perform step 5 above.
Threshold [–63dB...0dB]
When performing auto sampling (“REC Mode” Auto), this
sets the level at which sampling will begin (
☞“REC Mode”
Auto, step
3).
Count Down REC [Off, 4, 8, 3, 6]
When sampling manually (“REC Mode” Manual), this spec-
ifies whether there will be a count-down before sampling
begins.
Off: Sampling will begin immediately when you press the
[START/STOP] key from the recording-standby condition.
4, 8, 3, 6: When you press the [START/STOP] key from the
recording-standby condition, there will be a count for the
specified number of beats at the tempo of “ (Tempo),” and
then sampling will begin. If you set this to 4, sampling will
begin on the “0” count of 4–3–2–1–0.
(Tempo) [040...240]
This sets the tempo of the count-down when “Count Down
REC” is used.
The tempo specified here will also be used when the LFO or
delay time of the insert effect is controlled by the BPM/
MIDI SYNC function during sampling (
☞p.216). This can
also be set by the [TEMPO] knob.
Pre Trigger REC [000...500ms]
When sampling the sound that occurs before sampling is
actually triggered, this setting specifies the time length that
will be “pre-sampled.”
When sampling in auto mode (“REC Mode” Auto), sam-
pling will begin when the input signal exceeds the specified
threshold level “Threshold” (0–2b). However depending on
the “Threshold” settings, the early portion of the attack
sound may be lost, and in such cases you can use “Pre Trig-
ger REC.”
Also, when sampling manually (“REC Mode” Manual) and
using “Count Down REC,” you may intend to play your
instrument etc. at precisely the downbeat but actually be
slightly ahead of the beat. In such cases, you can use Pre
Trigger REC to sample without loosing the beginning of the
note.
0–1
0–2a
0–2c
0–2b