8
1–4: Controller (Controller Setup)
These settings specify the functions of the [SW1] key, the
[SW2] key, and the B-mode functions of REALTIME CON-
TROL knobs [1]–[4] in Program mode.
1–4a: Panel Switch Assign
These settings assign functions to the front panel [SW1] and
[SW2] keys (
☞p.217 “SW1, SW2 Assign List”).
SW1 [Off, ..., After Touch Lock]
Assign a function to the [SW1] key.
The on/off status of the switch is saved when the program is
written. When you change the function, it will be reset to the
“off” state.
Toggle/Momentary [Toggle, Momentary]
Specify how the on/off state of the [SW1] key will change
when it is pressed.
Toggle: On/off will alternate each time the switch is
pressed.
Momentary: The function will be on only as long as the
switch remains pressed.
SW2 [Off, ..., After Touch Lock]
Toggle/Momentary [Toggle, Momentary]
Assign a function to the [SW2] key.
The functions that can be assigned to SW2 are the same as
for SW1, except that SW2 Mod.:CC#81 is available instead
of SW1 Mod.:CC#80.
1–4b: Realtime Control Knobs B–Assign
Assign functions (mainly various types of control change) to
the “B” mode of the front panel REALTIME CONTROL
knobs [1]–[4] (
☞p.218 “Realtime Control Knobs B–Assign
List”).
The functions you set here will take effect when you operate
the front panel REALTIME CONTROL knobs [1]–[4] in “B”
mode.
Knob 1–B [Off, ..., MIDI CC#95]
Knob 2–B [Off, ..., MIDI CC#95]
Knob 3–B [Off, ..., MIDI CC#95]
Knob 4–B [Off, ..., MIDI CC#95]
▼ 1–4: Page Menu Command
☞ “0–1A: Write Program,” “1–1A: Copy Oscillator,” and “1–
1B: Swap Oscillator.”
Here you can make pitch modulation settings for oscillators
1 and 2.
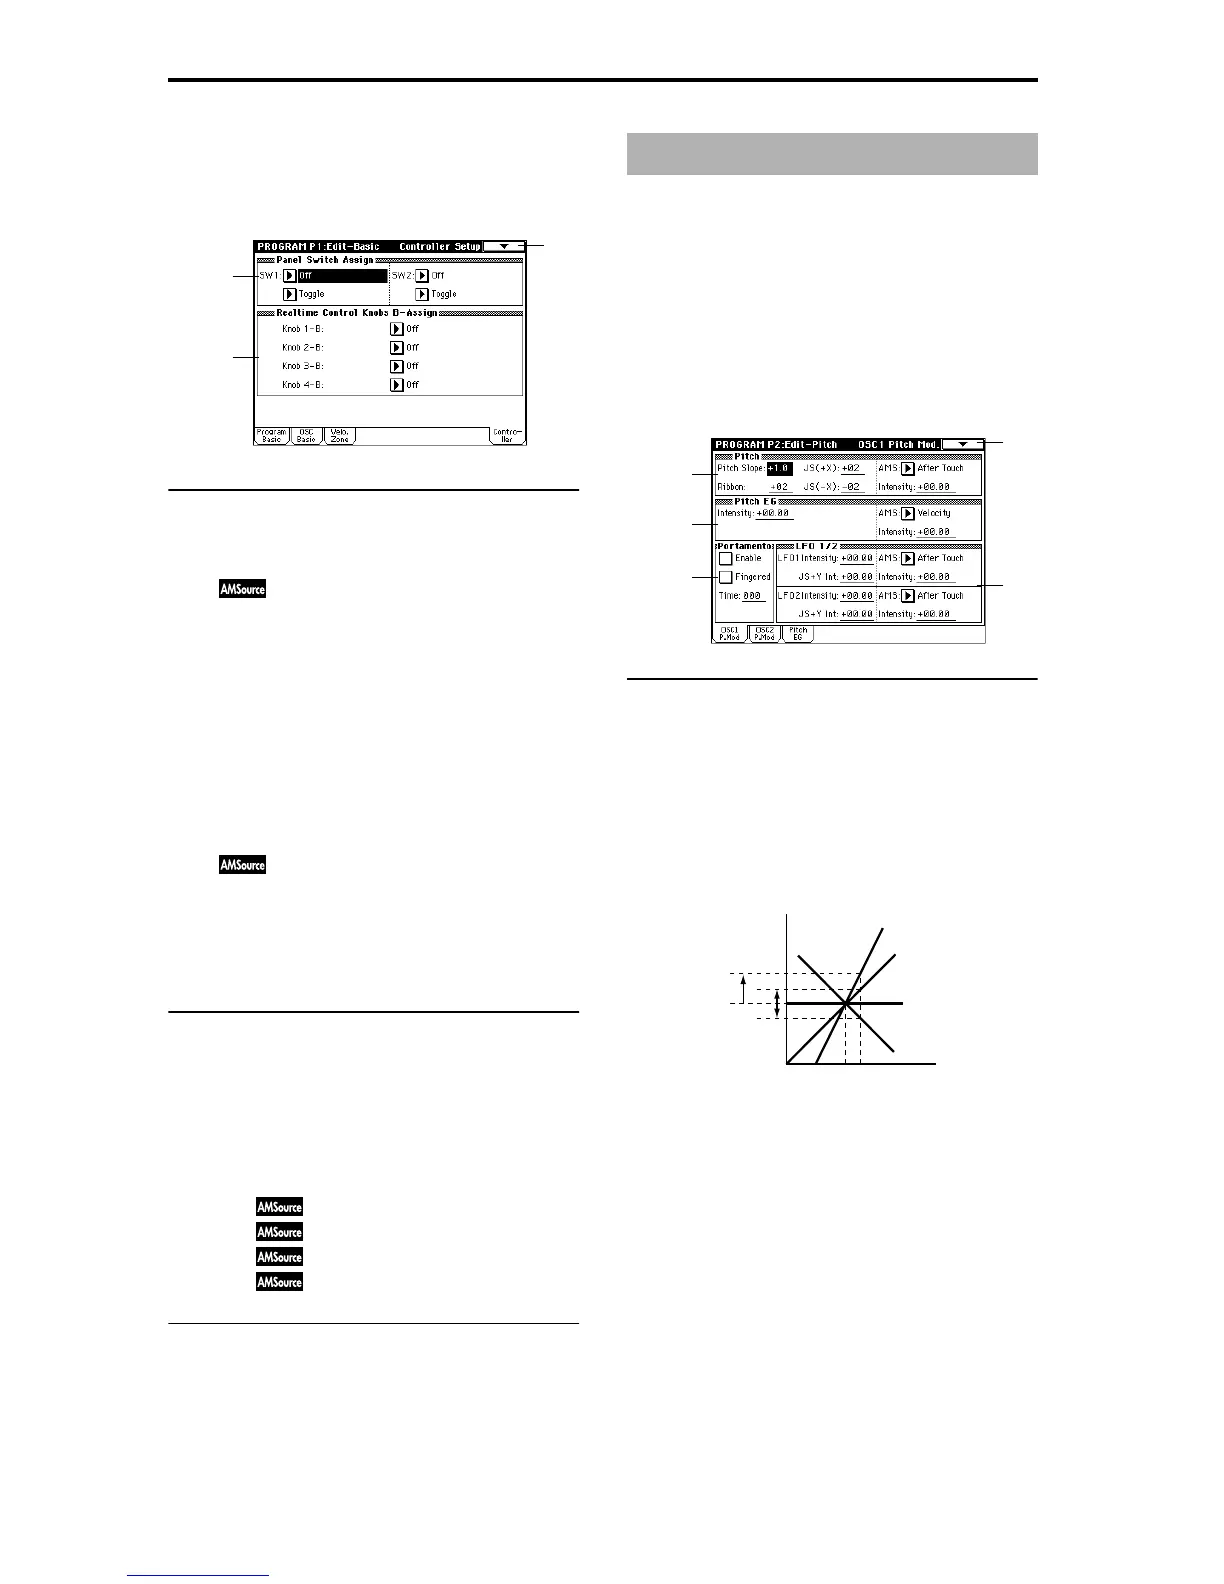
2–1: OSC1 P.Mod (OSC1 Pitch Mod.)
These settings specify how keyboard location will affect the
pitch of oscillator 1, and select the controllers that will affect
the oscillator 1 pitch and specify the depth of control. Here
you can also specify the amount of pitch change produced
by the Pitch EG and by LFO1 and LFO2. You can also switch
portamento on/off and specify how it will apply.
2–1a: Pitch
Pitch Slope [–1.0…+2.0]
Normally you will leave this at +1.0.
Positive (+) values will cause the pitch to rise as you play
higher on the keyboard, and negative (–) values will cause
the pitch to fall as you play higher on the keyboard.
With a value of 0, there will be no change in pitch, and the
C4 pitch will sound regardless of the keyboard location you
play.
How the Pitch Slope and pitch are related
Ribbon [–12…+12]
Specify how greatly the pitch will be changed when you
press the ribbon controller. With a value of 12, the pitch can
be changed a maximum of one octave.
Positive (+) values will cause the pitch to rise when you
press the ribbon controller to the right of center, and nega-
tive (–) values will cause the pitch to fall.
For example with a setting of +12, pressing the far right edge
of the ribbon controller will raise the pitch one octave. With
a setting of –12, pressing the far right edge of the ribbon con-
troller will lower the pitch one octave.
At the center of the ribbon controller, the original pitch will
remain, so you can use this in conjunction with pressing the
ribbon at its right edge to simulate the “hammering-on”
techniques used by guitarists.
1–4
1–4a
1–4b
Program P2: Edit – Pitch
2–1
2–1a
2–1d
2–1c
2–1b
Pitch
Key
2oct
1oct
1oct
C4 C5
+2
+1
0
–1