Sequencer
P0
P1 P2 P3 P4 P5 P6 P7 P8 P9
71
6–2: Pattern Name
6–2a: Pattern name [U00...U99: name]
Here you can rename a pattern U00–U99. A name of up to
sixteen characters can be input.
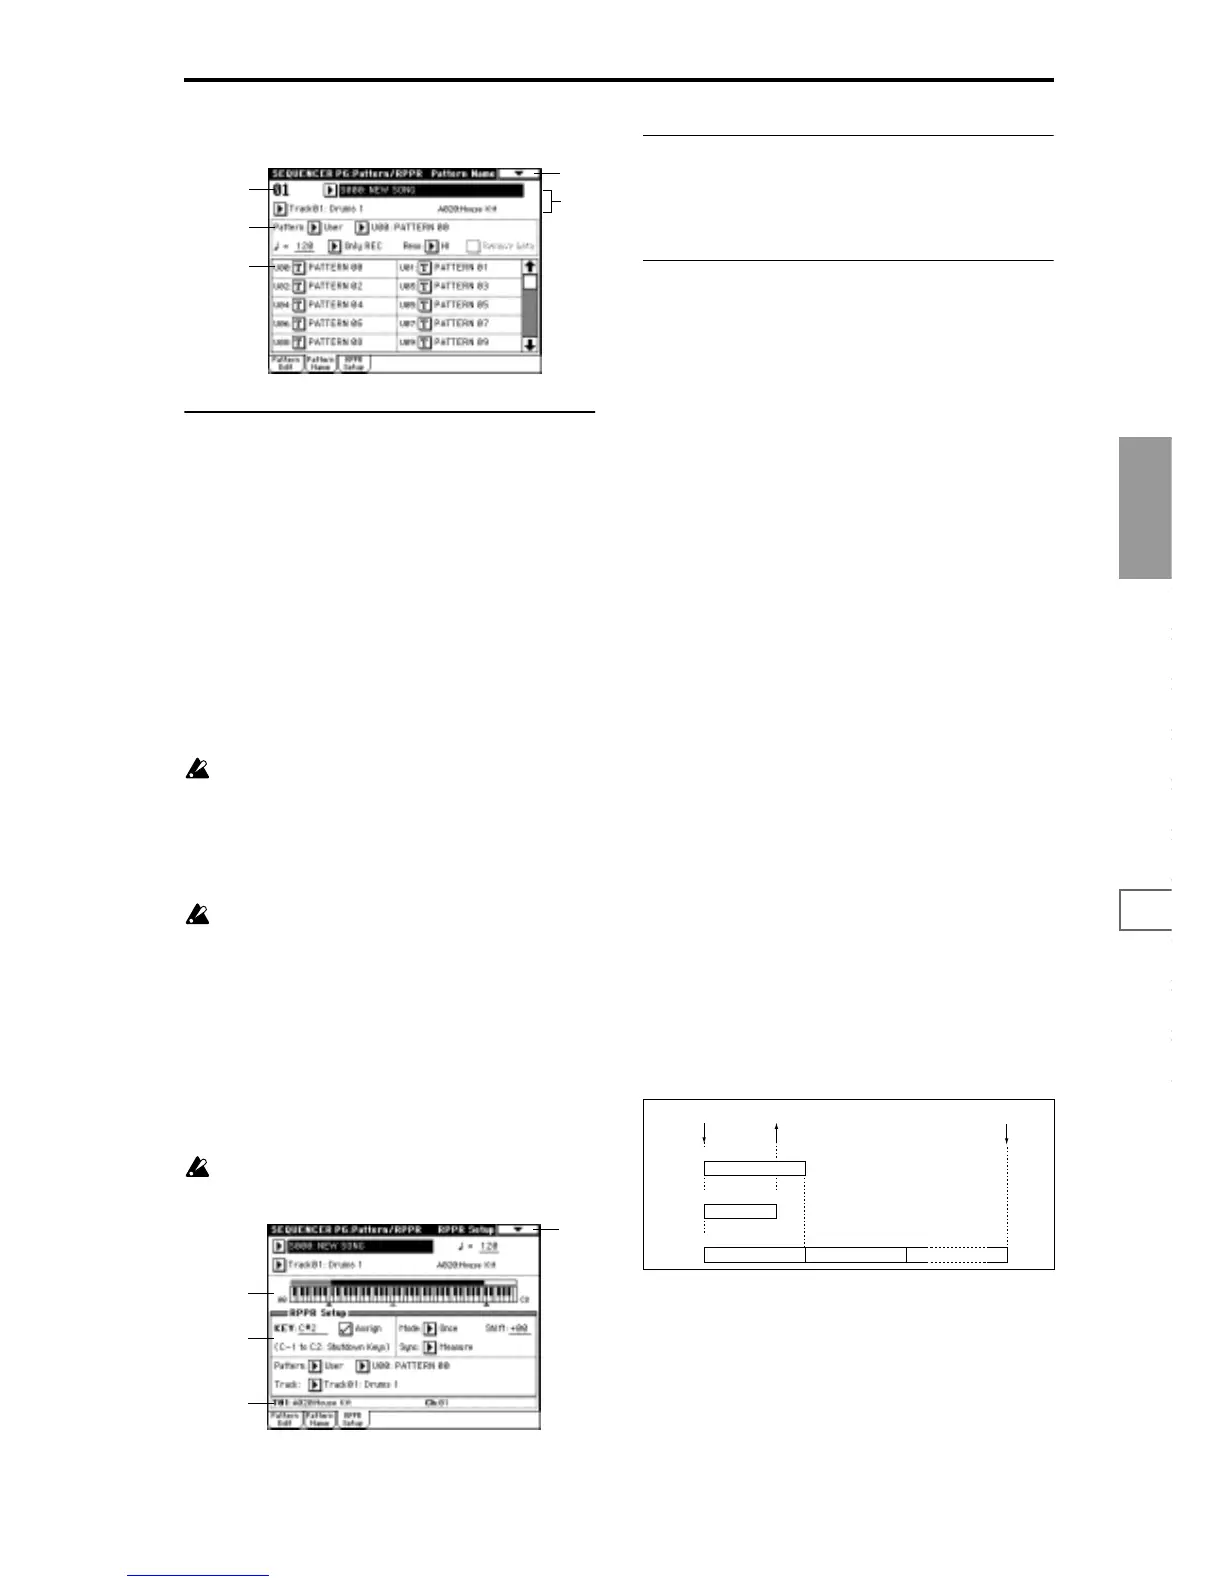
6–3: RPPR Setup
Here you can make settings for the RPPR (Realtime Pattern
Play/Recording) function. RPPR lets you assign a pattern
from a song to each key, and then playback patterns simply
by pressing individual notes on the keyboard. The results
can also be recorded.
For each song, you can assign either a preset pattern or a
user pattern to each of the seventy two keys in the range
C#2–C8. For each key, you can specify the pattern, track
number, and how the pattern will be played.
The arpeggiator is not operated by patterns played
back by RPPR. When RPPR is on, keys for which no
pattern is assigned will sound the track selected by
“Track Select.” At this time, the arpeggiator will operate
if either arpeggiator A or B is selected for that track and
turned on. RPPR will not be triggered by notes gener-
ated by the arpeggiator.
When Local Control is OFF (“Local Control On” Global
P1: 1–1a), the keyboard will not trigger RPPR pattern
playback. Notes received at MIDI IN on the channel of
the track currently selected by “Track Select” will trig-
ger patterns. If you have recorded only the trigger notes
on an external sequencer and wish to playback the
external sequencer to trigger RPPR patterns on the TRI-
TON, set Local Control OFF.
If you want the note data generated by RPPR to be
recorded on the external sequencer, set Local Control
ON, and turn off the echo back function of the external
sequencer.
In the RPPR Setup page, RPPR is turned on automati-
cally. This will be the same result as when the RPPR
check box in each page is checked.
6–3a: Keyboard & Assigned drawing
This shows the selected key, and the keys to which a pattern
has been assigned by the RPPR function. (Assignments are
not possible for the keys displayed in gray.)
6–3b: RPPR Setup
KEY (Key Select) [C#2...C8]
Select the key that you wish to edit. The following parame-
ters will apply to the key that you select here.
This can also be selected by holding down the [ENTER] key
and playing a note on the keyboard.
Assign
Checked: When you play the key specified by “KEY,” the
pattern selected in “Pattern” will be triggered.
Unchecked: That key will sound the currently selected track
at the corresponding pitch, just as in normal Sequencer
mode.
Pattern (Pattern Type) [Preset, User]
Pattern Select [P000...149, U00...99]
Select the RPPR pattern for the key selected in “KEY.” If the
selected user pattern contains no musical data, there will be
no sound when you press that key.
Track [Track No. and name]
Select the track that will be used for the RPPR pattern
selected for the “KEY.” When you play the key, the pattern
will be played according to the settings of the track you
select here. Track settings are made in P0: Song Play/REC,
P2: Trk Param, P3: MIDI Filter, and P4: Zone/Ctrl. When
you record in realtime with the RPPN function turned on,
the data will be recorded on the track you select here. (
☞For
the recording procedure, refer to p.73 in the Basic Guide)
Mode [Once, Manual, Endless]
Specify how the pattern of the specified “KEY” will be
played.
Once: When you press the key, the pattern will playback
only once to the end.
Manual: The pattern will continue repeating as long as you
continue holding the key, and will stop when you release the
key.
Endless: The pattern will continue repeating even after you
release the key. To stop the pattern playback, press any note
below C2, or press the same key once again.
Shift [–12...+12]
Adjust the playback pitch of the pattern for the specified
“KEY” in semitone steps over a range of ±1 octave. With a
setting of 0, the pattern will be played at its original pitch.
Sync [Off, Beat, Measure, SEQ]
Specify how the pattern playback will be synchronized
when you press the specified “KEY.”
6–1
6–2a
0–1d
0–1e
6–1a
6–1b
0–1A
6–3a
6–3b
6–3c
Once
START STOP
Key-on
Key-off
Same key, or C2
Key-off
Manual
START STOP
Endless
START STOP