Repair information 4-29
7541-03x
LED assembly removal
1. Remove the transfer belt. See “Transfer belt – CRU” on page 4-40.
2. Remove the top cover. See “Output bin (print engine top) cover” on page 4-17.
3. Remove the rear EMI shield. See “Rear EMI shield – Not a FRU” on page 4-106.
4. Remove the toner cartridges and imaging units.
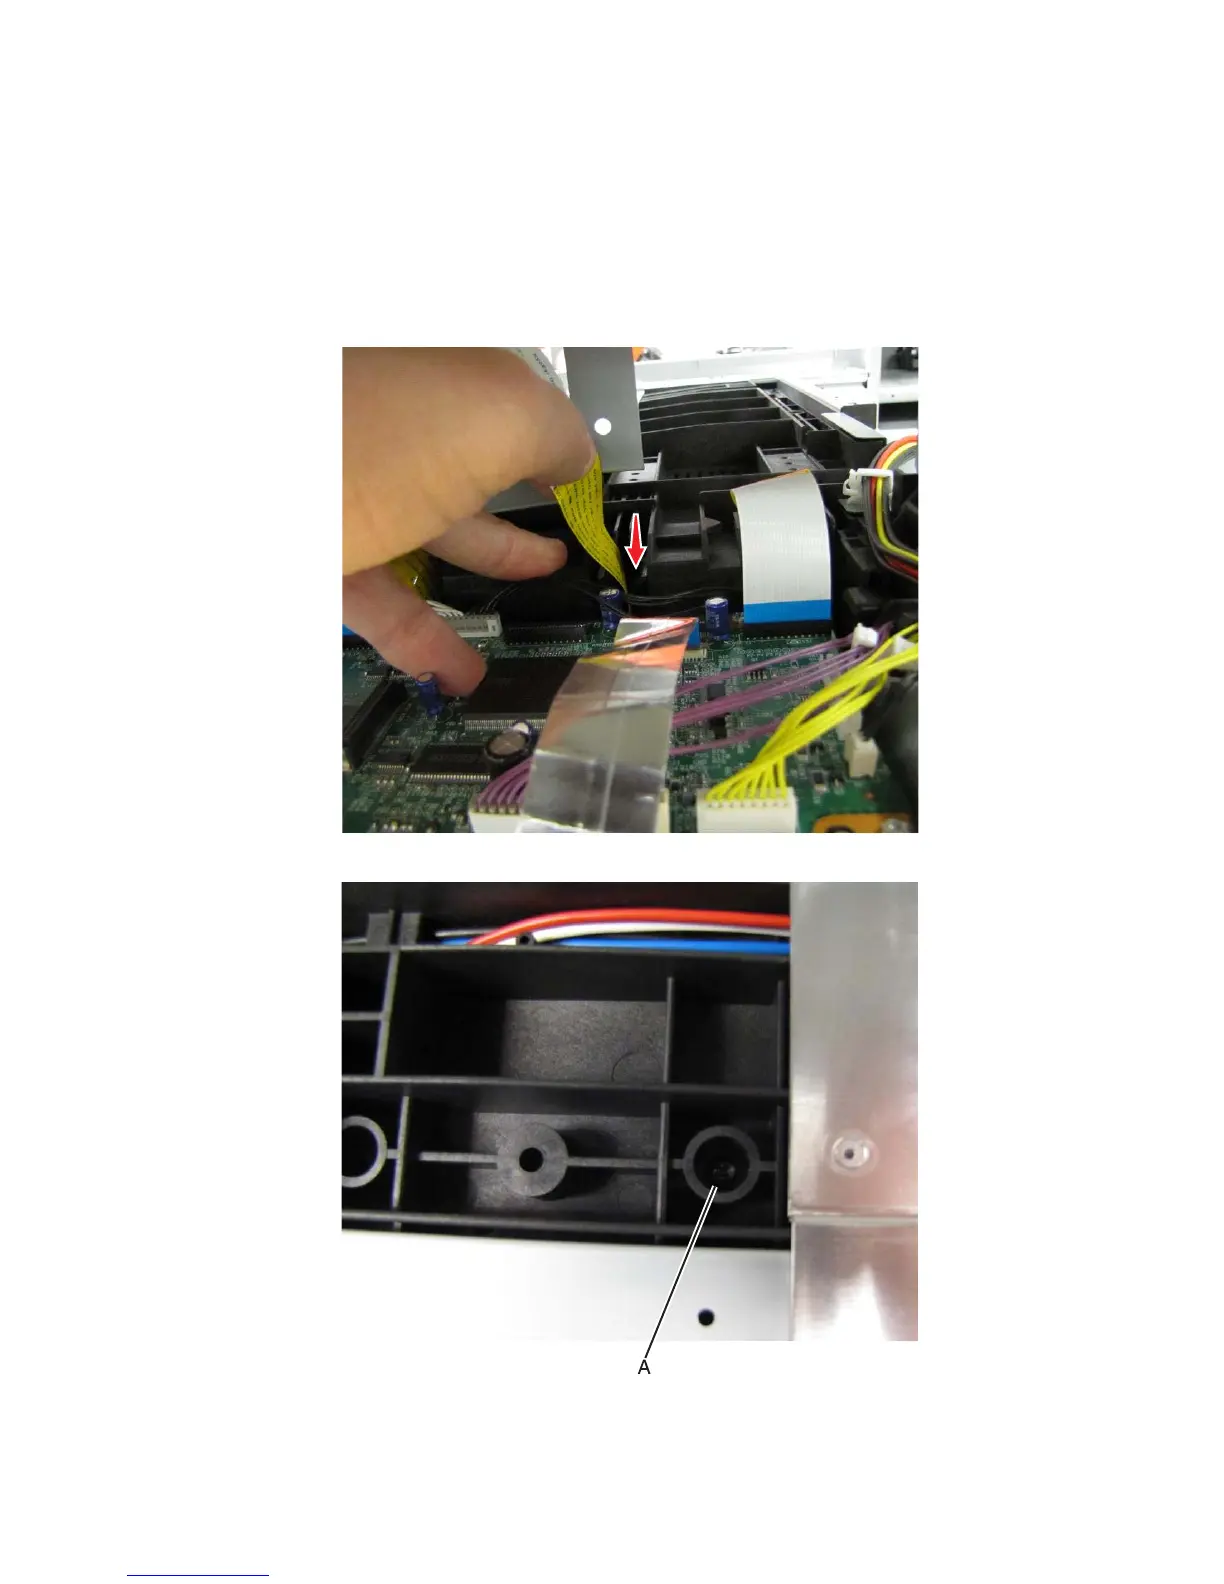
5. Disconnect the affected LED’s ribbon cable from the printhead controller board.
6. Guide the printhead ribbon cable through the top of the print engine.
7. Remove the head holder screw (A) securing the LED holder to the top frame.
Note: You will need to remove the top EMI shield to access the screw if you are removing the magenta or
yellow LED assembly. See “Top EMI sheild removal” on page 4-39.