SET-UP AND INSTALLATION MLC650 OPERATOR MANUAL
4-56
Published 08-12-19, Control # 224-13_v2
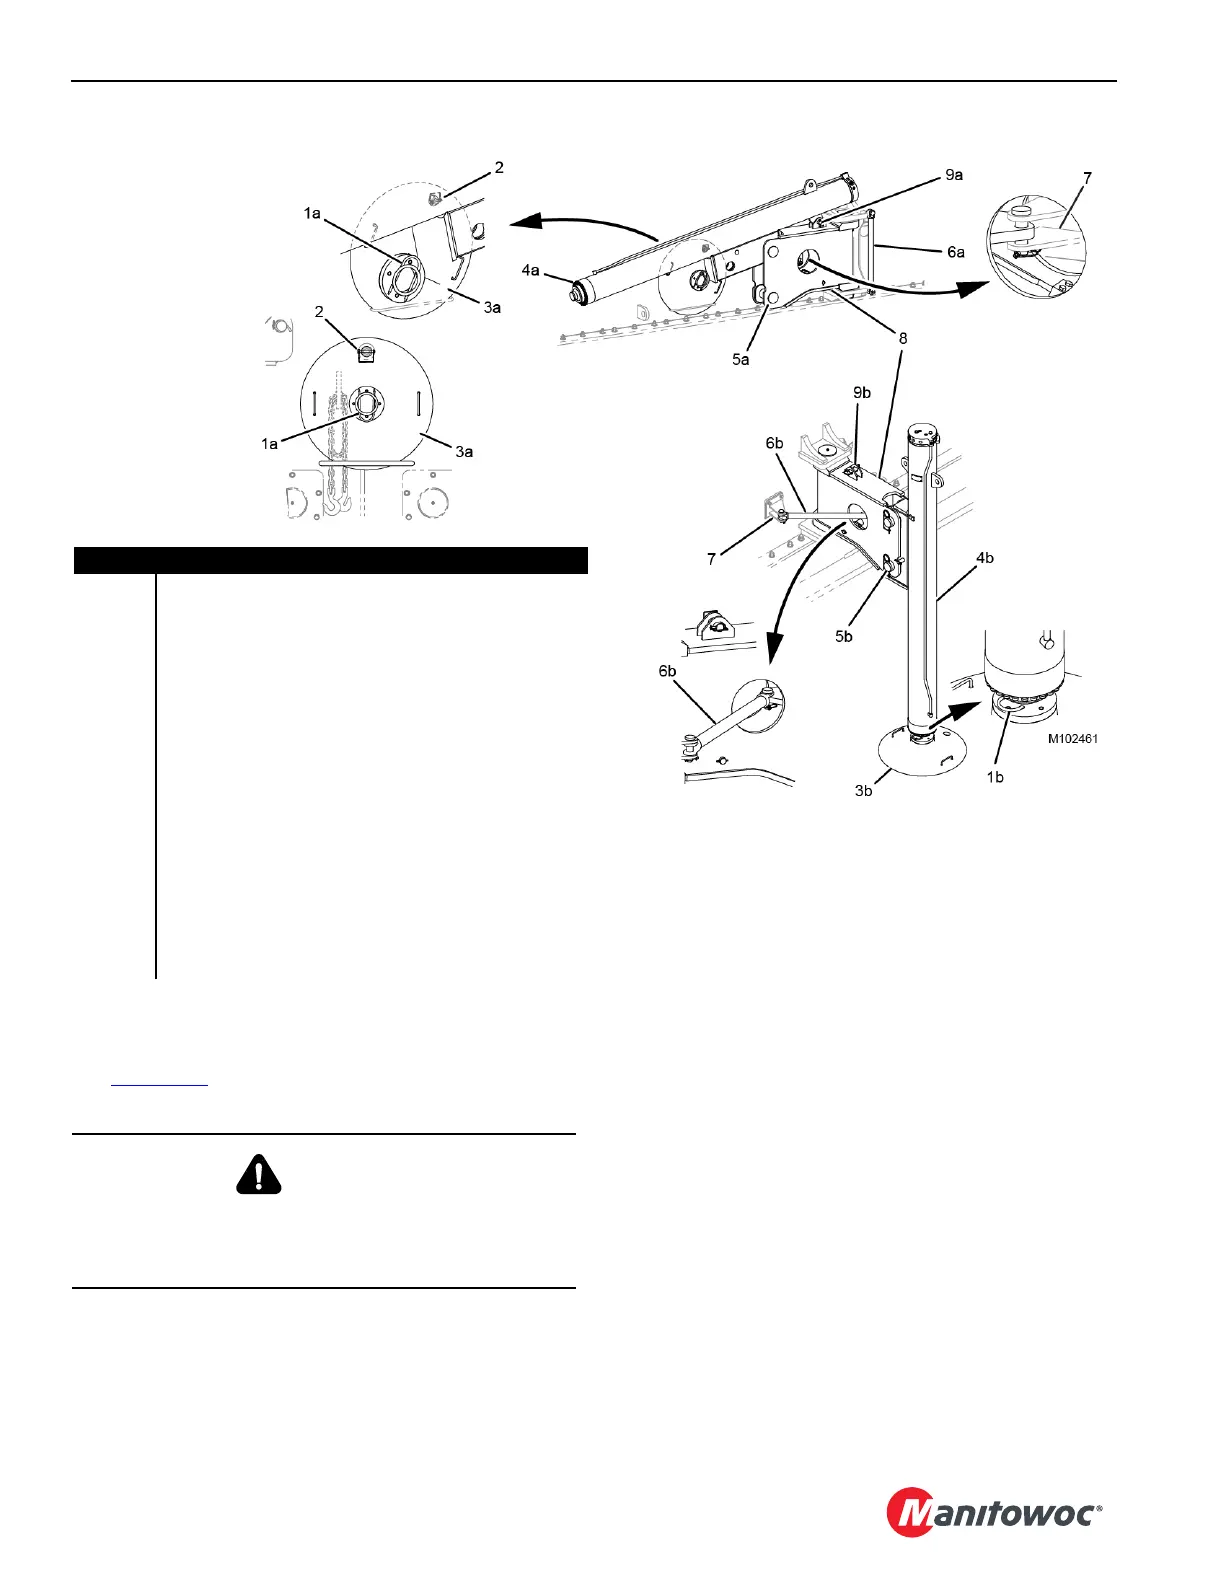
Storing Rotating Bed Jacking Cylinders
See Figure 4-46 for the following procedure:
1. Remove the U-shaped locking pin (1b).
2. Using the remote control, retract the rotating bed jacking
cylinder (4b) completely.
3. Place the outrigger pads in the stored position (3a) on
the rotating bed or on the crawlers (if equipped with lugs
and brackets) and secure them with the outrigger pad
locking pins (2). Place the U-shaped locking pins into the
stored position (1a).
4. Remove the jacking cylinder pin (5b and 9b) from the
working position.
5. Using the remote control, tilt the jacking cylinders up and
secure with jacking cylinder pins (9a). Place the jacking
cylinder pin (5a) in the stored position.
6. Remove the outrigger struts (6b) from the working
position and secure the struts in the stored position.
7. Swing the outrigger beam assemblies (8) toward the
rotating bed and secure to the rotating bed lug (7) with
the strut pin in the stored position.
FIGURE 4-46
Item Description
1a U-shaped Locking Pin (stored position) (qty 4)
1b U-shaped Locking Pin (working position) (qty 4)
2 Outrigger Pad Locking Pin (qty 4)
3a Outrigger Pad (stored position) (qty 4)
3b Outrigger Pad (working position) (qty 4)
4a Rotating Bed Jacking Cylinder (stored position) (qty 4)
4b Rotating Bed Jacking Cylinder (working position) (qty 4)
5a Jacking Cylinder Pin (stored position) (qty 4)
5b Jacking Cylinder Pin (working position) (qty 4)
6a Outrigger Strut (stored position) (qty 4)
6b Outrigger Strut (working position) (qty 4)
7 Rotating Bed Lug (qty 4)
8 Outrigger Beam Assembly (qty 4)
9a Jacking Cylinder Pin (stored position) (qty 4)
9b Jacking Cylinder Pin (working position) (qty 4)
STORED POSITION
WORKING POSITION
STORED
on Rotating
Bed
STORED
on Crawler
WARNING
Moving Part Hazard!
To avoid serious crushing injury — warn all personnel to
stand clear of jacks.