SET-UP AND INSTALLATION MLC650 OPERATOR MANUAL
4-150
Published 08-12-19, Control # 224-13_v2
Removing Counterweight Boxes
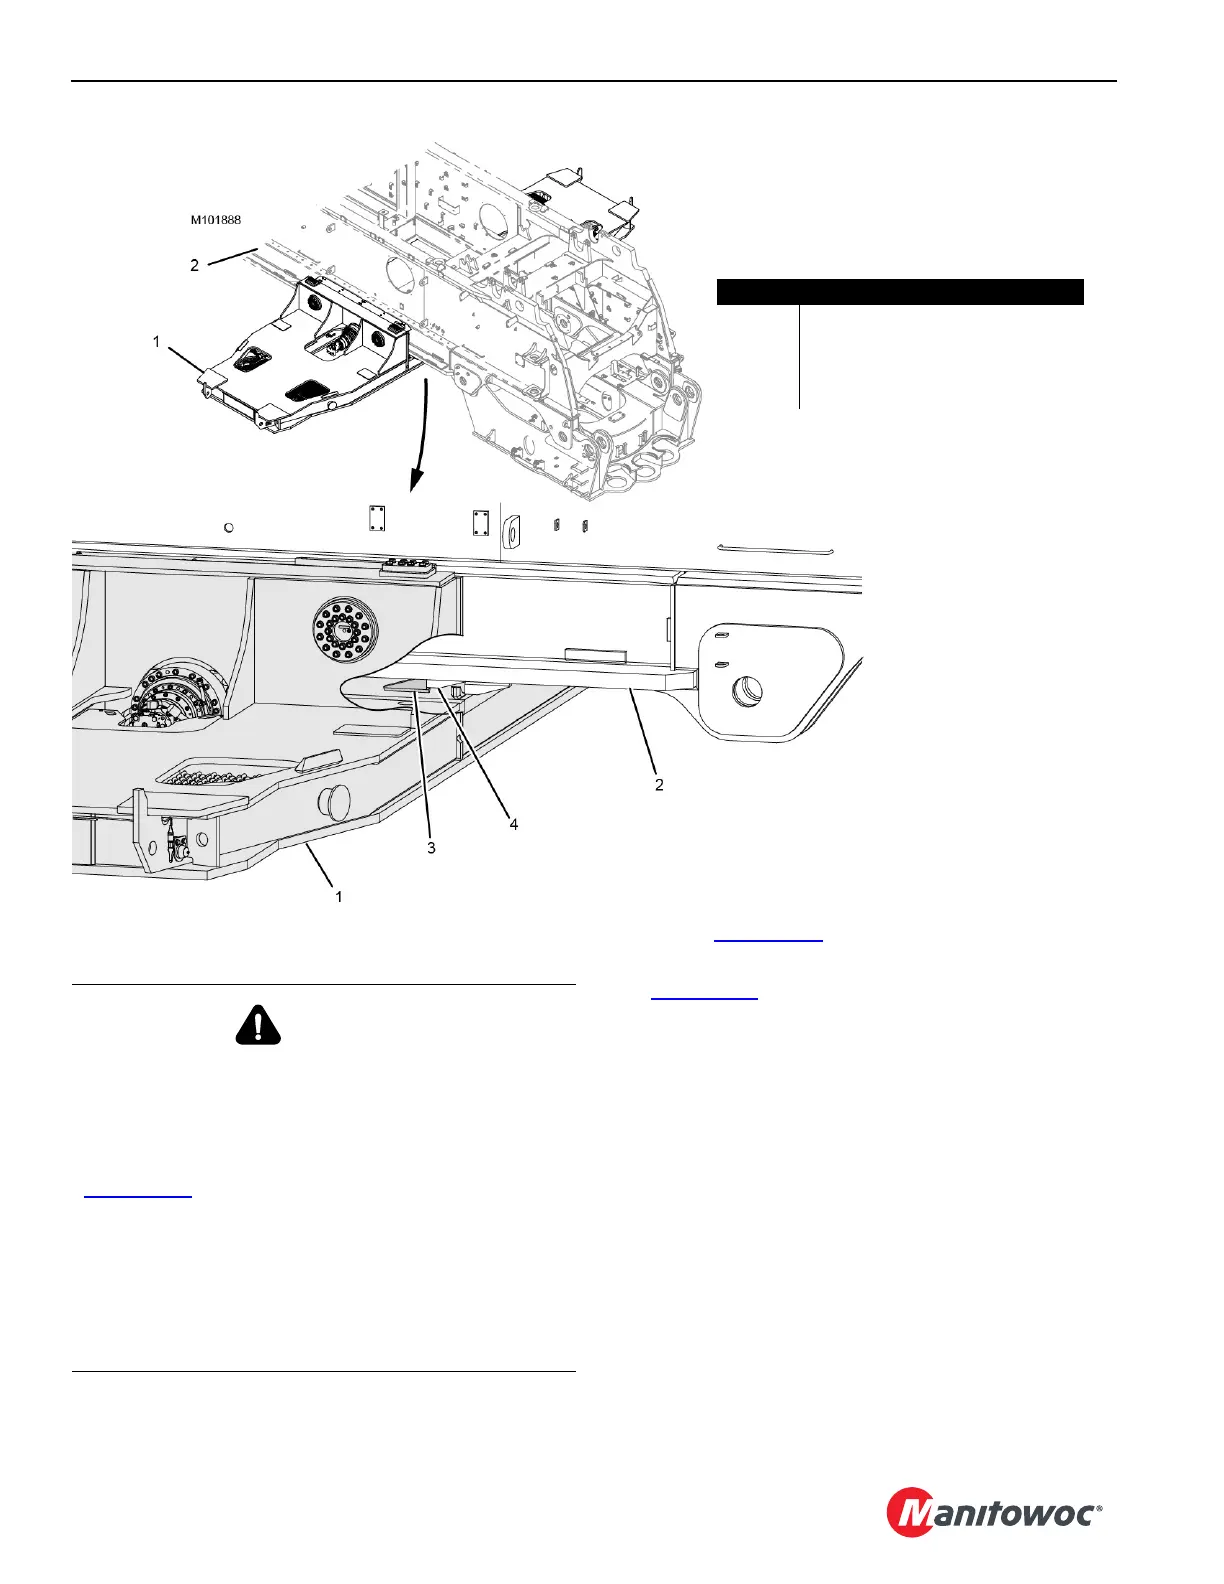
1. Using the switch on the remote control, travel the
counterweight tray forward until the physical stop on the
tray (3, Figure 4-117
) contacts the physical stop on the
bed (4).
See Figure 4-118
for the remaining steps.
NOTE: The counterweight boxes must be removed with an
assist crane.
2. Loosen the turnbuckles (7) and remove the
counterweight chain assemblies (2) from the
counterweight tray lugs (6).
The ratchet on each turnbuckle must be flipped in one
direction to tighten the turnbuckle and in the opposite
direction to loosen the turnbuckle.
3. Store the counterweight chain assemblies in the
counterweight tray after the counterweight boxes are
removed.
4. Remove the counterweight boxes in the following
sequence:
a. Remove one counterweight box from either side of
the tray.
Item Description
1 Counterweight Tray
2 Rotating Bed
3 Physical Stop on Tray (1 each side)
4 Physical Stop on Bed (1 each side)
FIGURE 4-117
WARNING
Crushing Hazard!
To prevent the crane from tipping and the counterweight
boxes from falling off the tray during disassembly, do not
remove the counterweight boxes until the counterweight
tray is traveled to the position in step 1 shown in
Figure 4-117
. The crane will tip.
To prevent the counterweight boxes from falling and
crushing personnel see the following.
• Do not lift more than two boxes at a time. The lifting
lugs may break, causing the boxes to fall.
• Remove the counterweight boxes in the sequence
specified in step 4 of this procedure.