95
PRO2 Live Audio System
Owner’s Manual
Chapter 10: Stereo Linking
This chapter describes stereo linking, or channel pairing,
which lets you configure two adjacent channels as stereo.
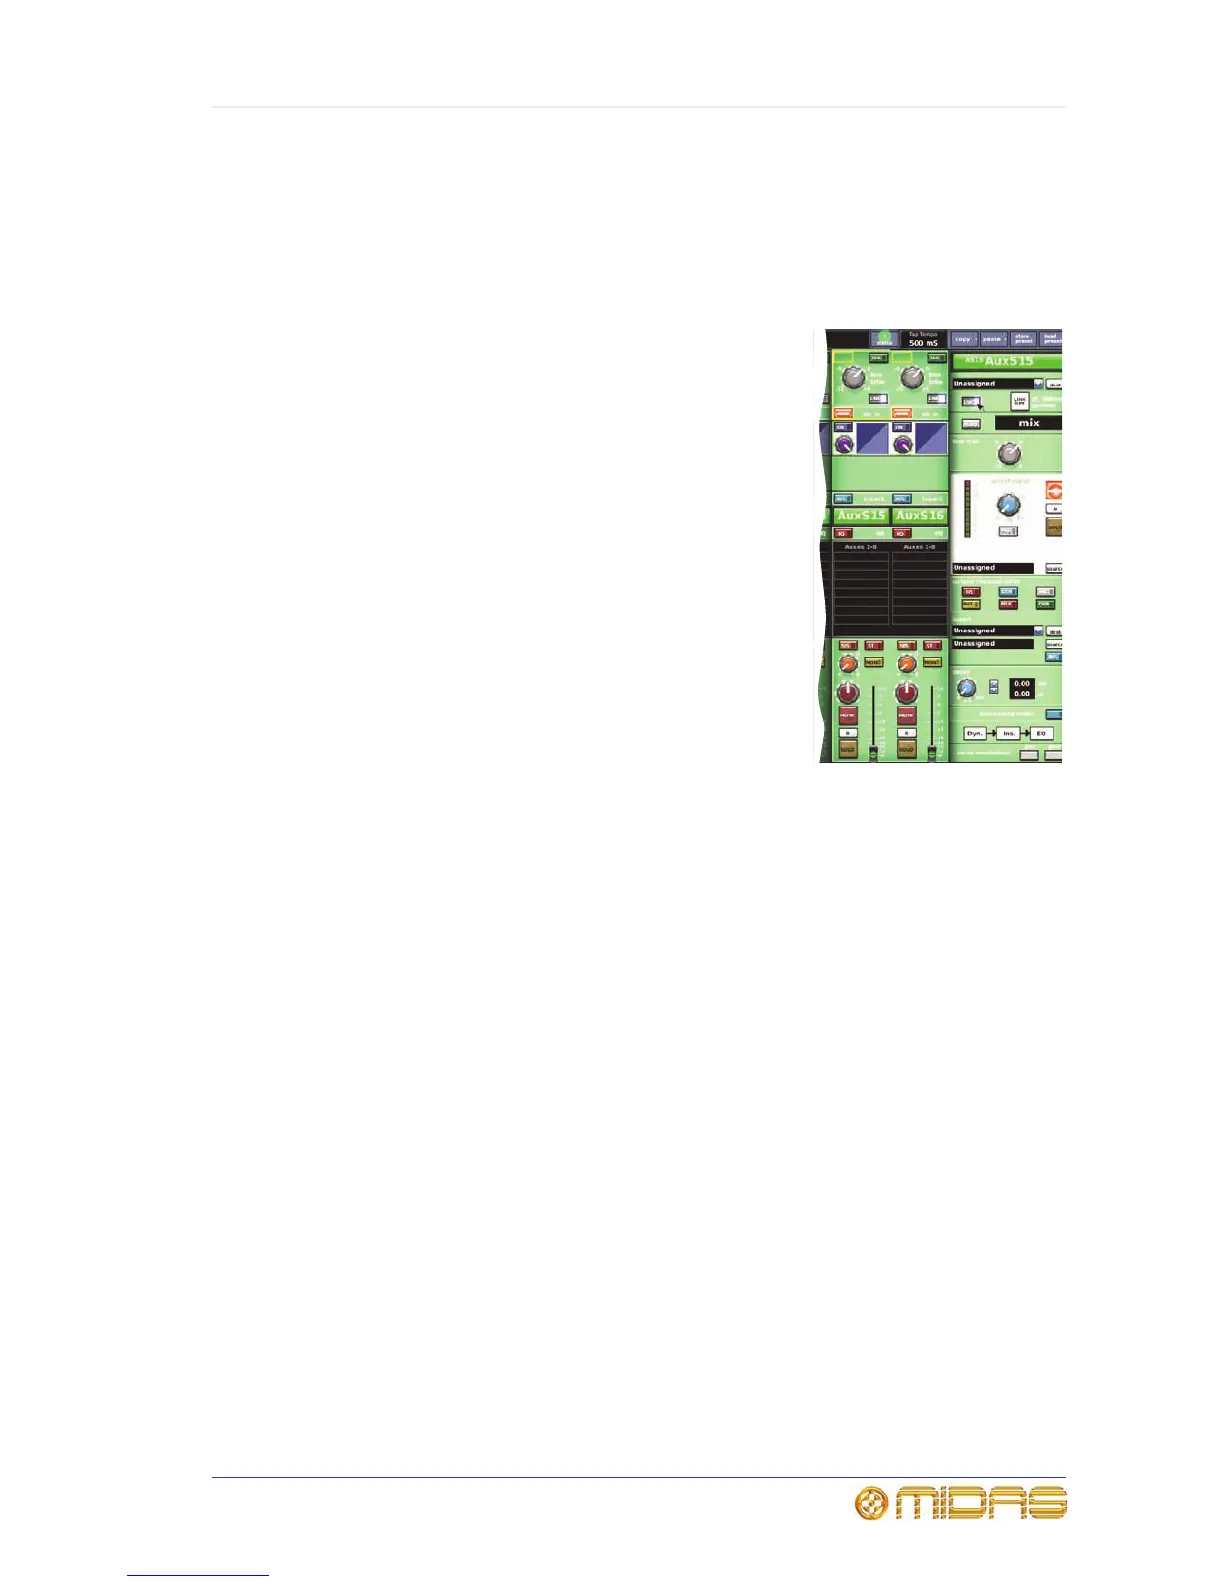
The diagram right gives an example of two linked
channels (auxes 15 and 16).
By default, all channels of the PRO2 are unpaired (mono).
When paired, the controls for each signal path act
simultaneously on both the left and right signal paths.
Individual trims, for example, adjusting the mic amp
gains to balance stereo mix inputs, can be applied to the
left and right audio paths individually. The channels are
not truly mono at this time and any settings necessary to
preserve the audio prior to trimming, such as dynamics
side chain linking, are maintained.
When linking previously unlinked channels, some
normalisation of the prospective left and right control
settings — which may be quite different — is required.
The PRO2 does this by automatically copying the control
settings of the left (odd-numbered) channel, with the
exception of the pan controls, to the right channel. The
pan controls, depending on whether they are in the left or
right audio paths, should be manually set to hard left or
hard right, respectively.
Linking is a GUI-only function, as there are no link buttons on the control surface. You
can link any two adjacent input channels together. However, although each output
channel has a link button only the ones on the odd numbered channels function (for
example, you can link aux send channel 7 with aux send channel 8, but you cannot link
aux send channel 8 with aux send channel 9.
>> To link two channels
1 If necessary navigate the desired channels to the channel faders.
2 In the GUI fast strip of the desired channel, click LNK. Alternatively, you can
click the LNK button in the GUI channel strip if the desired channel and its
appropriate detail area is selected.
3 In the channels you have just linked, set the pan control knob in the left channel
fully anti-clockwise and the one in the right channel fully clockwise.