35
PRO2 Live Audio System
Owner’s Manual
Chapter 5: Before You Start
This chapter provides useful background information on PRO2 operation.
While this system is a complex, high-tech piece of equipment, we have made it as easy
to use and as user-friendly as possible.
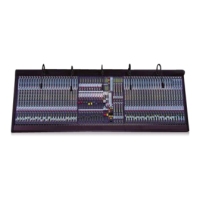
Principles of operation
PRO2 Control Centre operation is based on the concept of colours and groups rather
than ‘layering’ or ‘paging’, which is the case with most digital consoles on the market
today. With so many channels available it is far easier to remember them by their
user-configured individual/group colour and name rather than their channel number.
The control surface is populated with instantly recognisable controls that are logically
distributed in major sections, so that all the controls you need to access most of the
time are always on the control surface, while the remainder are only one action away.
Hints and tips
During operation, we recommend that you carry out the following:
• Check what is hidden On the PRO2, unlike on an analogue control surface, some
of the settings and parameters will be hidden from view (stored in the computer
memory of the PRO2). To make sure there are no hidden surprises, such as a reverb
send left from a previous mix, we recommend that you view unused parameters at
various times during a mix.
• Check the Console Overview screen It is a good idea to frequently monitor the
Console Overview screen (press the HOME button underneath the GUI screen),
which provides at a glance an overview of the control centre’s status and operation.
It shows all the meters and the status condition of faders and some switches, such
as solos and mutes. However, some things will still remain hidden.
Saving your work
We recommend that you save your work regularly while carrying out the procedures
included in this chapter. Not only is this good practice during normal PRO2 operation,
but in this instance it may save you from losing some set-ups that could prove useful
later on. To do this, create a new show (see “To create a new show” on page 82), and
then continue reading through the remainder of this section, following the instructions
carefully. Save your work at convenient points (see “To create a new scene using the
current settings” on page 84 and “To save a show or create a new one from the current
settings” on page 83).