2 - Q - 5
ADU PAPER FEED/CONVEYANCE SECTION
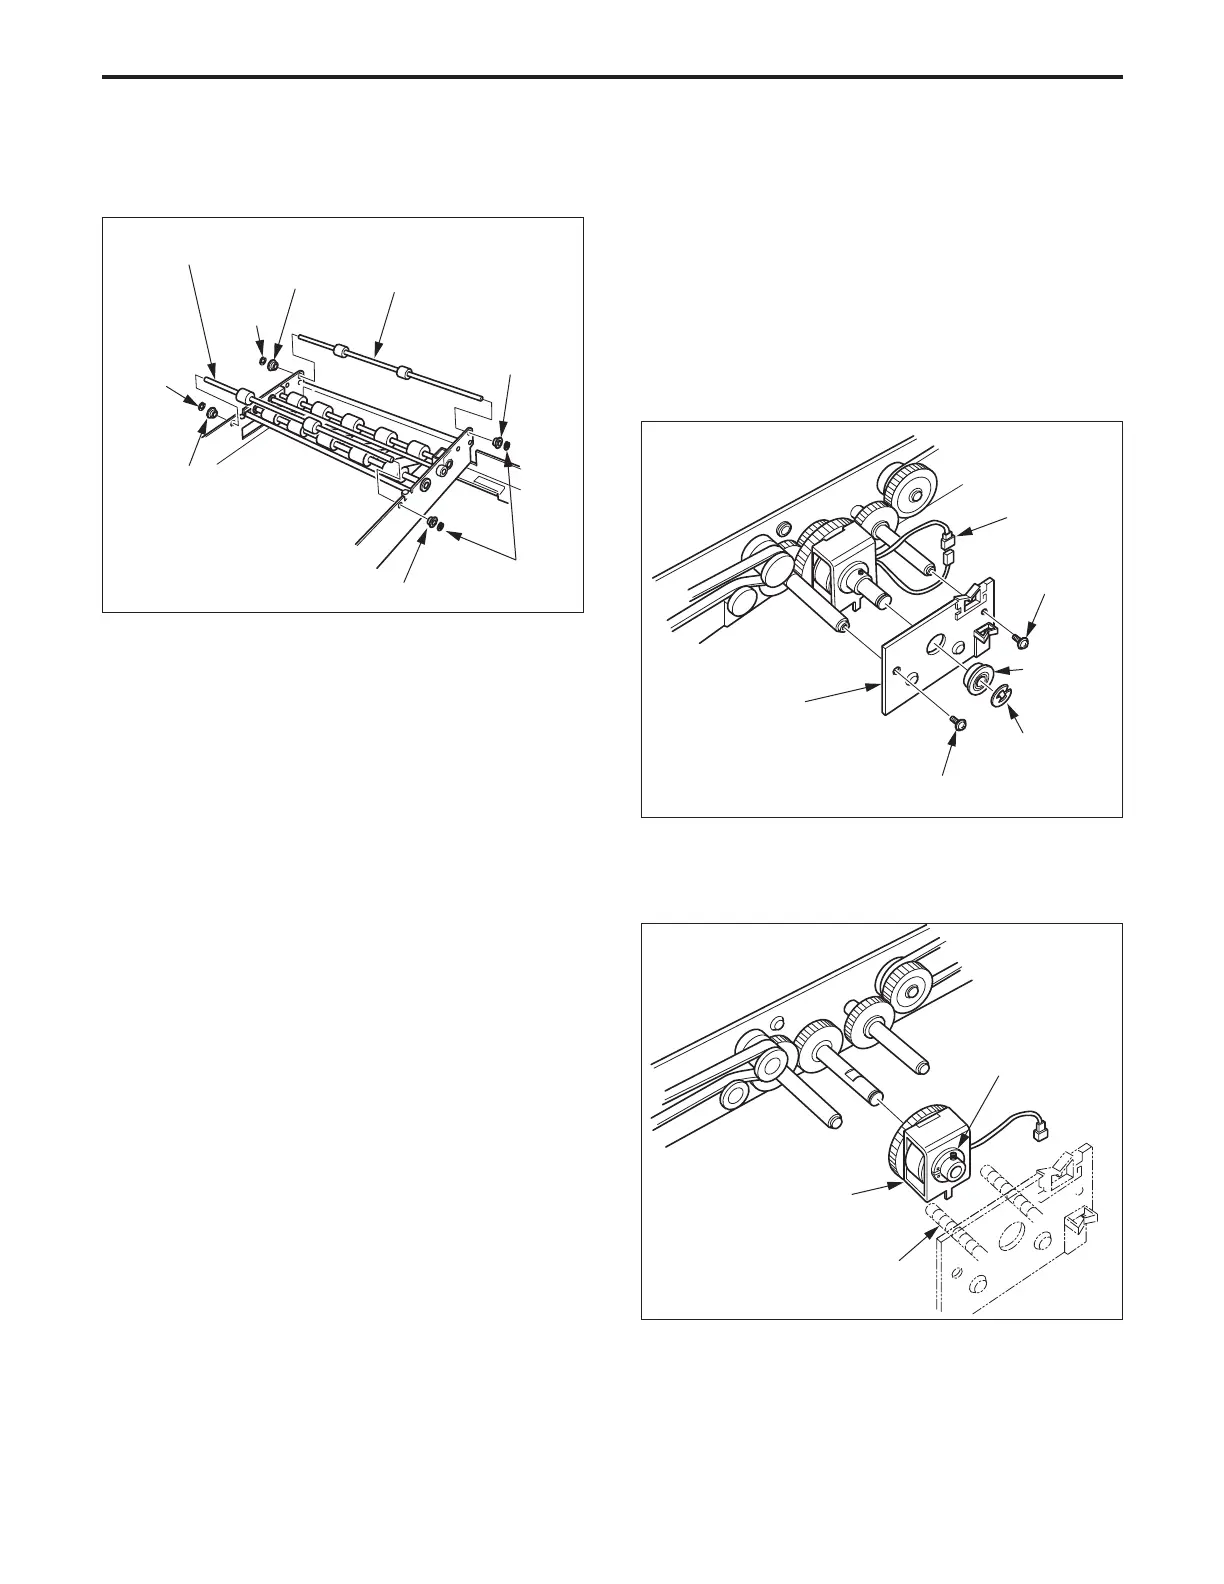
(8) Remove the four E rings and the four bearings, then
remove the ADU conveyance roller/E.
Bearing
E ring
Bearing
Bearing
E ring
E ring
Bearing
ADU conveyance roller/E
ADU conveyance roller/E
3. Replacing the ADU Drive Clutch (conveyance
section)
a. Procedure
(1) Remove the ADU unit.
(2) Remove the ADU cover (front).
(3) Remove the ADU cover (upper).
(4) Remove the E ring and the bearing.
(5) Remove the two set screws, then remove the clutch
mounting plate.
(6) Disconnect the clutch connector (CN551).
Set screw
E ring
Set screw
Clutch mounting
plate
Bearing
CN551
(9) Re-install the above parts in the opposite sequence to
removal.
ADU drive clutch
(conveyance section)
Set screw
(7) Slacken the set screw, then remove the ADU drive
clutch (conveyance section) from the shaft.
(8) Re-install the above parts in the opposite sequence to
removal.
Caution: When re-installing the clutch, ensure that the clutch
is between the screws in the clutch mounting plate.
Screws in the clutch
mounting plate