2 - Q - 6
ADU PAPER FEED/CONVEYANCE SECTION
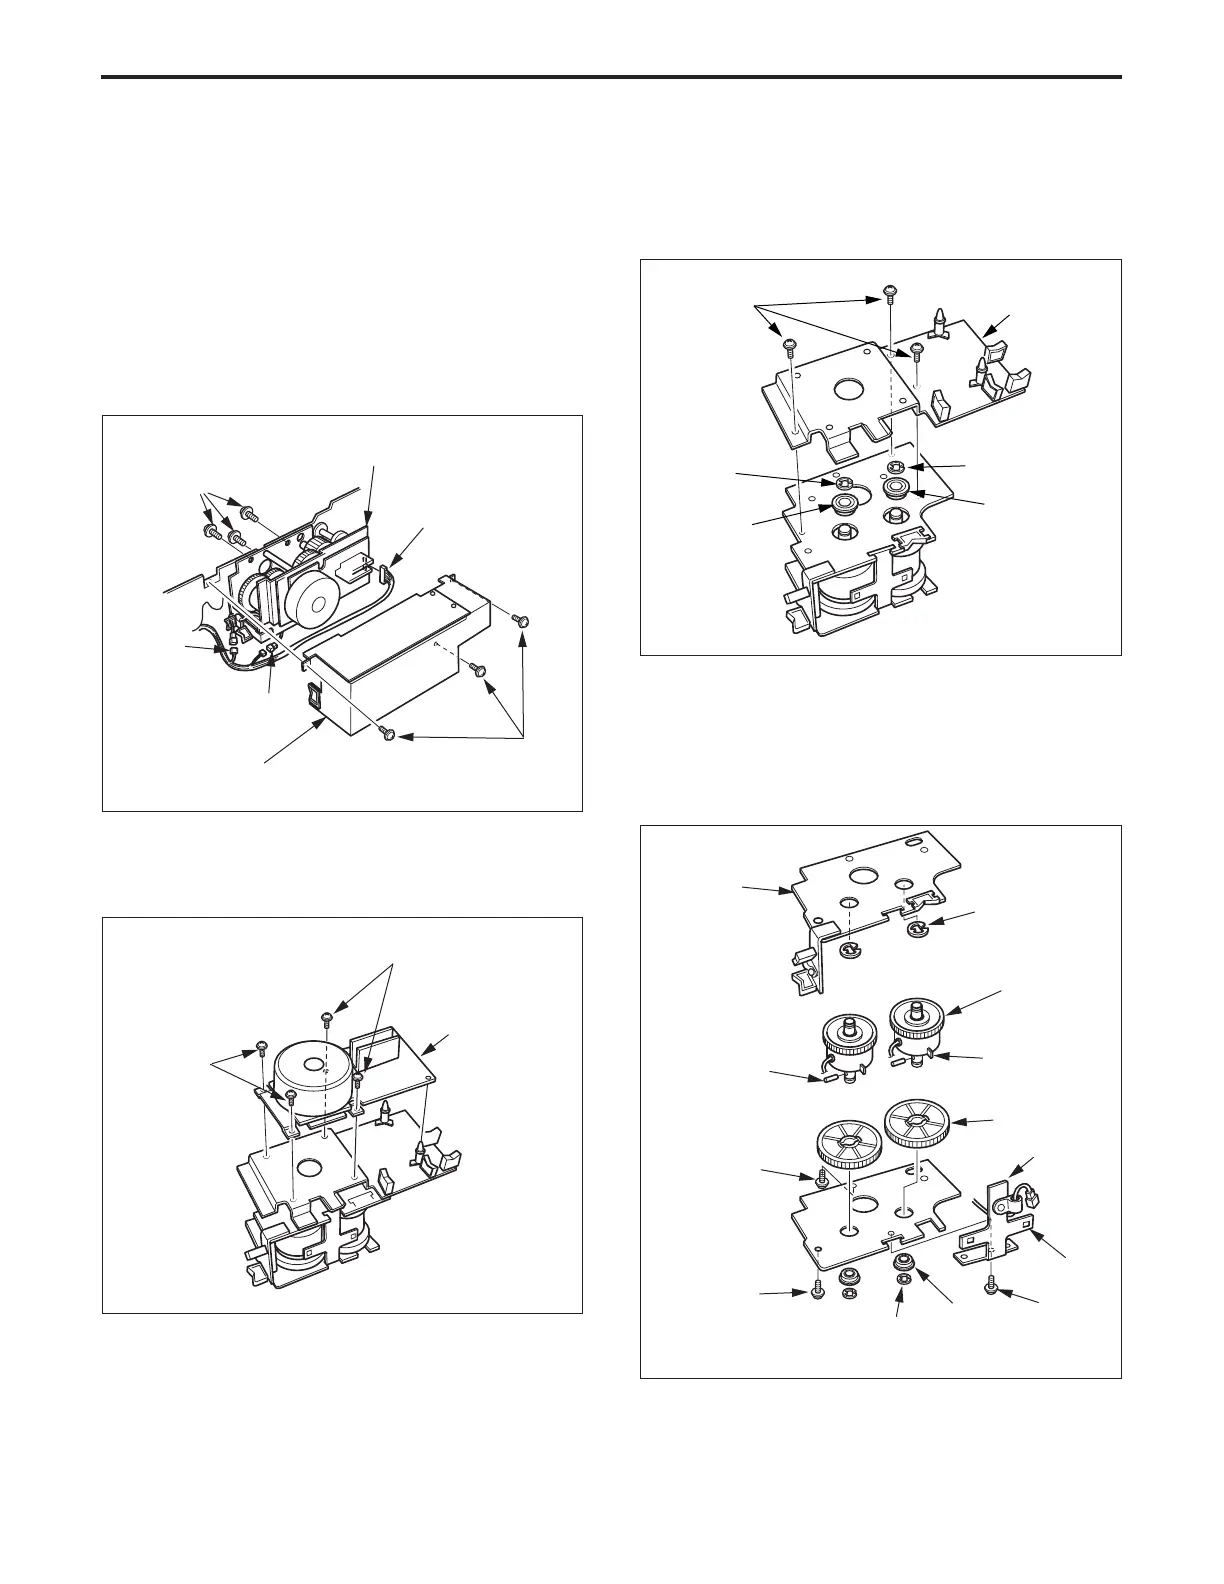
4. Replacing the ADU Drive Clutch (reversal
section)
a. Procedure
(1) Remove the ADU unit.
(2) Remove the three set screws, then remove the drive
cover plate.
(3) Remove the three set screws, then remove the ADU
drive unit from the ADU.
(4) Disconnect the three connectors (CN552, CN553 and
CN554).
(5) Remove the four set screws and two supports, then
remove the ADU drive motor board ass’y.
Set screws
Drive cover plate
Set screws
ADU drive unit
CN554
Set screws
Set screws
ADU drive motor
board ass’y
CN553
CN552
(6) Remove the three set screws, then remove the motor
mounting board.
(7) Remove the two E rings and the two bearings.
(11)Re-install the above parts in the opposite sequence to
removal.
Caution: When installing ADU drive clutch/B, ensure that the
projection enters the square hole of lead wire guide
plate (B).
(8) Remove the E ring, the three set screws, and the
bearing, then remove the ADU drive board plate
(9) Remove each gear (4), then pull out the pins remaining
in the shafts.
(10)Remove the E ring and the C ring, then pull out the
clutch gear from the ADU drive clutch/B.
Motor mounting
board
Bearing
Bearing
E ring
Set screws
E ring
ADU drive
clutch/B
E ring
Gear (4)
Lead wire
guide plate
(B)
Square hole
Set
screw
Bearing
E ring
Set screw
Set screw
Projection
Pin
ADU drive
board plate