ADJUSTMENT
4 - 21
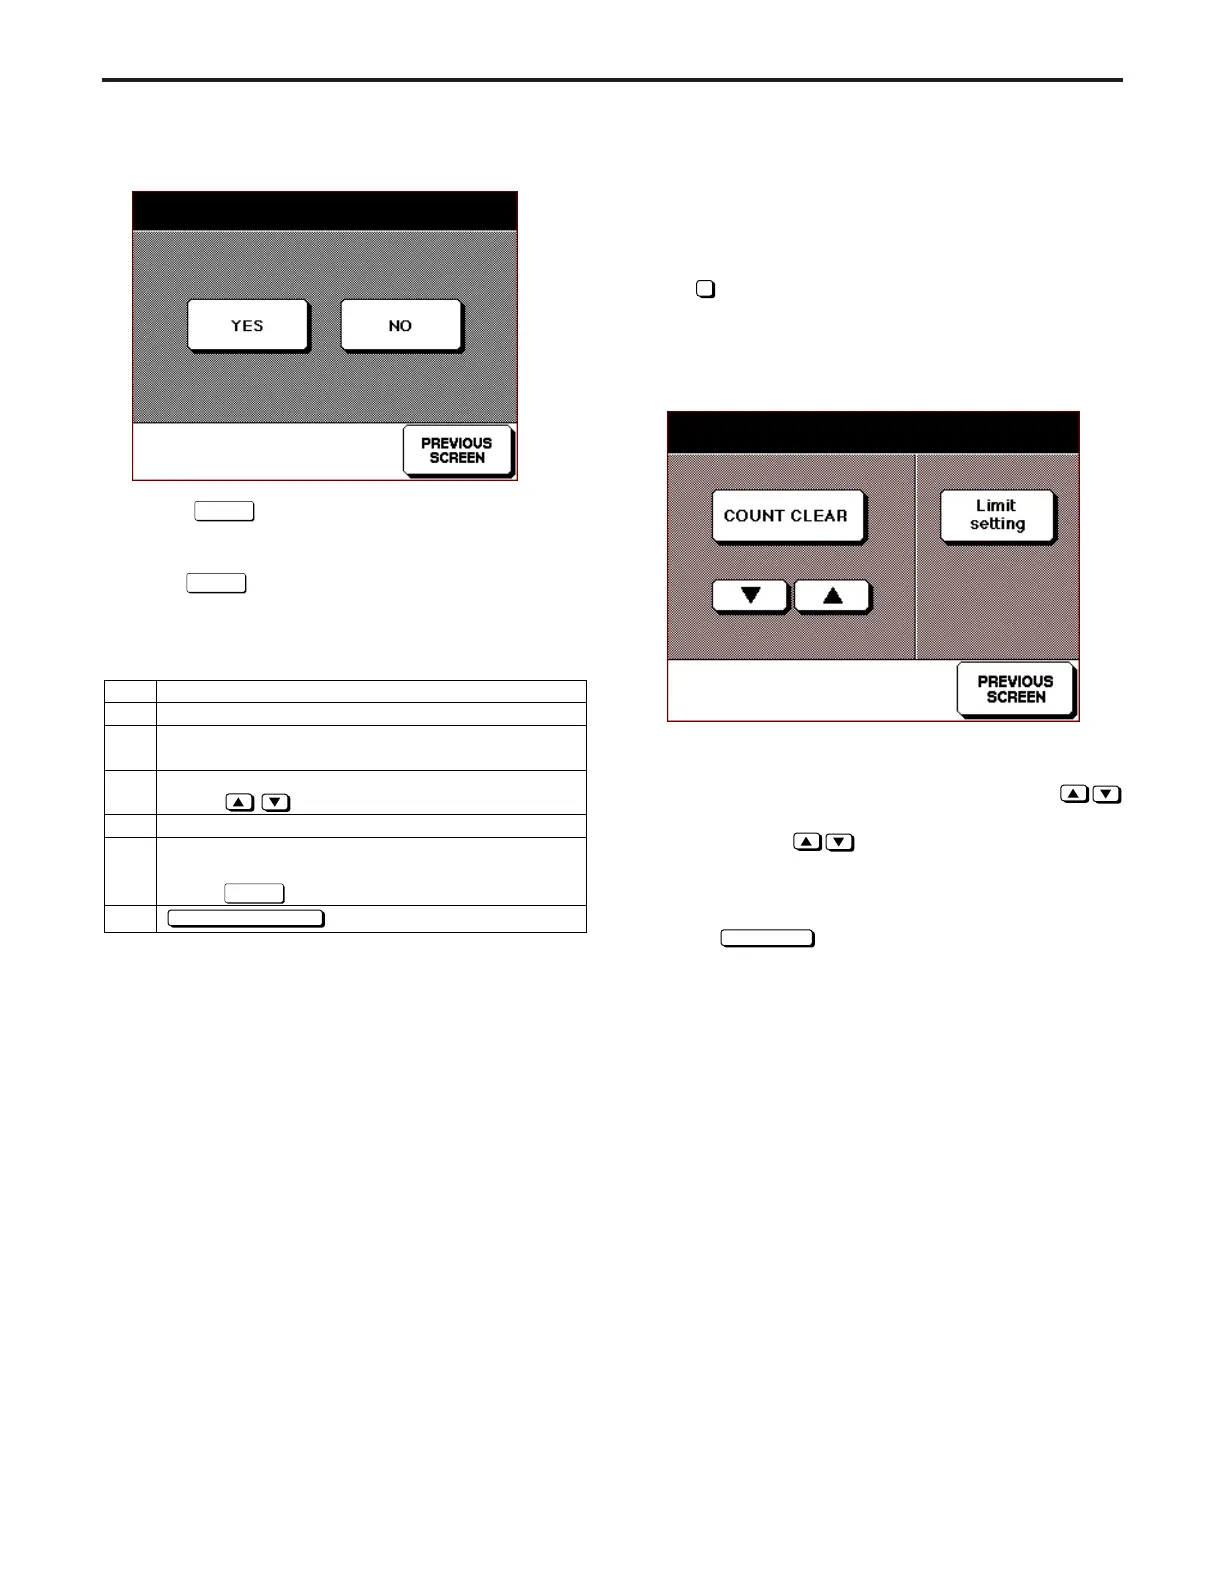
(5) Select
Yes
key to clear the copy count. The screen
returns to Copy Count Screen by Parts to be Replaced
after the count is cleared.
(6) Select
No
key to return to Copy Count Screen by Parts
to be Replaced without clearing any count.
Step
1
2
3
4
5
6
Operation
Enter the 25 mode.
[25 MODE SCREEN]
Press
5
Copy Count by Parts to be Replaced.
[COPY COUNT SCREEN BY PARTS TO BE REPLACED]
Press
key to select the data number.
Press Count Reset button.
[COPY COUNT RESET SCREEN BY PARTS TO
BE REPLACED]
Press key to clear the count.
key to end setting.
Yes
PREVIOUS SCREEN
[Copy Count Reset Screen by Parts to be Replaced]
Each part counter clear YES / NO?
No.1 1565/5000
2. Copy count limit setting by parts to be replaced
Set new limit value for the copy count by parts to be re-
placed.
<Count Limit Selection>
Select
5
Copy count by parts to be replaced in the 25 Mode
Screen to display Copy Count Screen by Parts to be Replaced
as an initial screen. Select the limit set here.
[Copy Count Screen by Parts to be Replaced]
(1) Data number, count value then limit value are displayed
on the second row of the message area.
(2) The data number can be changed by pressing
key.
Press and hold
key to display next items continu-
ously.
(3) The count/limit value for the selected data No. will be dis-
played.
(4) Press
Limit setting
key to set the limit value.
Copy Count Limit Setting Screen by Parts to be Replaced
will appear.
Note:
The right side of the limit value will be marked as "
*
" if the
copy count exceeds its limit value.
Each part counter limit selting
No.15 P/N xxxxxxxxx 00300/050000
ADJUSTMENT-1