2 - E - 2
READ SECTION
2. Removing and Re-installing the CCD Unit
Caution: Be sure that the power cord has been unplugged
from the power outlet.
Caution: Be sure to perform image adjustment after installing
the CCD unit. (For details, refer to "Adjustment
section".)
a. Procedure
(1) Remove the glass holder plate, original stopper plate,
platen glass and upper cover (center).
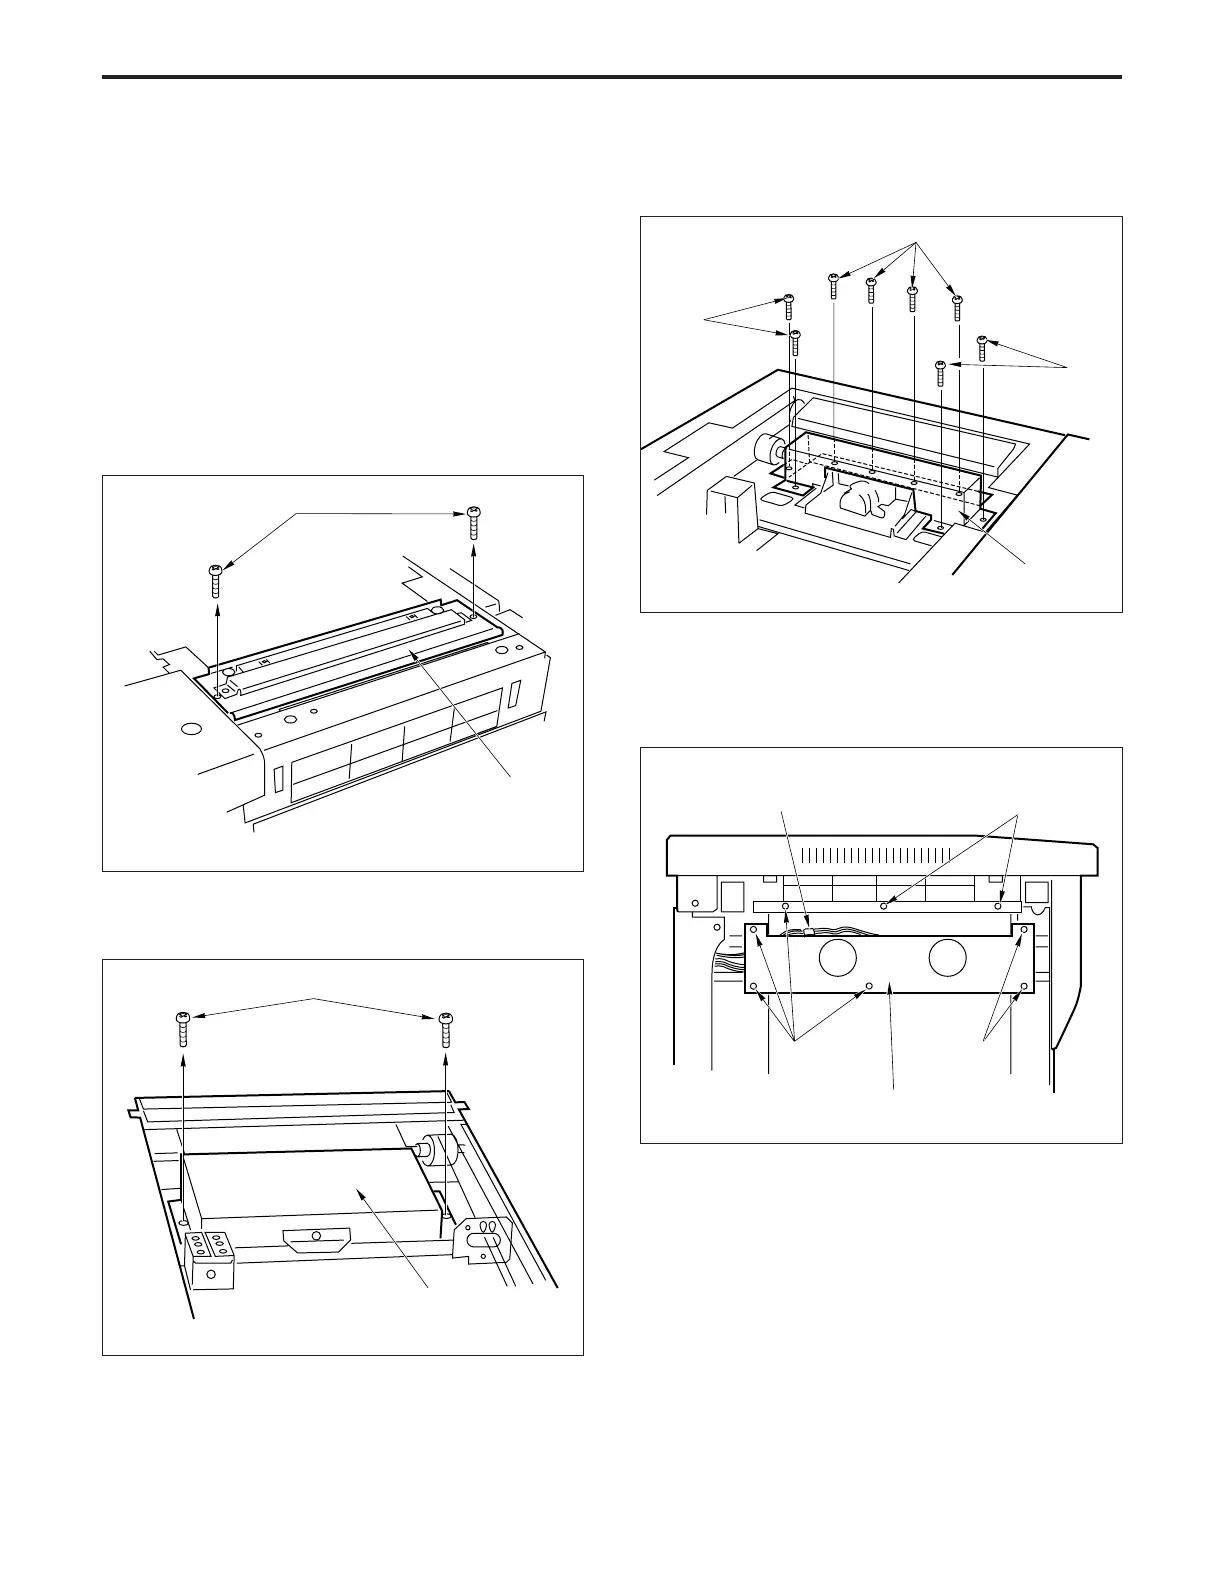
(2) Remove the two set screws, then remove the glass
stopper plate.
(4) Remove the eight set screws, then remove the lens
light blocking cover 1.
(5) Remove the left side upper cover.
(6) Disconnect the connector (CN49).
(7) Remove the eight set screws, then remove the fan
mounting plate.
Set screws
Set
screws
Set
screws
Lens light
blocking
cover 1
(3) Remove the two set screws, then remove the lens light
blocking cover 2.
Set screws
Set screws
Glass stopper plate
Lens light
blocking cover 2
Connector (CN49) Set screws
Fan mounting plate
Set screws Set screws