2 - E - 3
READ SECTION
3. Replacing the Exposure Lamp
Caution:
1. Be sure that the power cord has been unplugged
from the power outlet.
2. DO NOT touch the glass of the exposure lamp with
bare hands.
Caution:
1. Be sure to install the exposure lamp with the maker's
mark facing the front side of the main body.
2. The nipple on the exposure lamp must face the paper
feed side.
3. Be sure to check the image after installing the expo-
sure lamp. (For details, refer to "Adjustment section".)
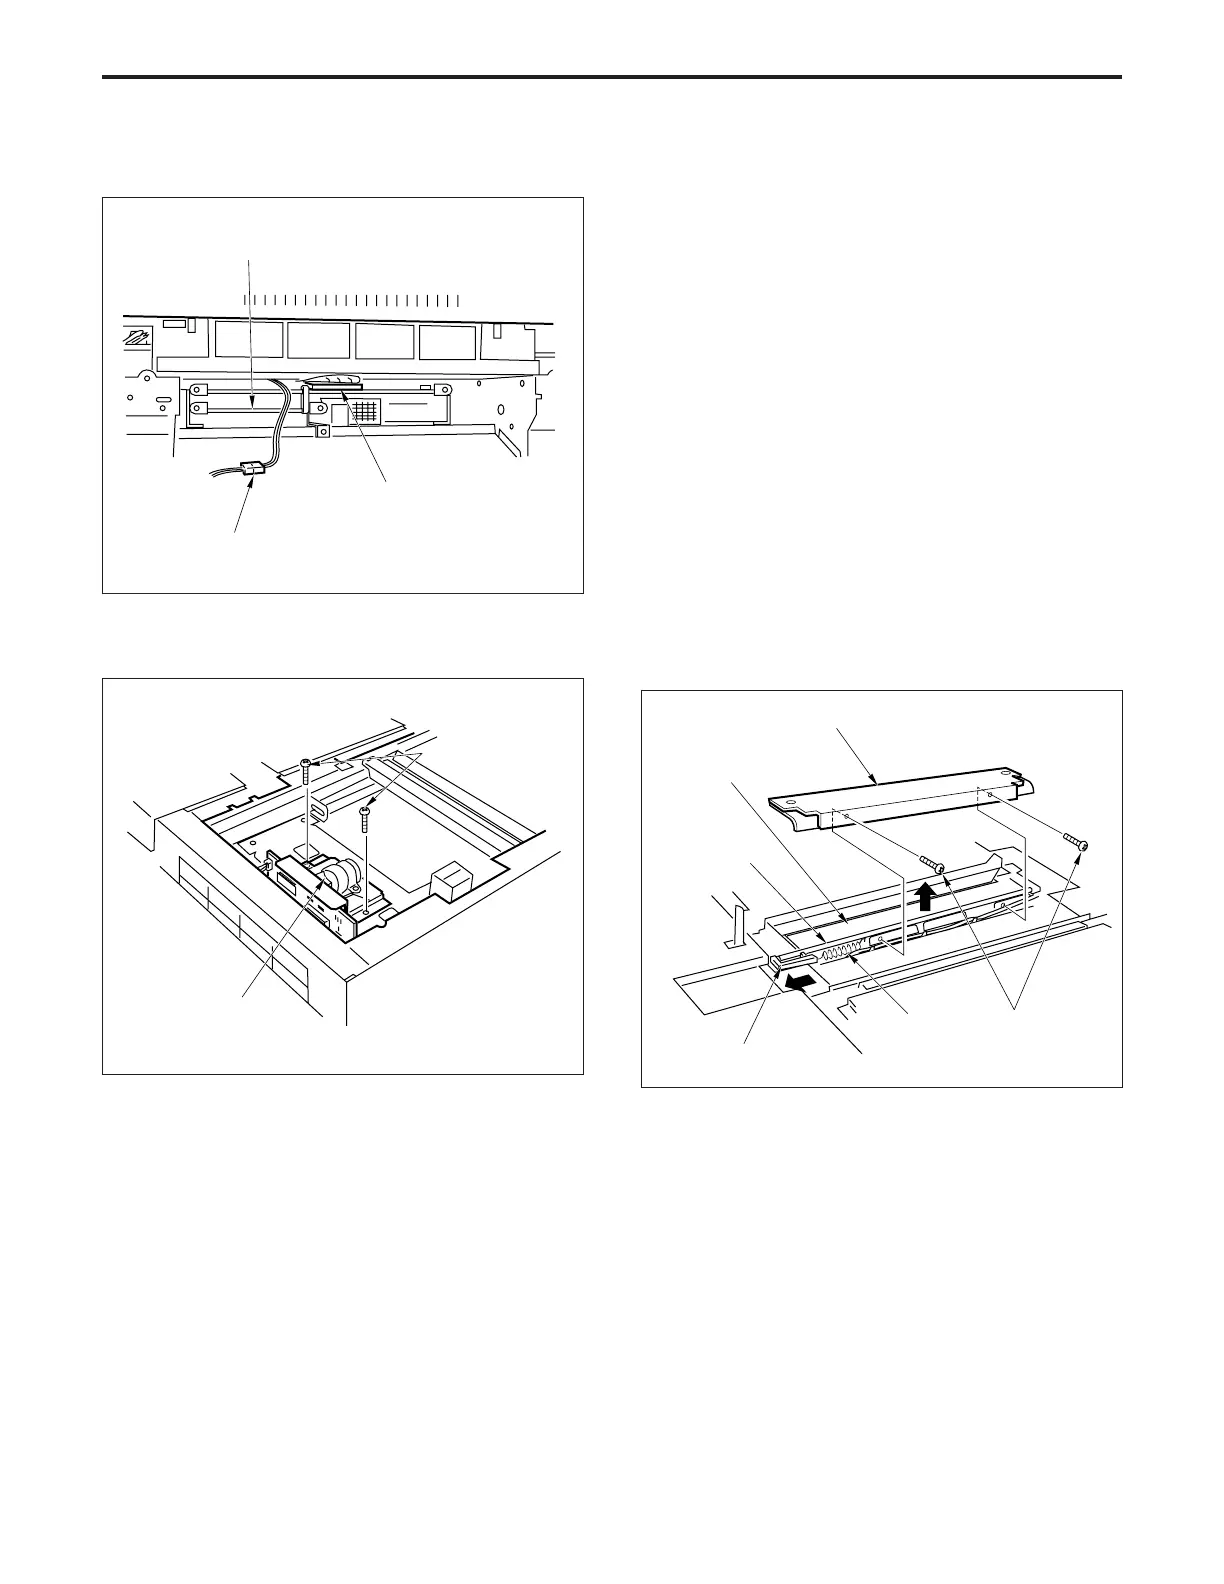
a. Procedure
(1) Remove the glass holder plate, original stopper plate,
platen glass and the upper cover (center).
(2) Move the exposure unit to the notch on the main frame
fitted on the paper exit side.
(3) Remove the two set screws, then remove mirror sup-
port plate 2.
(8) Disconnect the two connectors (CN420 and 412).
(9) Remove the two set screws, then remove the CCD
unit.
Connector (CN412)
(10)Re-install the CCD unit in the opposite sequence to
removal.
Set screws
CCD unit
Electronic RDH
Connector (CN420)
Set screws
Mirror support plate 2
Reflector mirror 1
Exposure lamp
Lamp terminal
Spring
(4) To prevent the exposure lamp from dropping out, insert
a sheet of paper from beneath reflector mirror 1 and
wrap it around the exposure lamp.
(5) Remove the spring, then slide the lamp terminal to the
rear and remove the exposure lamp. (Lift out the lamp
while holding it with the paper that you wrapped around
it.)
(6) Re-install the exposure lamp in the opposite sequence
to removal.