2 - G - 3
DRUM UNIT
2. Removing and Re-installing the Drum
Caution:
1. Be careful not to touch the drum or the cleaning blade
with bare hands, or damage these parts.
2. When leaving the drum to stand, be sure to place the
drum cover over it and store it in a dark place.
3. When re-installing the drum, cleaning blade and guide
roller, apply setting powder to the entire surface of the
drum and also to the cleaning blade regardless of
whether or not the parts are new or old types. In
addition, apply toner to both ends of the cleaning
blade.
4. After applying setting powder to the drum, carry out the
following work before installing the drum unit on the
main body.
1) To ensure that the toner density is correct, before
installing the drum to the drum unit, discharge the
surface of γ detection sensor and the Dmax sensor
on the control board by using a piece of cloth
moistened with alcohol, thus preventing toner from
adhering to the sensors.
2) After
installing
the drum to the drum unit, with the
charging corona unit and the developing unit re-
moved, insert the centering jigs into both sides of
the drum, then turn the drum one revolution. This
prevents setting powder from scattering onto the
charging corona unit, and other parts, and also
prevents image defects.
5. When installing the drum, be careful of the orientation
of the drum. The end of the drum with the wider non-
image area is the front.
6. When installing a new drum, be sure to enter code 91
of the 47 mode and reset the process counter (drum
counter). (For details, refer to "Adjustment section".)
a. Procedure
(1) Remove the drum unit from the main body.
(2) Remove the charging corona unit, developing unit and
cleaning blade from the drum unit. (For the sequence
of removing these parts, refer to "Charging corona unit,
Developing unit and cleaning/recycle unit section".)
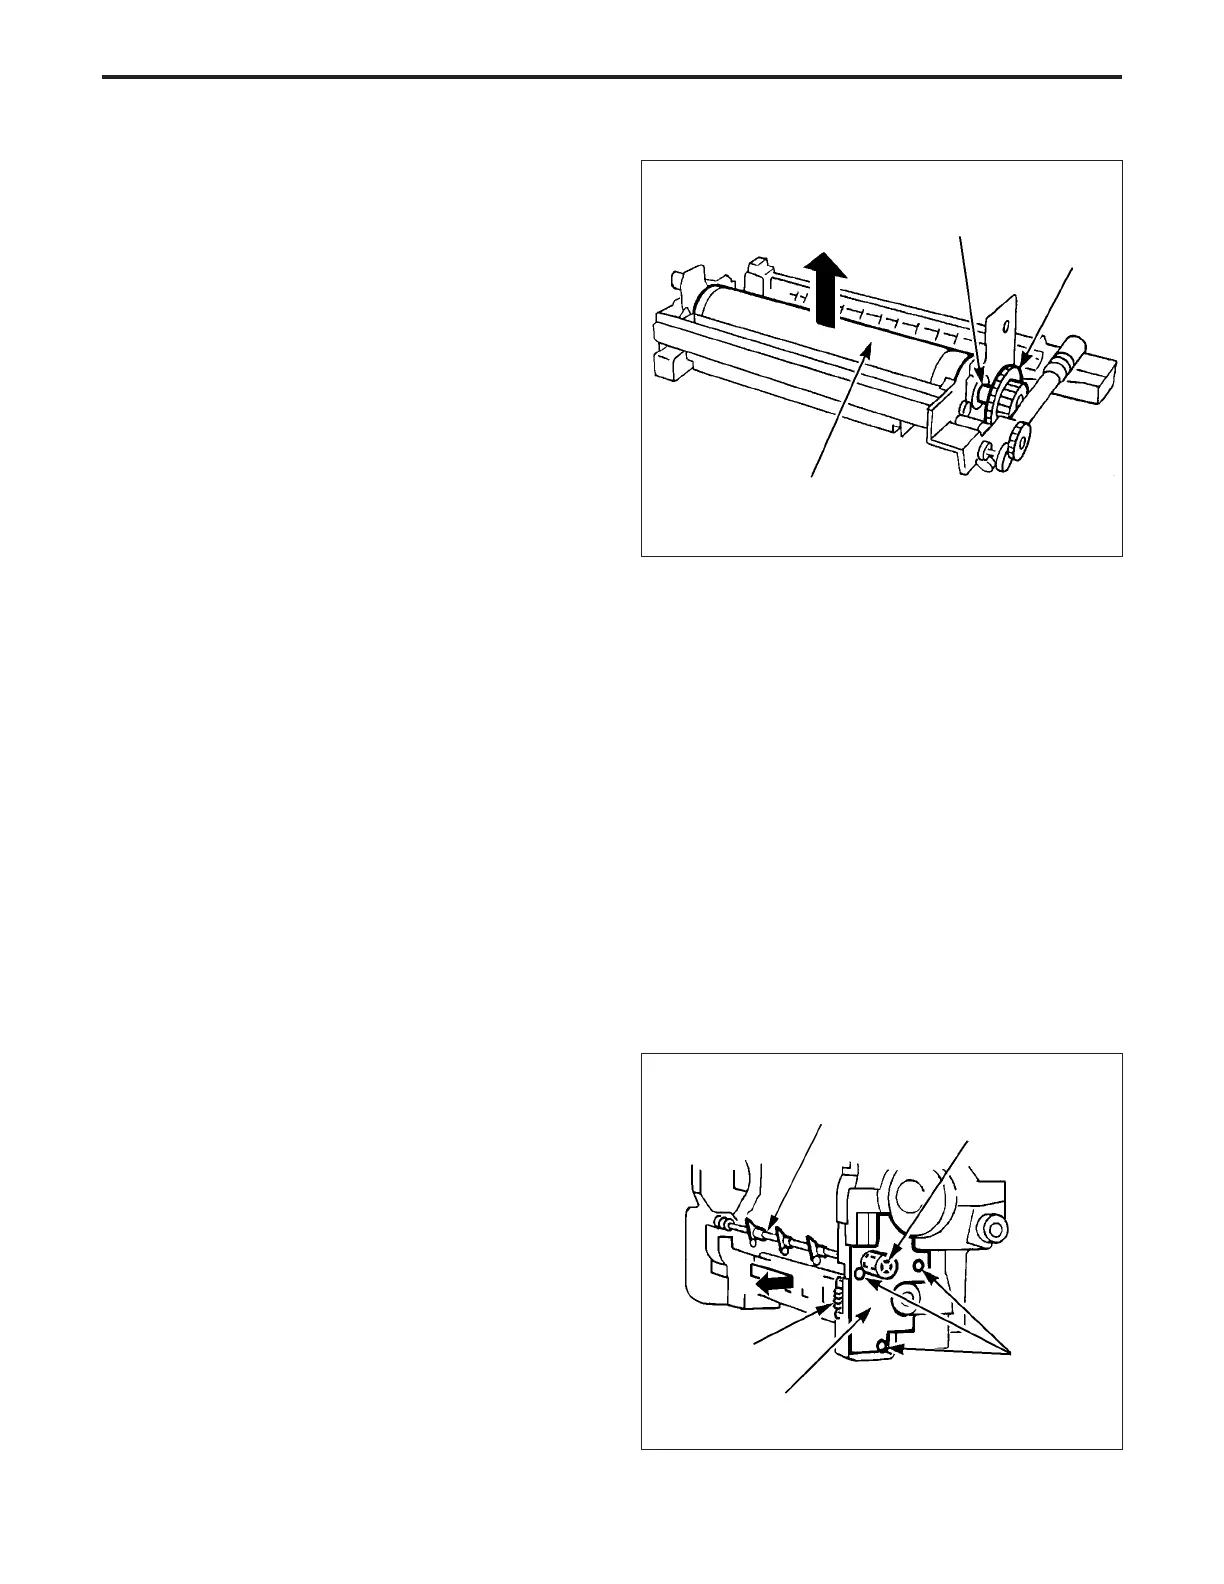
(3) Remove the cleaner idler gear and the drum fixing
coupling.
Note: Before removing the drum, in order to prevent the toner
from dropping, rotate the cleaner idler gear/B
counterclockwise and remove the toner remaining be-
tween the drum and guide roller.
If the toner cannot be removed, rotate the drum clock-
wise a bit, then detach the drum keeping the toner in
place.
(4) Gently lift out the drum while holding it at both ends to
ensure that you do not damage the photosensitive
surface.
(5) Re-install the drum in the opposite sequence to re-
moval.
3. Removing and Re-installing the Separation
Claws
Caution:
1. Take care not to damage the drum when removing the
separation claws.
2. Be careful of the direction and position of the separa-
tion claws when re-installing the claws.
3. Do not touch the cleaning blade or the drum with the
bare hands.
a. Procedure
(1) Remove the drum carriage from the main body.
(2) Remove the drum from the drum carriage.
(3) Remove the spring.
(4) Remove the three set screws, then remove the swing
block and swing clutch.
(5) Remove the separation claw unit.
Drum fixing coupling
Cleaner idler gear
Drum
Swing clutch
Set screws
Separation claw unit
Spring
Swing block
DRUM UNIT-1