Virtual Private Networking Using IPSec and L2TP Connections
217
NETGEAR ProSAFE VPN Firewall FVS318G v2
Create an IPv6 Gateway-to-Gateway VPN Tunnel with the
Wizard
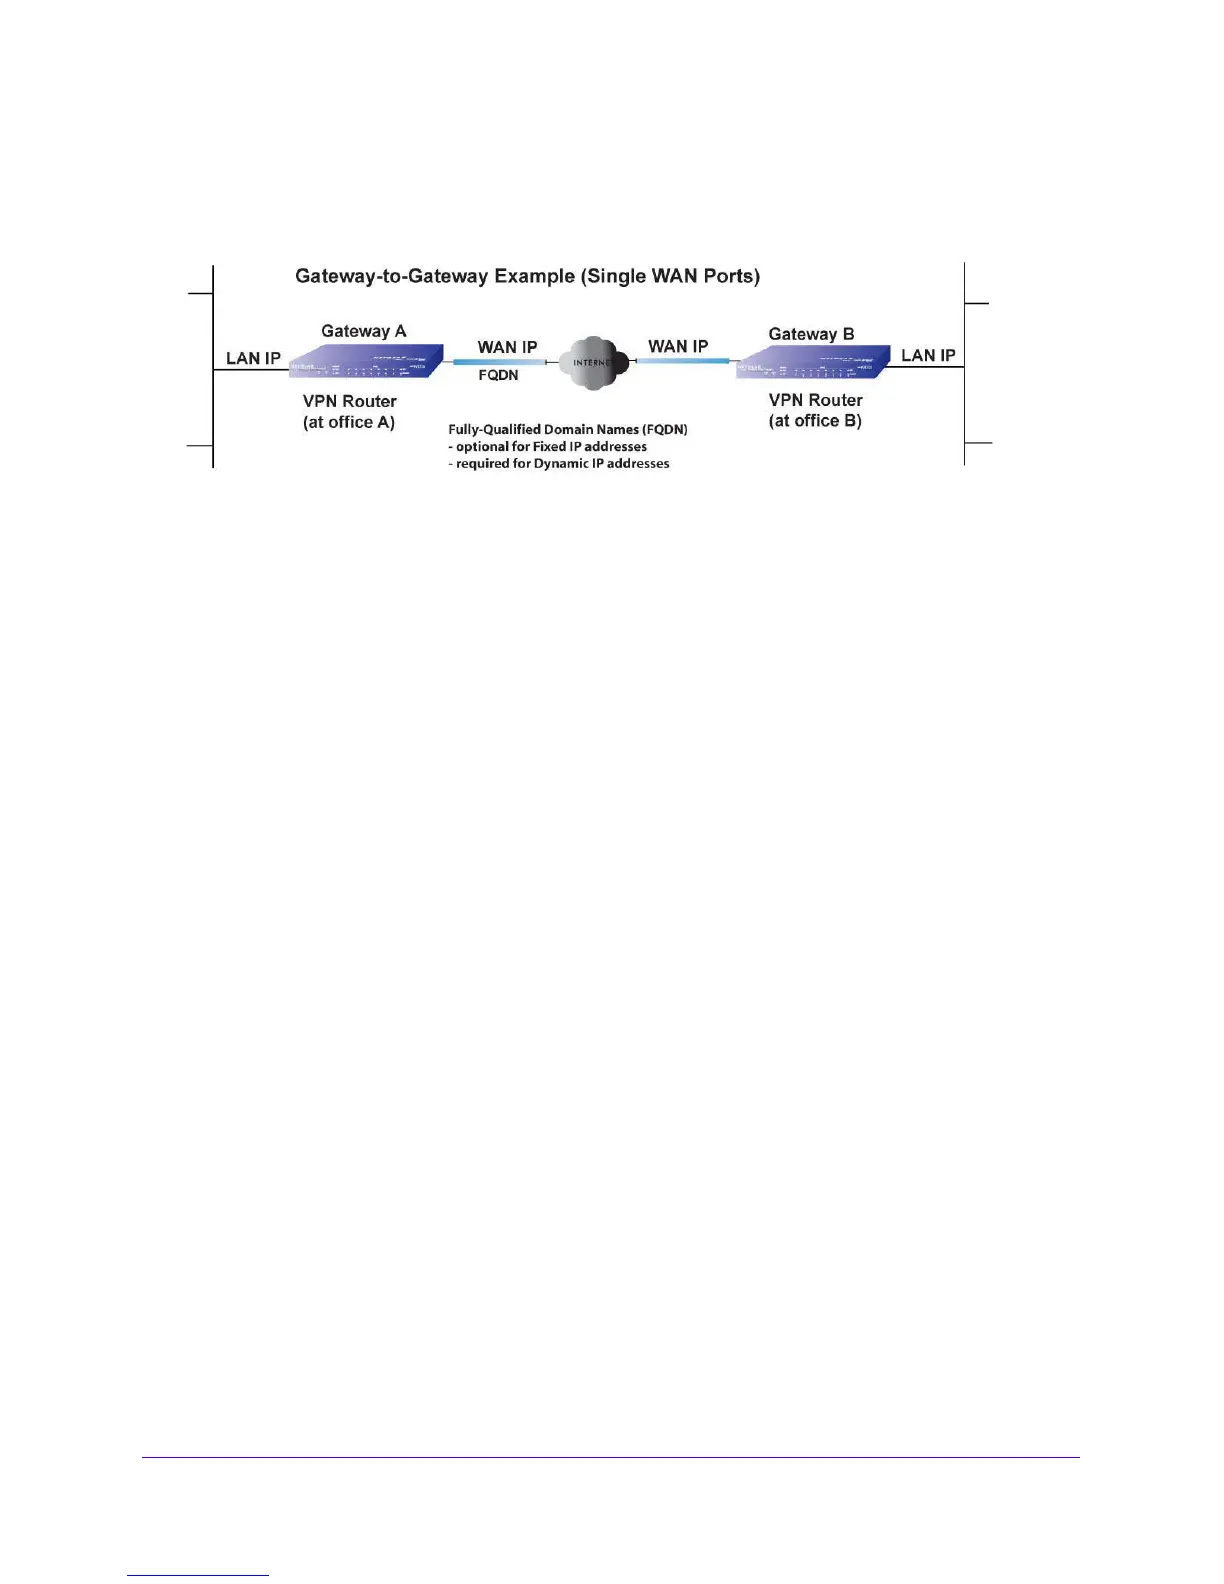
Figure 17. Example of VPN tunnel
To ensure that tunnels stay active, after completing the wizard, manually edit the VPN policy
to enable keep-alives, which periodically sends ping packets to the host on the peer side of
the network to keep the tunnel alive. For more information, see Configure Keep-Alives on
pa
ge 277.
For DHCP WAN configurations, first set up the tunnel with IP add
resses.
After you validate
the connection, you can use the wizard to create new policies using the FQDN for the WAN
addresses.
When using FQDNs, if the Dynamic DNS service is slow to
update
its servers when your
DHCP WAN address changes, the VPN tunnel fails because the FQDNs do not resolve to
your new address. If the option to configure the update interval is available, set the interval to
an appropriately short time.
To set up an IPv6 gateway-to-gateway VPN tunnel using the VPN Wizard:
1. Log in to the unit:
a. In the address field of any of the qualified web browsers, enter
https://192.168.1.1.
The NETGEAR Configuration Manager Login screen d
isplays.
b. In the Username
field, enter admin and in the Password / Passcode field, enter
password.
Use lowercase letters. If you changed the password, enter your personalized
password. Leave the domain as it is (geardomain).
c. Click
the Logi
n button.
The Router Status screen displays. After five minutes of inactivity
, which is the default
login time-out, you are automatically logged out.
2. Select V
P
N > IPSec VPN > VPN Wizard.
The VPN Wizard screen displays.
3. In the upper right of the screen, select the IPv6
radio button.