6. From the menu bar
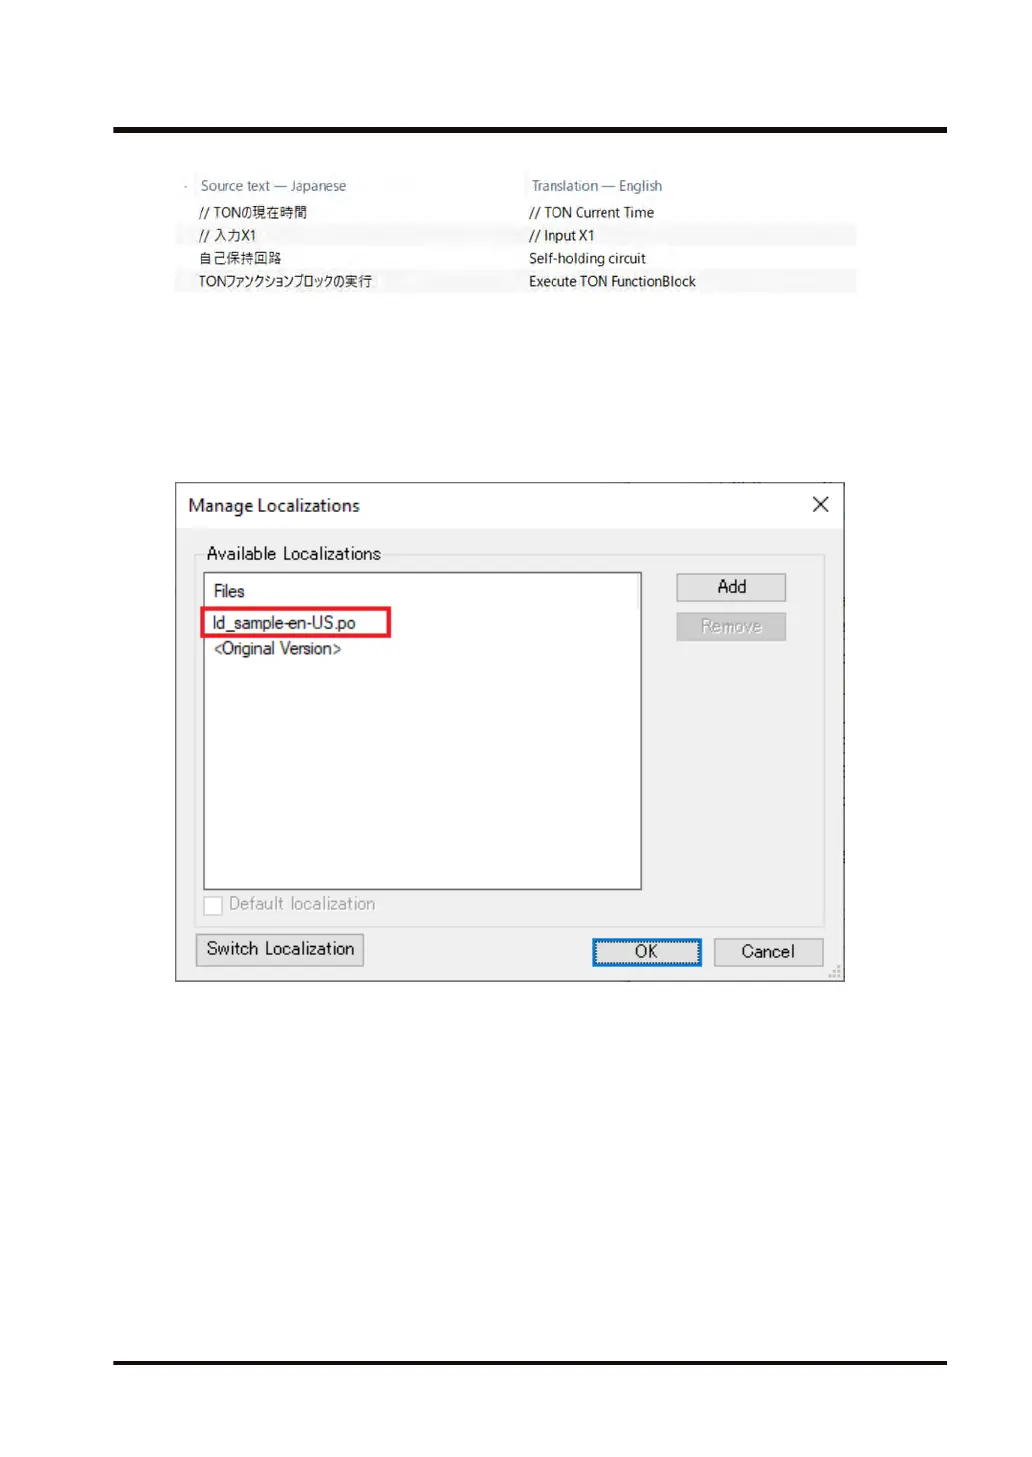
, select Project>Project Localization>Manage Localizations.
The "Manage Localizations" dialog box will be displayed.
7. Click the [Add] button.
The "Open Localization File" dialog box will be displayed. Select a localization file (".po")
that has been created.
The added localization file will be displayed in the "Available Localizations" area.
8. Click the [OK] button.
The "Manage Localizations
" dialog box will be closed.
This completes the localization file creation procedure.
Next, the procedure for switching the display is explained below.
9. From the menu bar, select Project>Project Localization>Switch Localization.
Symbol comments and title comments will be displayed according to the translations in the
added localization file.
To return the display to its original state, select "Switch Localization" again.
7.7 Program Creation Support Functions
WUME-GM1RTXOP-01 7-57