Build 21 v21.4.1
© 2007-2010 RED.COM INC. FEBRUARY 23, 2010
60 60
If the RECORD button is pushed while in pre-record, the pre-record mode is terminated and a normal
record is enabled. The timecode value and clip name are carried over between pre-record and record
modes.
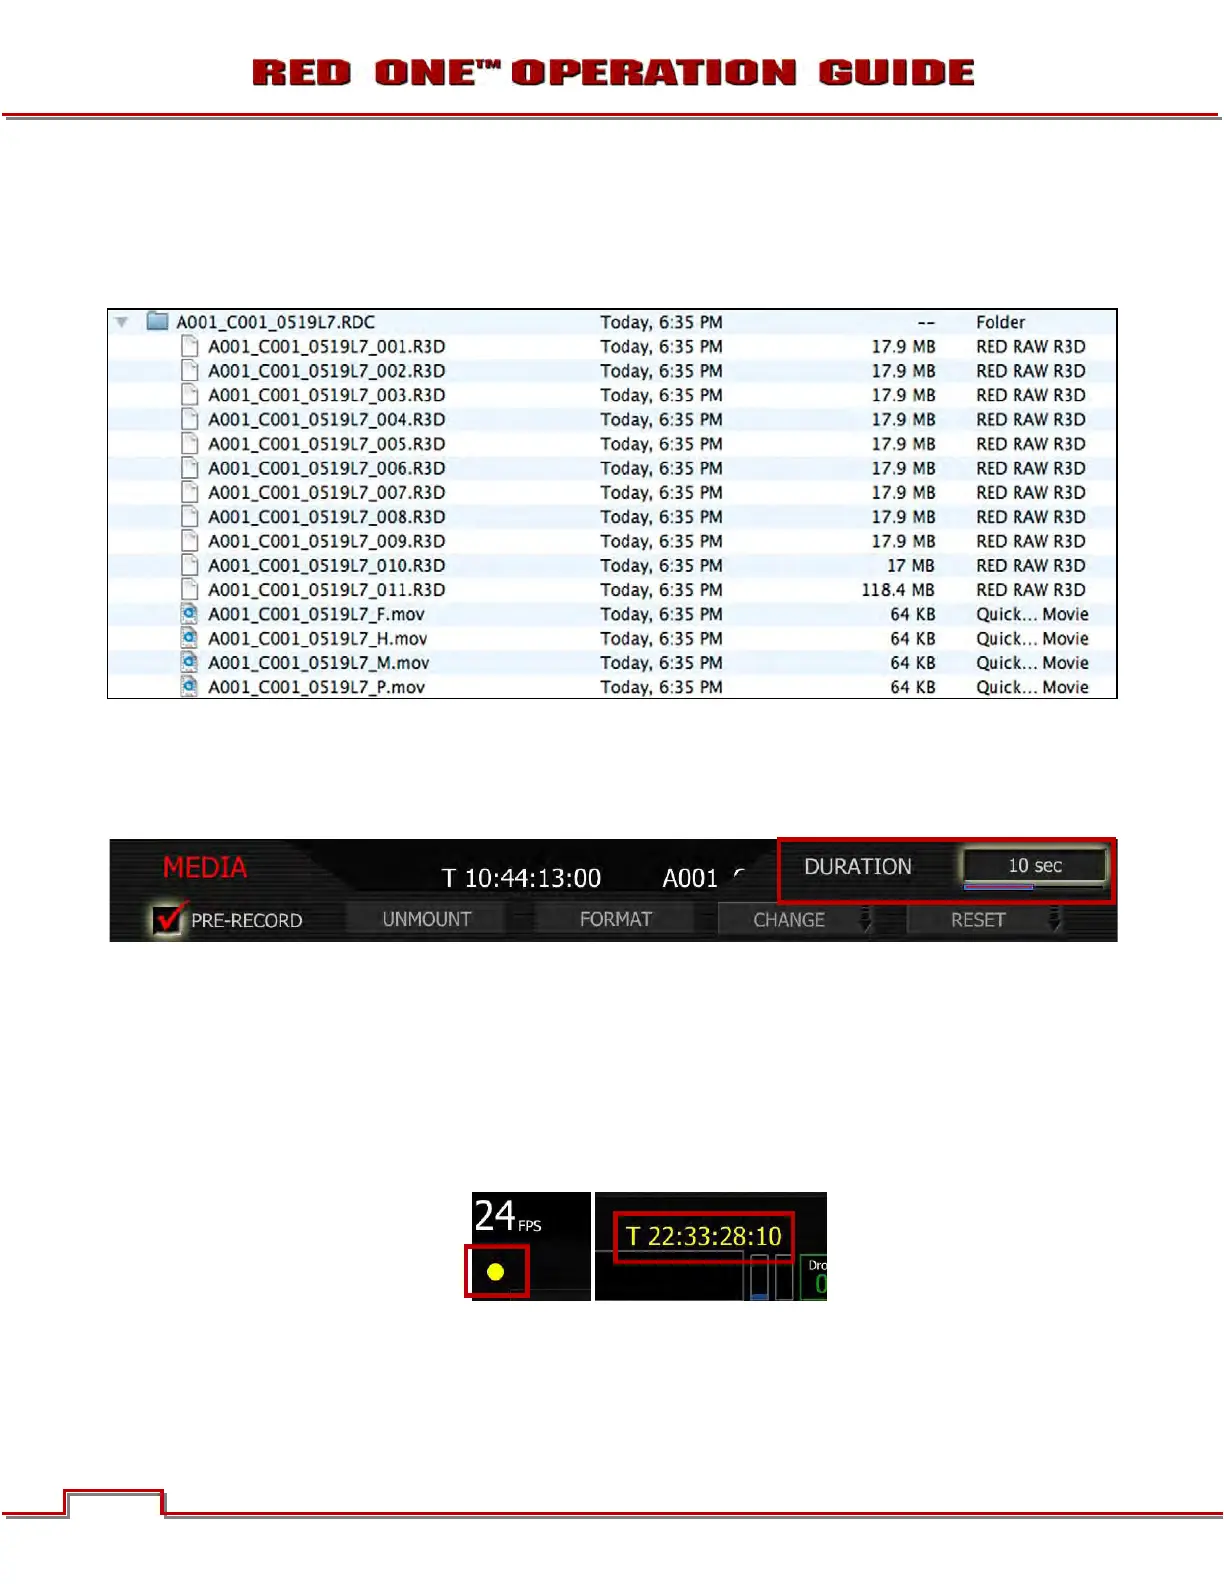
A typical clip folder in this scenario looks as follows:
This specific clip includes eleven .R3D files, the first ten of which correspond to the pre-record and the
eleventh file corresponds to the normal record period. All have the same clip name.
NOTE: On playback on camera or in the RED Alert! or any QuickTime application, these eleven indi-
vidual .R3D files are seen as a single continuous video clip.
1. To enable PRE-RECORD, push in or down on joystick to place checkmark in PRE-RECORD check-
box.
2. DURATION box will highlight to allow you to choose between 10 sec and 30 sec. Default is 10 sec.
3. Twist joystick to change the highlighted DURATION box to the desired setting.
4. Move joystick right or up to select and exit.
To activate pre-record, push both the UNDO key and the RECORD key on the camera. The camera will
commence prerecord, indicated by the record tally light and timecode changing to Yellow.
To record, push the RECORD key. This will be indicated by the record tally light and timecode changing
from Yellow to Red. To terminate pre-record, push the RECORD key a second time.
NOTE: When using Pre-Record, the Edge Code written to the digital magazine can become discon-
tinuous between clips, however Time Code is unaffected.