Build 21 v21.4.1
© 2007-2010 RED.COM INC. FEBRUARY 23, 2010
68 68
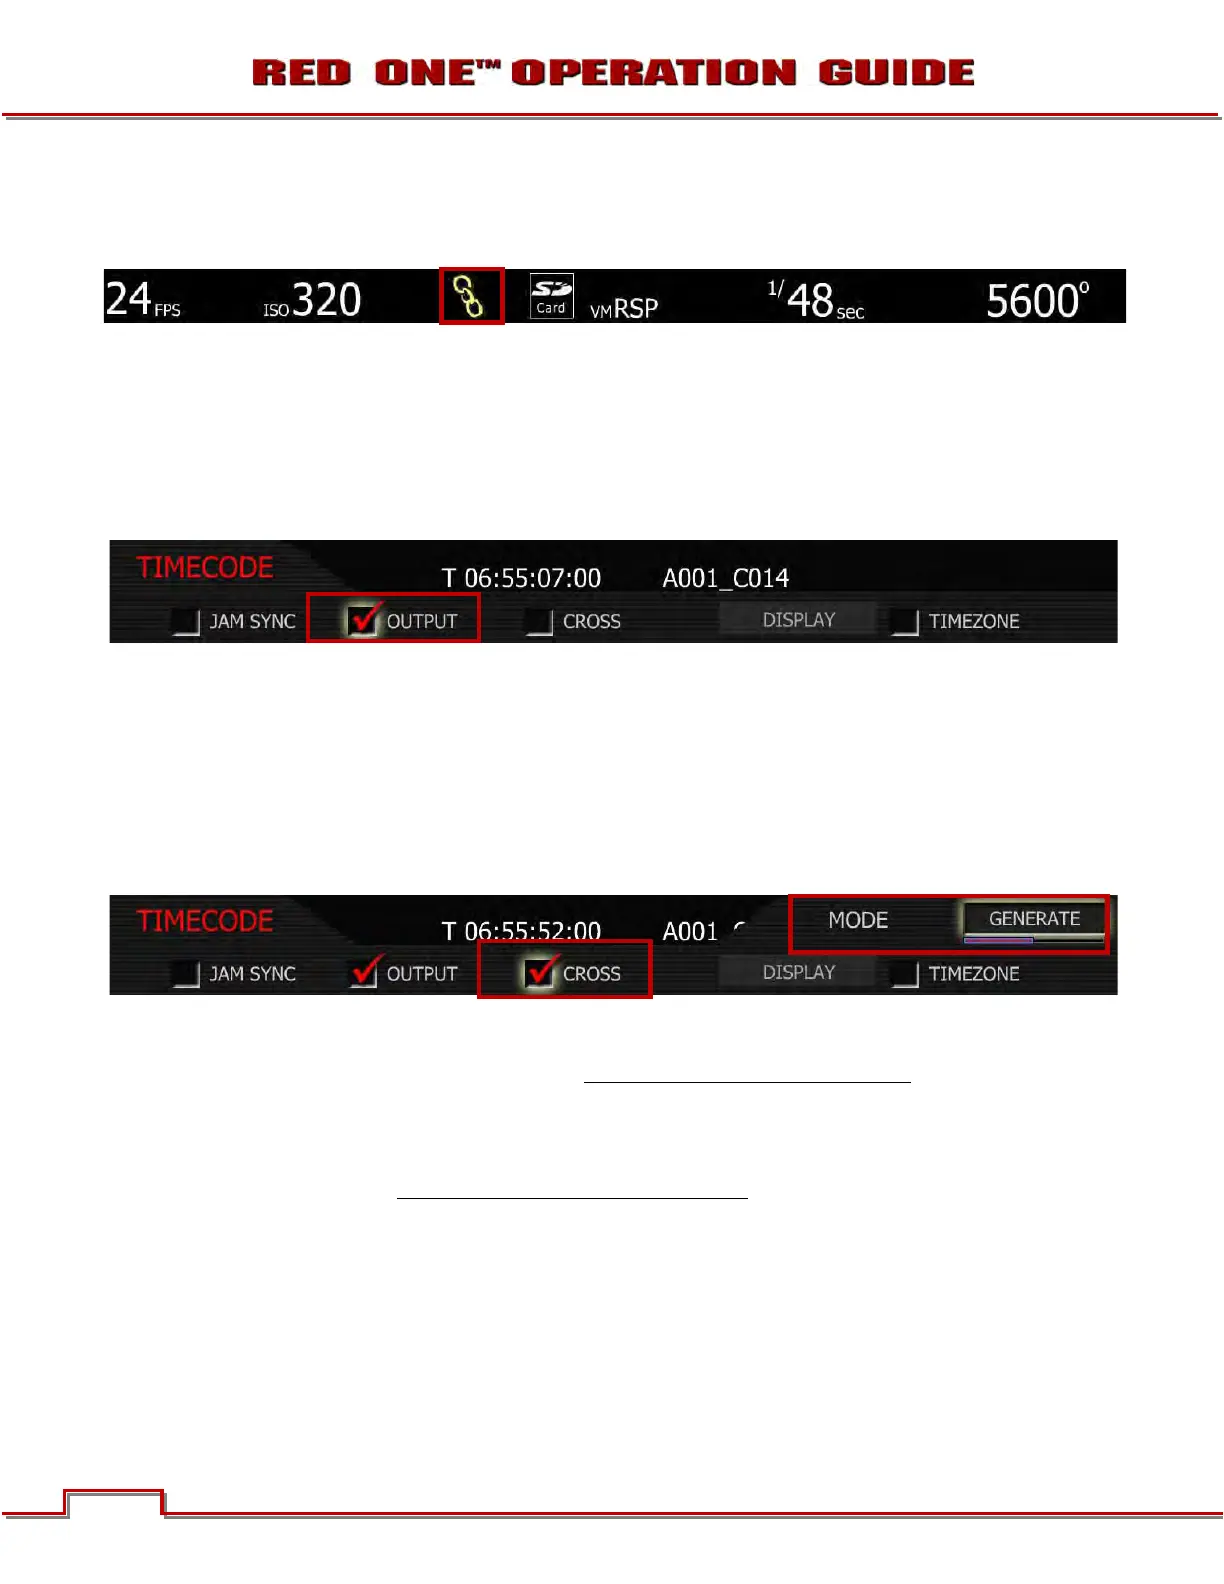
and set to the same frame rates as the camera's project TIME BASE, a CHAIN LINK icon will be displayed
at the top of the EVF, LCD and all external monitors. This indicates a valid timecode signal is available to
the camera.
NOTE: Once Jam Synced, the camera will maintain Sync even if the external timecode source is
removed, until the next power cycle.
TIME CODE OUTPUT
Checked by default, when un-checked, timecode is disabled on the 5-pin LEMO timecode I/O connector.
If checked, the current Time Code value is provided on the 5-pin LEMO timecode I/O connector. Time
Code is always embedded in HD-SDI irrespective of this setting.
CROSS
Cross allows user to select between Cross JAM and Cross GEN.
1. Push in or down on joystick to place checkmark in CROSS checkbox.
2. MODE box will highlight to allow you to choose between GENERATE or JAM.
3. Twist joystick to change the highlighted MODE box to the desired setting.
4. Move joystick left or right to select and exit.
CROSS JAM: Cross Jam activates 23.98 from 29.97 fps time code sync. The RED-ONE camera will ac-
cept a 29.97 fps time base external Time Code signal and generate a synchronized 23.98 Time Code sig-
nal for use with the camera’s 23.98 fps recording. Normally used with OUTPUT off
.
CROSS GENERATE: Cross Gen activates 29.97 from 23.98 fps time code sync. The RED-ONE camera
will generate a 23.98 Time Code signal for use with the camera’s 23.98 fps recording, and also generates
a synchronized 29.97 fps Time Code signal for use by an external device, available as an output from the
5-pin timecode I/O connector. Normally used with JAM SYNC off
.
DISPLAY
Display lets the operator select whether Edge Code or Time Code is displayed in the status displays. This
selection also determines which of the two recorded timecode tracks will be used in the QuickTime refer-
ence movies, and the primary timecode track in HD-SDI outputs.
1. To set display, select DISPLAY and press in or down on joystick.
2. Twist joystick to change the highlighted FORMAT box to either EDGE-CODE or TIME-CODE.