BRP-Rotax
REPAIR MANUAL
ASSEMBLY OF THE CRANKCASE
General
NNOOTTEE
When using new studs for the assembly of the cylinder, first screw the long side of
the threaded studs into the housing and secure them with LOCTITE 243.
Tightening torque 10 Nm.
When using new housing halves insert new dowel pins!
Instruction
ATTENTION
Pay attention on the different lengths of the Allen. screws!
Tighten the Allen. screws crosswise, start in the middle of the housing.
1. Insert a new housing gasket part no. 650494 included in the gasket set part no. 296160.
2. Mount both housing halves together with 8 Allen screws M6x45 and 2 Allen screws M6x60
(see mounting plan) together.
Tightening torque 10 Nm.
3. Let the Crankcase assy. cool down.
4. Attach the crankcase assy. on trestle mounting plate with 4 attachment screws.
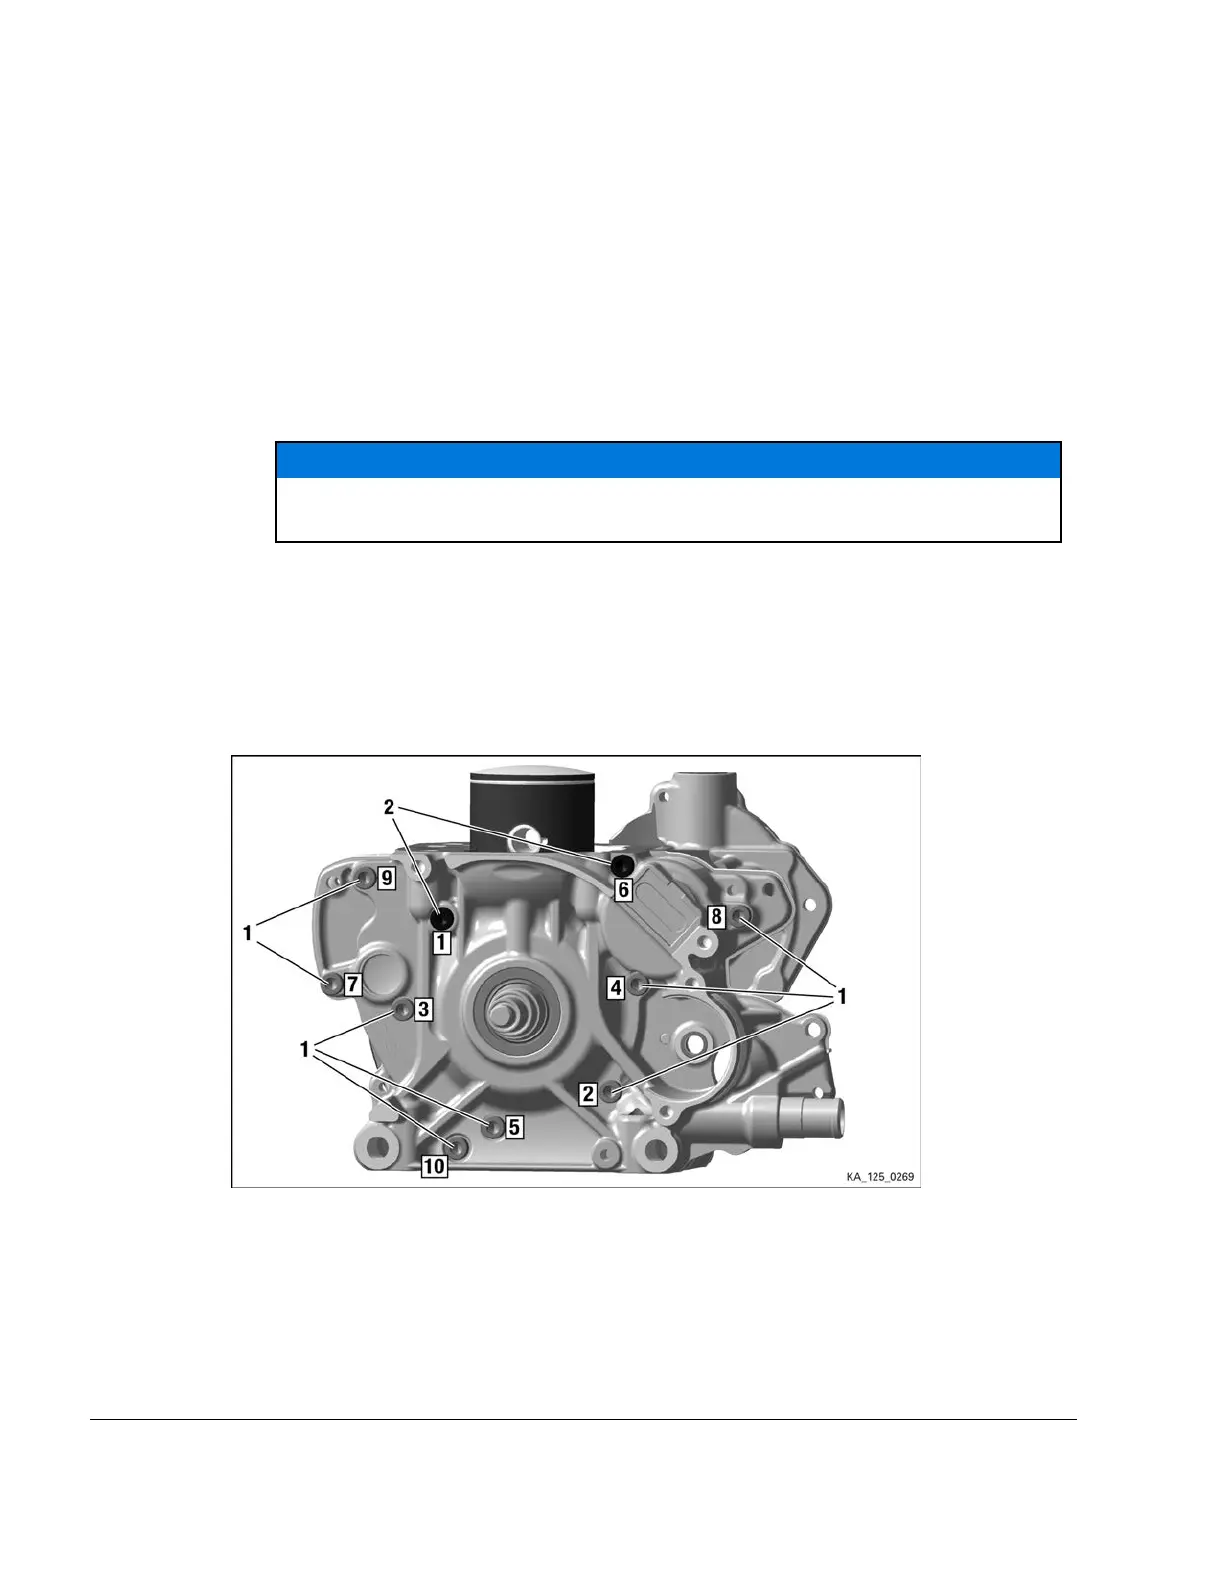
Figure 5.32: Mounting plan 1-10
1 Allen screw M6x45 2 Allen screw M6x60
5. Cut off the protruding section of the crankcase gasket with a sharp knife at the cylinder base
surface.
Chapter 5
Page 36
Effectivity: 125 MAX evo, Junior MAX
evo, Mini MAX evo, Micro MAX evo
Edition - February 01 2018 /Rev. 0

 Loading...


