BRP-Rotax
REPAIR MANUAL
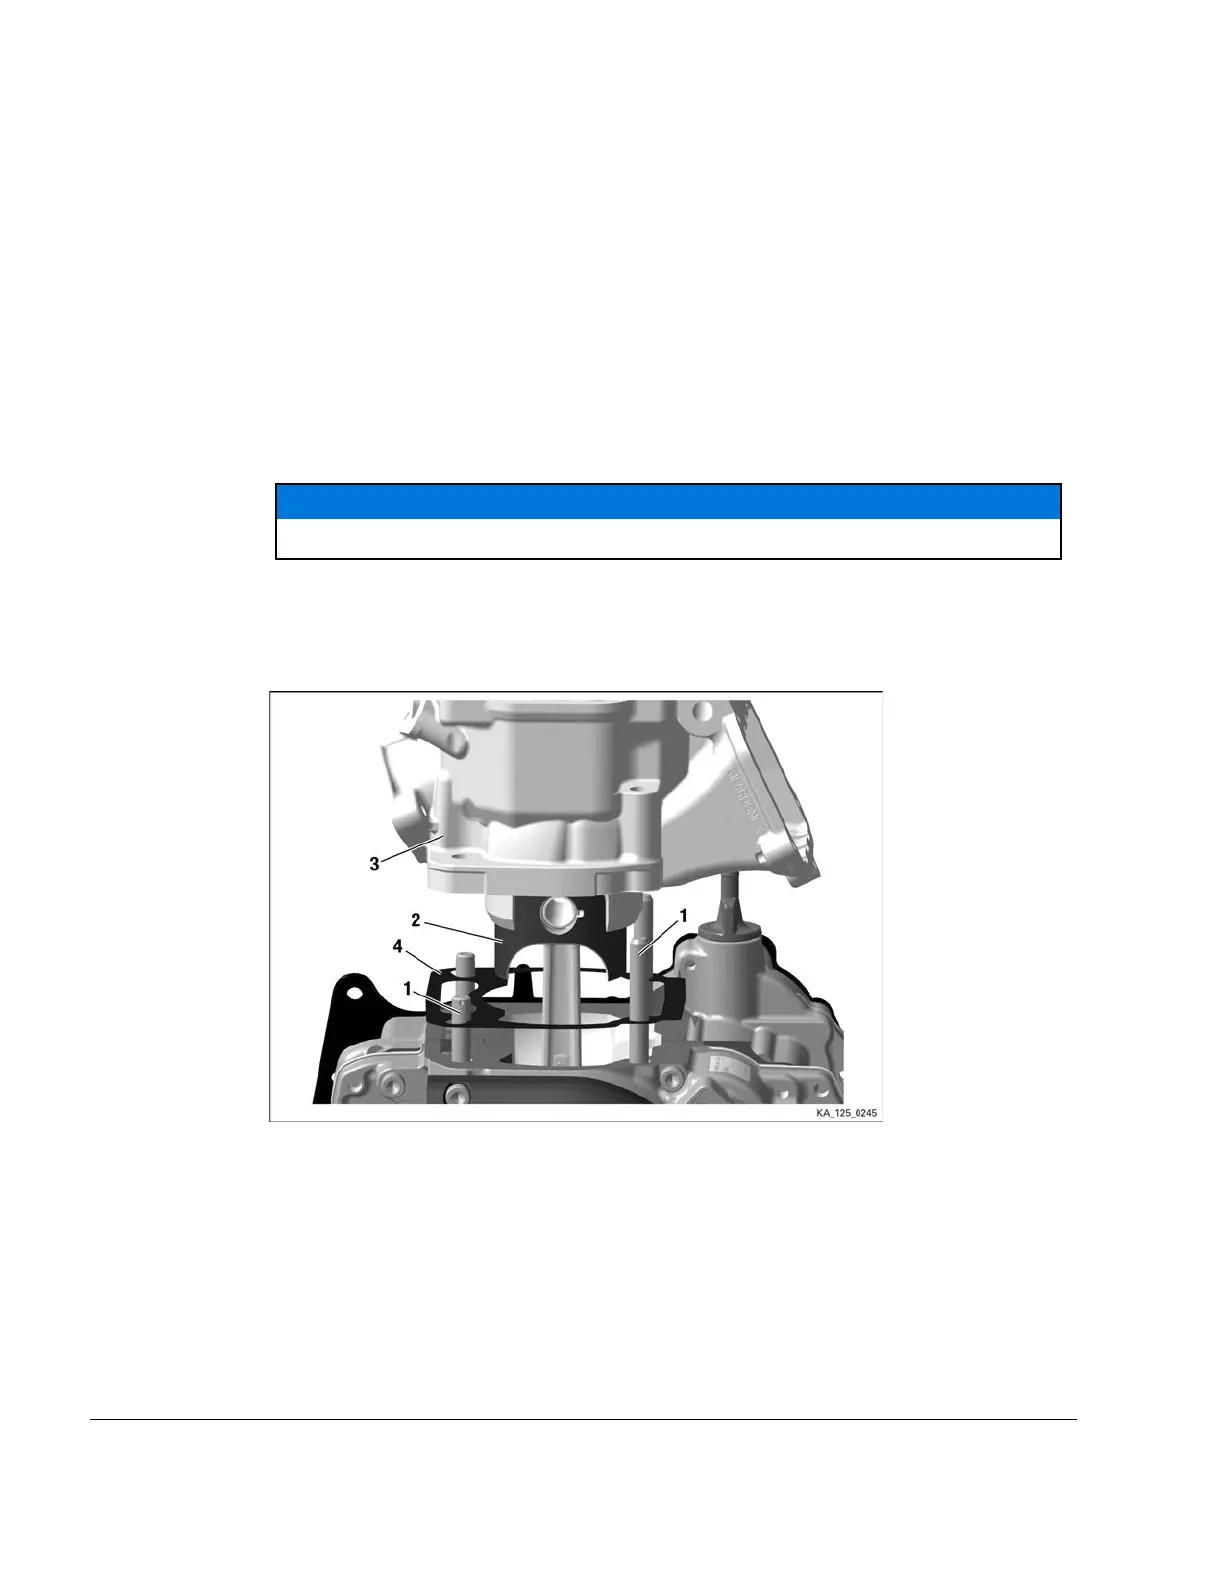
Instructions Proceed as follows to install the cylinder head: See Figure: Cylinder head.
1. Coat the stud bolts (1) on the longer thread end with LOCTITE 243 and screw into the crank-
case. Tightening torque 5 Nm (44.25 in.lb).
2. Position new cylinder base gasket (0.2 mm) (4). Determine the correct thickness of the base
gasket (see Chapter 4 Section: Squish gap measurement) to adjust the squish gap to the
correct value.
3. Coat cylinder bore and piston (2) with Engine oil.
4. Press piston ring into the piston with two fingers.
ATTENTION
Do not damage the gasket.
5. Position the cylinder (3) over the piston.
6. Screw cylinder crosswise to the crankcase with the four studs. Tightening torque 24 Nm (18
ft.lb).
Figure 4.24: Cylinder head
1 Stud bolts 2 Piston
3
Cylinder
4 Gasket
______________________________________________________
INSTALLATION OF THE EXHAUST SOCKET
Special tools The following special tools and equipment are required:
Chapter 4
Page 26
Effectivity: 125 MAX evo, Junior MAX
evo, Mini MAX evo, Micro MAX evo
Edition - February 01 2018 /Rev. 0

 Loading...


